Special settings allow you to specify your own times for each customer for your services.
You can access this area via Settings > Customer-Specific Times
If this function is not activated, it can be activated via "Settings > Add Function".
Example of application:
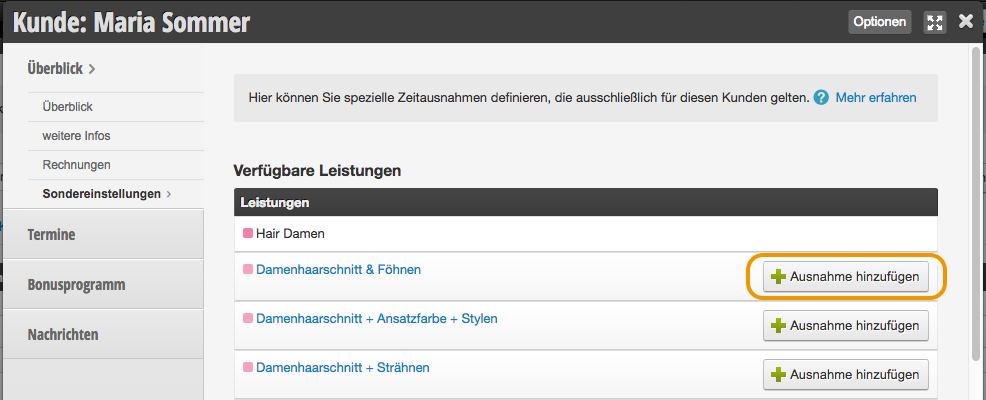
For customer Maria Sommer, you need a bit longer for the "Ladies' Haircut & Blow Dry" service due to her very long, thick hair. You can specify the time deviation in the customer file so that appointments booked for this customer in the future will always take a bit longer.
Creating customer-specific times
Brief explanation via video
More detailed explanation After the function has been activated, select the service in the submenu Special Settings for which you want to add an exception and click "Add Exception" in the corresponding line.
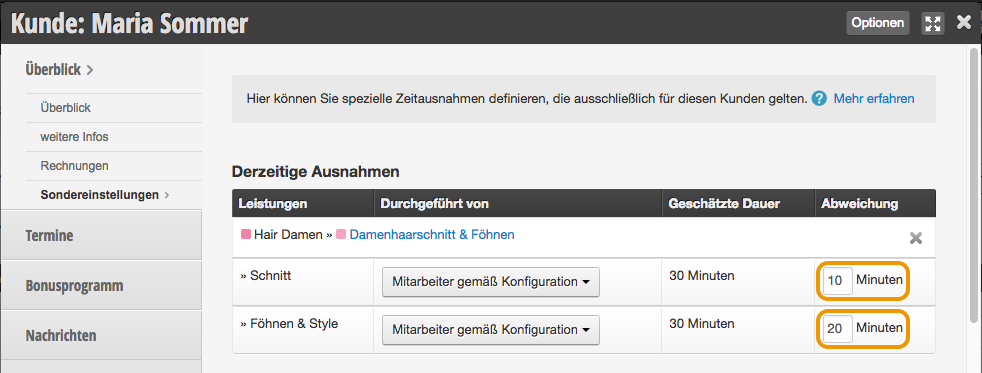
Then add a time deviation to the desired steps.
Note that the entered time is added to the original length.
A step that is specified as 30 minutes in your service settings will be extended by 10 minutes if you enter "10" in the input field. The step will then be 40 minutes long for this customer.
If you enter "-10", the step will be shortened to 20 minutes.
Here you can define special time exceptions that apply exclusively to this customer.
For customers who need less time, simply write e.g. -15
If a team member is selected here, this service will only be entered for this person, regardless of which team member is selected online.
We recommend always storing "assigned employee" here.
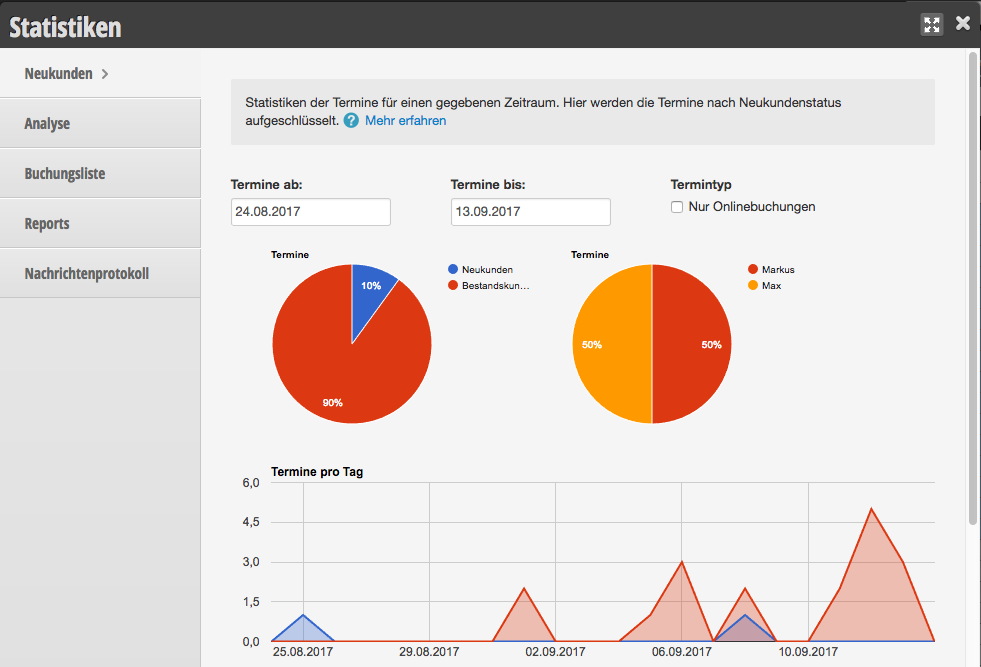
In the "Information" section, you can view statistics about your online bookings. In the Online New Customers section, you can see how your bookings are broken down by new customers/regular customer status.
You can access this section via Settings > Statistics & Reports
The first statistic shows the total ratio between new customers and existing customers.
The second pie chart shows the distribution of online bookings across individual employees.
The timeline shows you how online bookings have developed over the last 30 days.
Finally, in the bottom graph you can see how the distribution of new to regular customer bookings is for each employee.
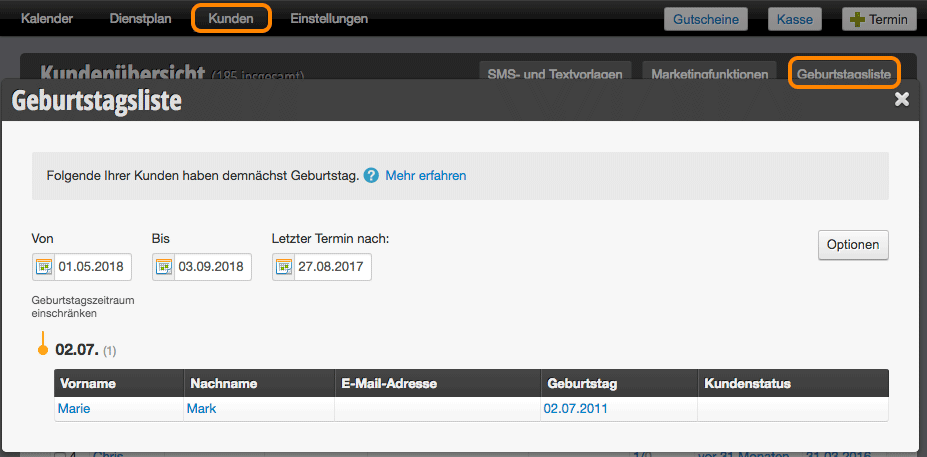
If you maintain birthdays in your customer file, the upcoming birthdays of your customers will be listed here.
To find the birthday list:
If you don't yet see a birthday field in each customer record, you can create one in the Customer Fields.
You can send your customers birthday congratulations emails, which are automatically sent to each customer on their birthday. Learn more here.
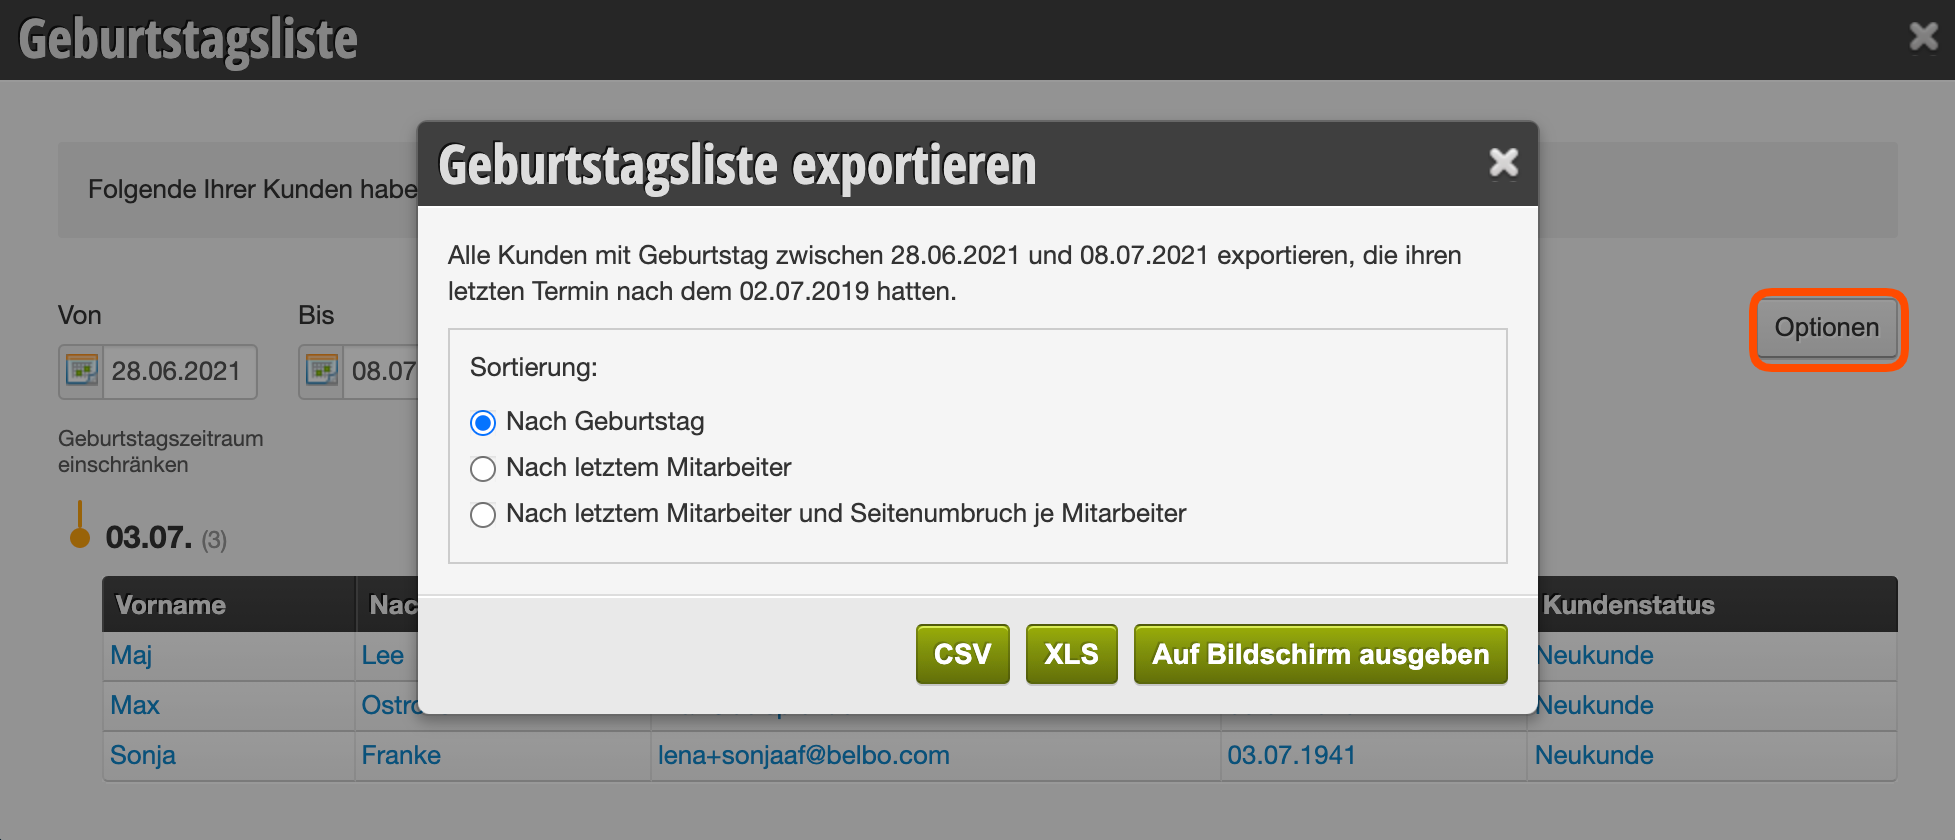
Export birthday list
You can export the birthday list to process it in another program or print it. To do this, click on the "Options" button:
Add data to export
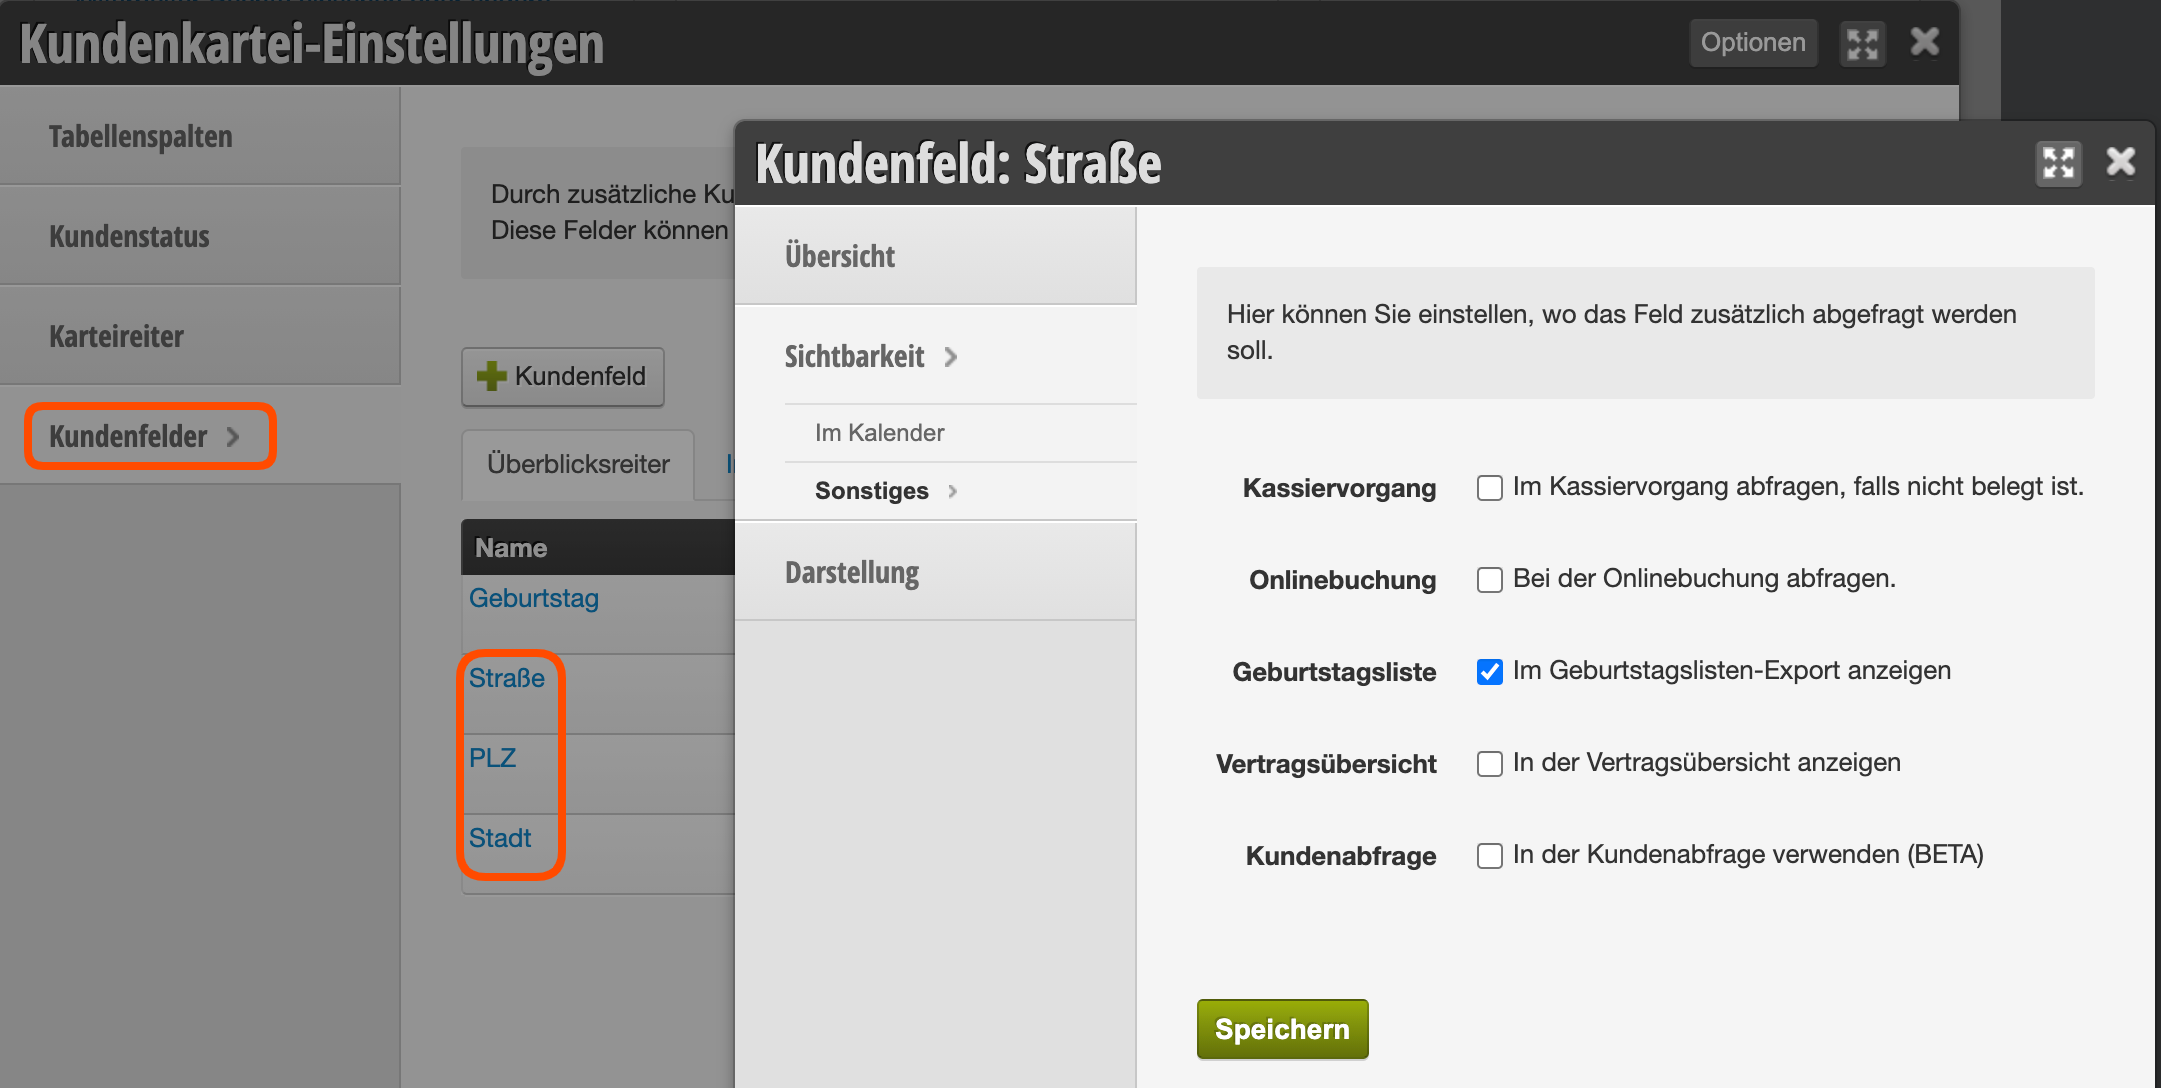
Basically, data such as name and birthday are included in the list. If you wish, you can add additional data, such as street, house number, and postal code.
Click on Customer Settings under Settings.
Open the "Customer Fields" tab.
Open the field you want to add to the export.
Switch to the "Visibility > Other" tab here.
Activate the option "Show in Birthday List Export" here and save the entry.
The desired field will then be displayed in the export.
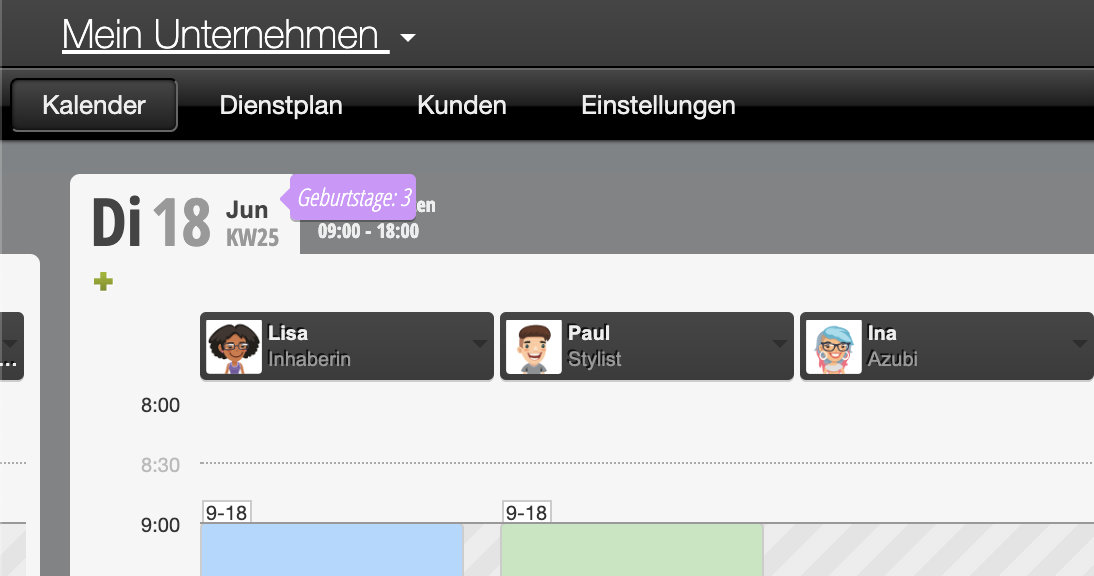
Customer birthdays in the calendar:
If you want to see every day which of your customers has a birthday, you can enable this. To do so, go to Settings > Calendar Settings and check the box for "Birthday Display".
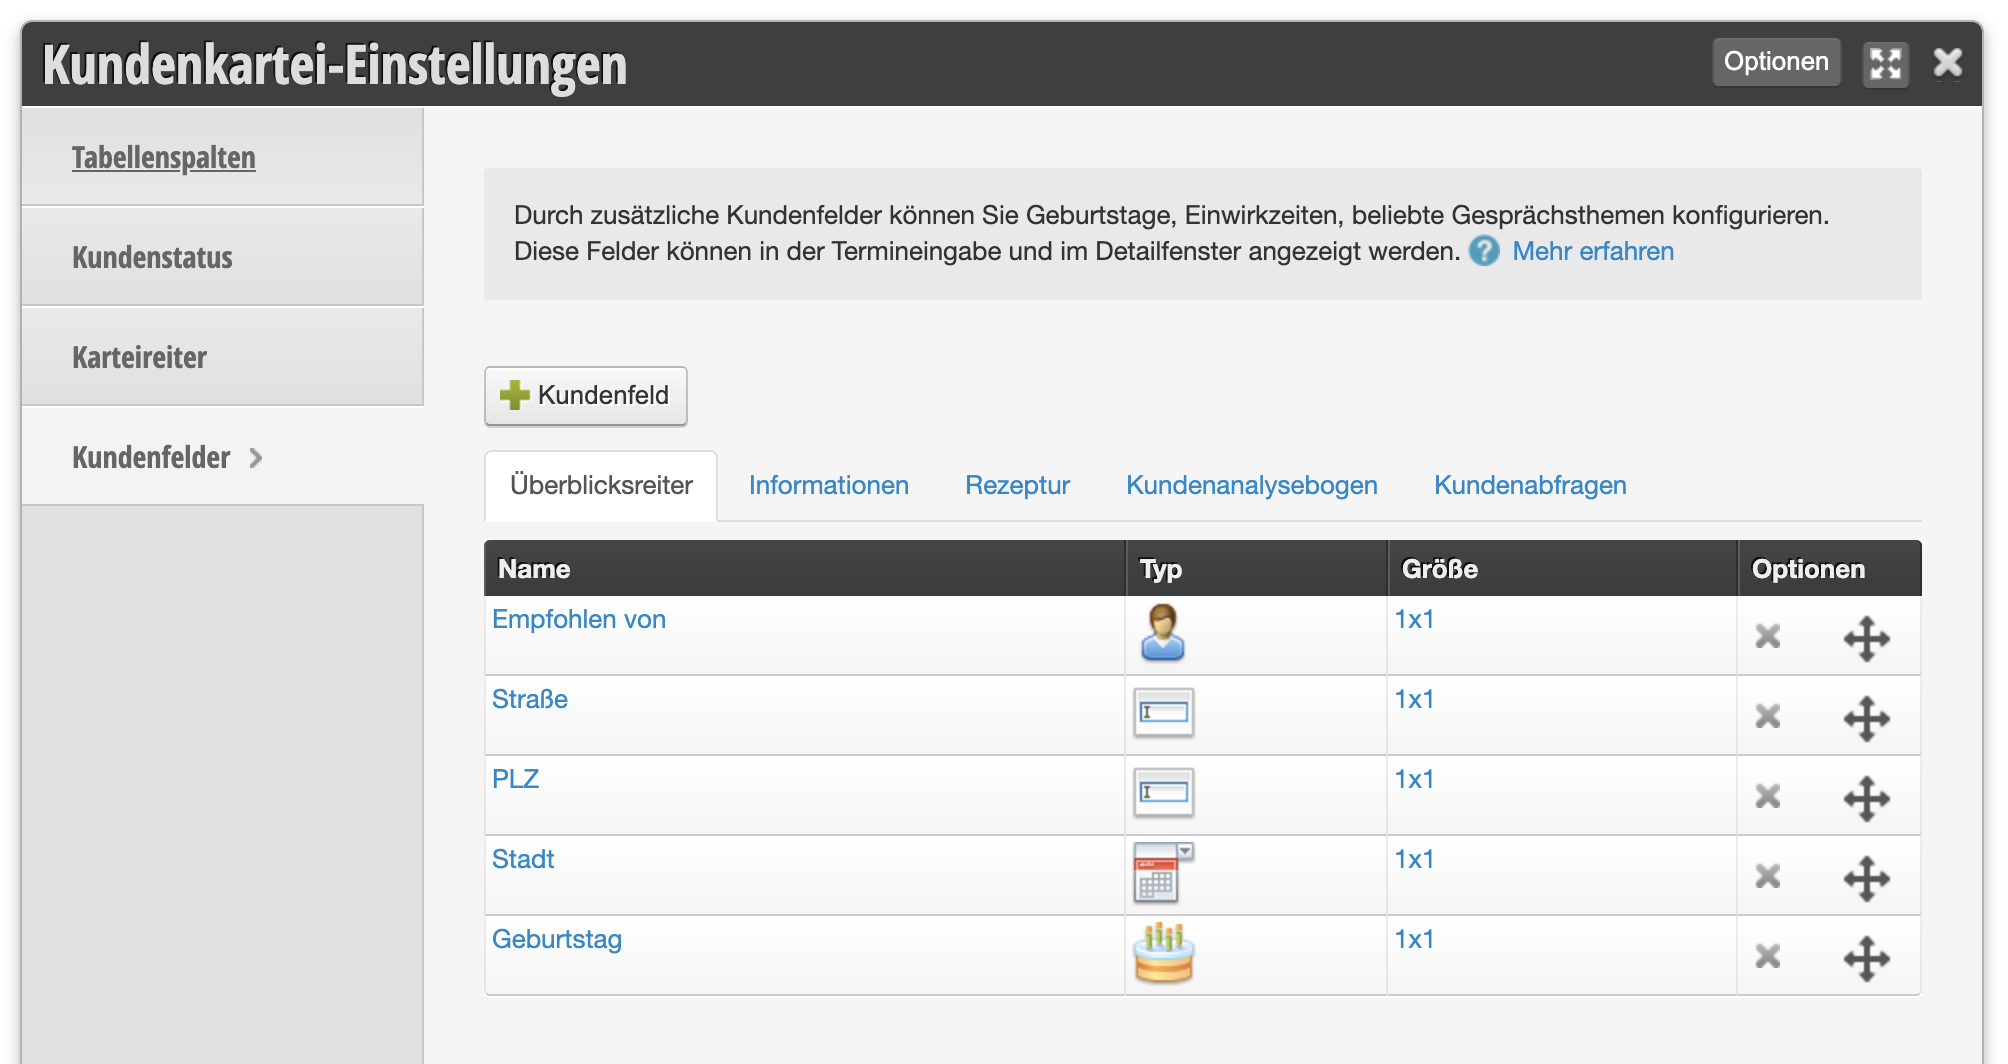
Customer fields are additional fields that you can create in every customer card.
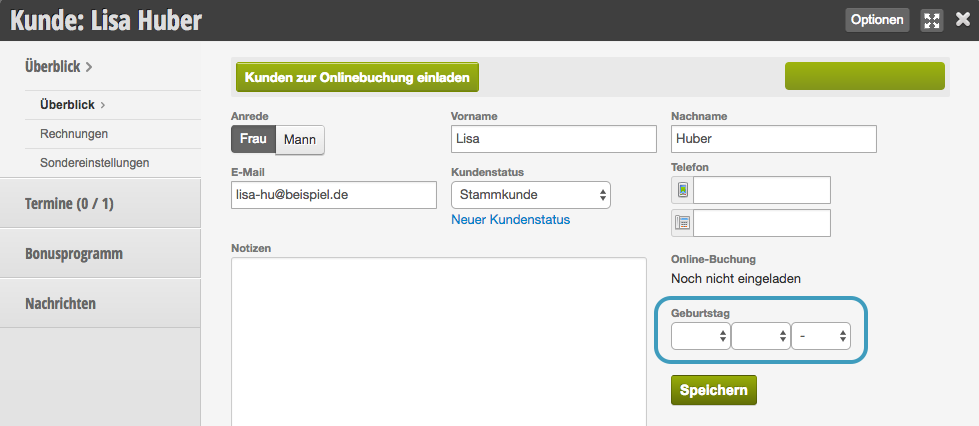
By default, "Name", "First Name", "Email Address", "Customer Status" and "Phone" are already present in the customer file. If you want to enter additional data such as "Address", "Birthday" or "Skin Type", you can create any number of customer fields.
You can access this area via Settings > Customer Settings > Customer Fields.
Edit Customer Fields
To create a customer field, click on +Customer Field in Customer Card Settings > Customer Fields.
Field Properties
Overview
Field Name
Describe here the information you want to collect. The name appears in every customer file.
Example:
If you want to add a field for Birthday, name it "Birthday". For Street and house number, "Street & No." is suitable.
Field Type
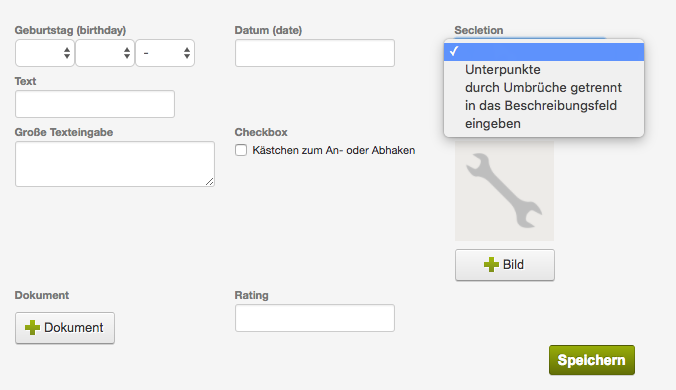
Depending on the type of information you want to store, different field types are suitable, which you probably know from the internet and from software applications.
Examples:
Description
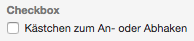
For the Checkbox field type:
Enter here the text that should be displayed behind the checkbox box.
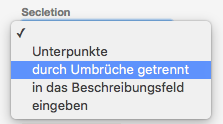
For the Select field type:
Enter here the text options that should be available for selection. Separate the lines by line breaks:
Icon for Calendar
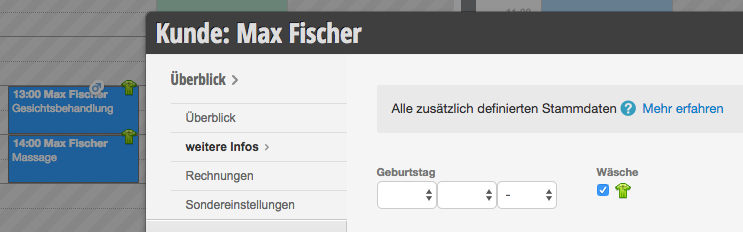
Here you can select a symbol image that appears in the calendar, as soon as you set "Checkbox" as the field type and activate it in the customer file.
Example application in a sports studio:
You want to see a small symbol at the appointment of every customer who pays for their sports clothes to be washed by you after training. Create the field "Laundry", use "Checkbox" as the field type and set an appropriate icon. When you then activate this field in the customer file, the selected icon appears at the appointment.
Required Field
This field must be filled in for an appointment to be saved.
Customers can only register online if they fill in this field.
Visibility
Tab
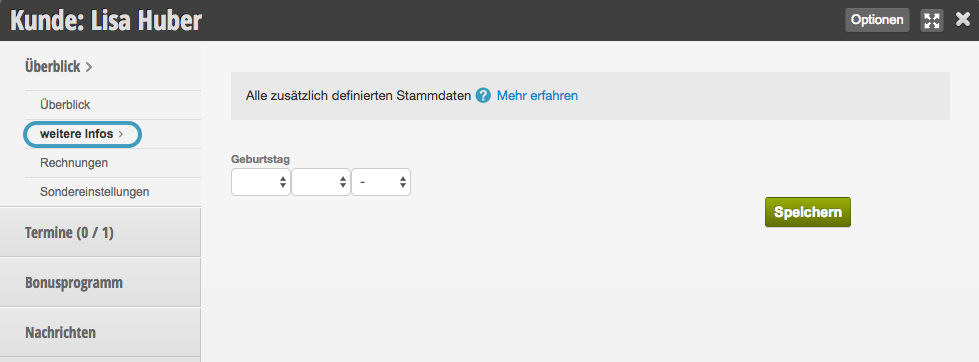
If you leave the "Tab" field empty, your customer field will appear on the main page of every customer file. If you click on it and enter a name, you add it to a tab. If a tab with the entered name does not yet exist, a new tab will be created.
New customer field on the main page:
New customer field with tab "Additional Information":
Hide Field
Use this function for data fields that you no longer want to display in the customer file, but do not want to delete completely.
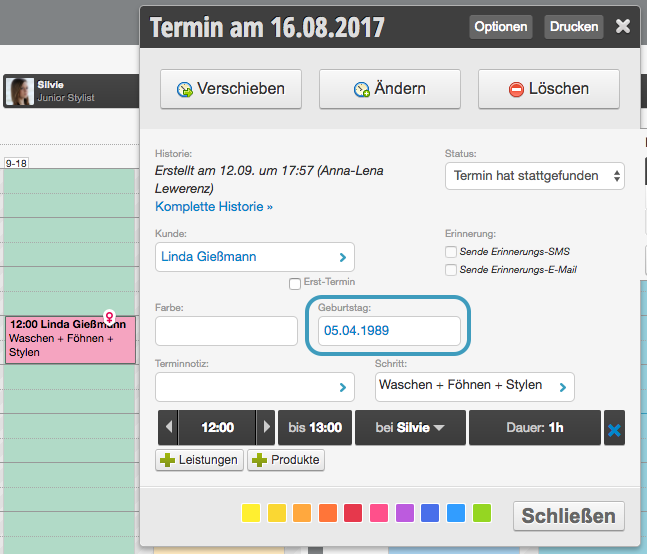
Show in Appointment Details
Your customer field appears in the appointment details (after you click on an appointment). Recommended for data needed during the appointment.
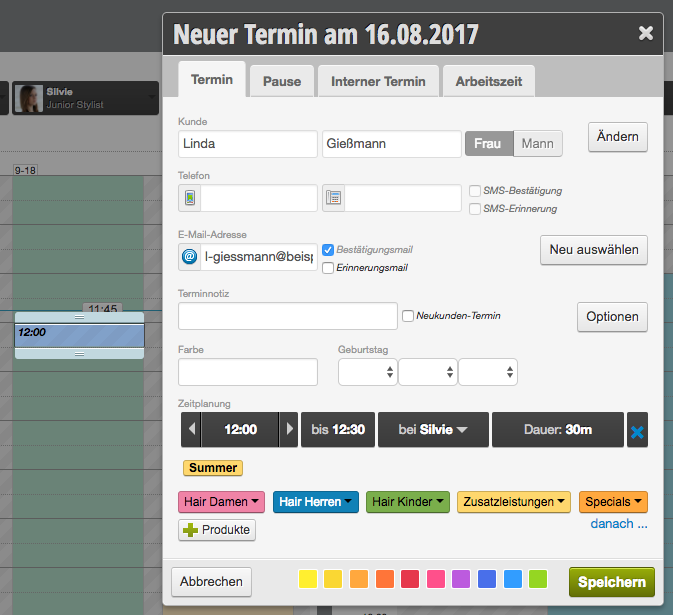
Show in Appointment Entry Form
Your customer field appears in the appointment entry form. Recommended for important data.
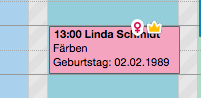
Show in Calendar
This field is displayed directly in the appointment.
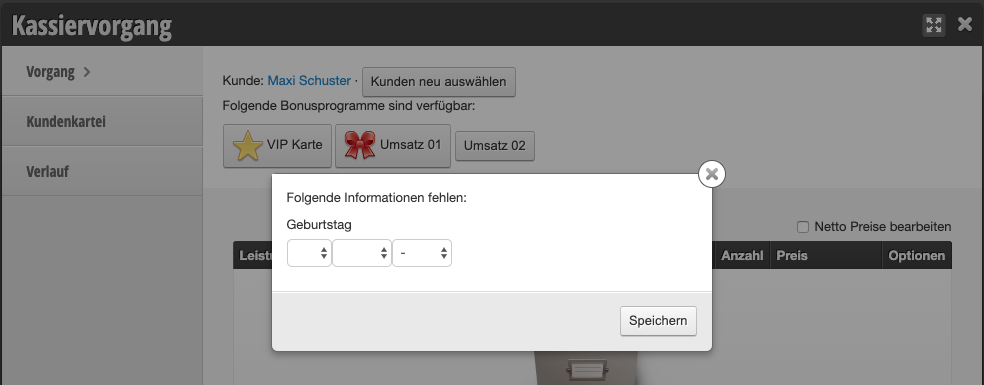
Cash Register Process
If you use the Belbo cash register system, you can query unfilled data during the cash register process.
Example:
You want to store the birthdays of all customers so you can congratulate your customers on their birthday and thus increase customer loyalty. Unfortunately, many customer files are missing the date of birth. During the cash register process, a popup appears that reminds the employee to ask the customer for their birthday if the field in their file is still empty.
Please only use this function for fields that should be filled in for all customer files.
Online Booking
This field is queried when registering on your online booking page. Recommended for data such as Birthday and Address.
Birthday List
This field is exported with the export of the Birthday List.
If you create many customer fields, you can group them using index tabs within a customer file and organize your customer files clearly. More information about index tabs can be found here.
If you want your customers to fill in certain customer or appointment fields when booking online, use the Service Fields.
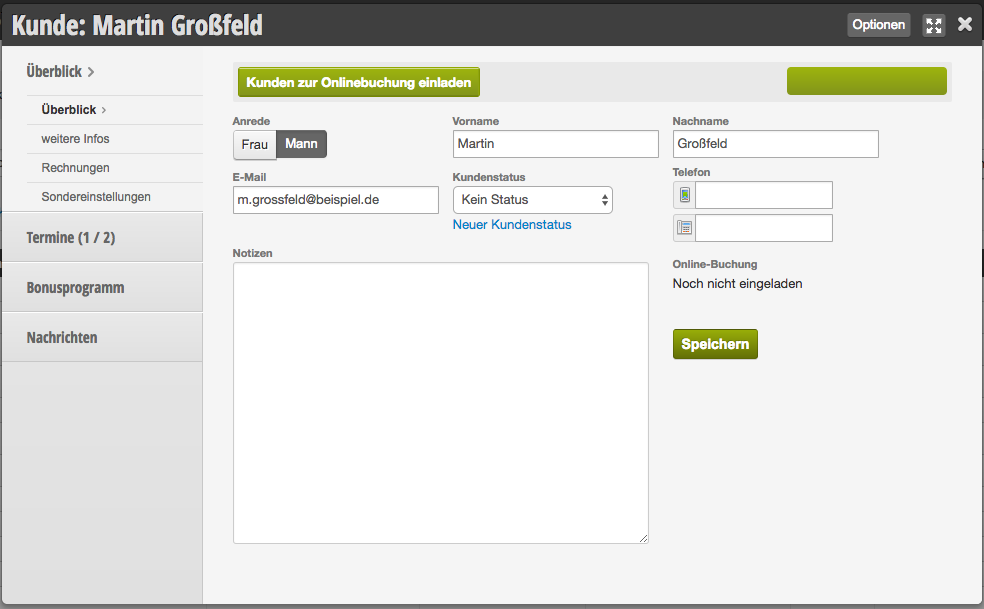
In every customer file you will find all important information about your customer. Here you can invite them to online booking, store information, prohibit online booking for this customer and much more.
Opening the customer file
Open customer file in the customer overview
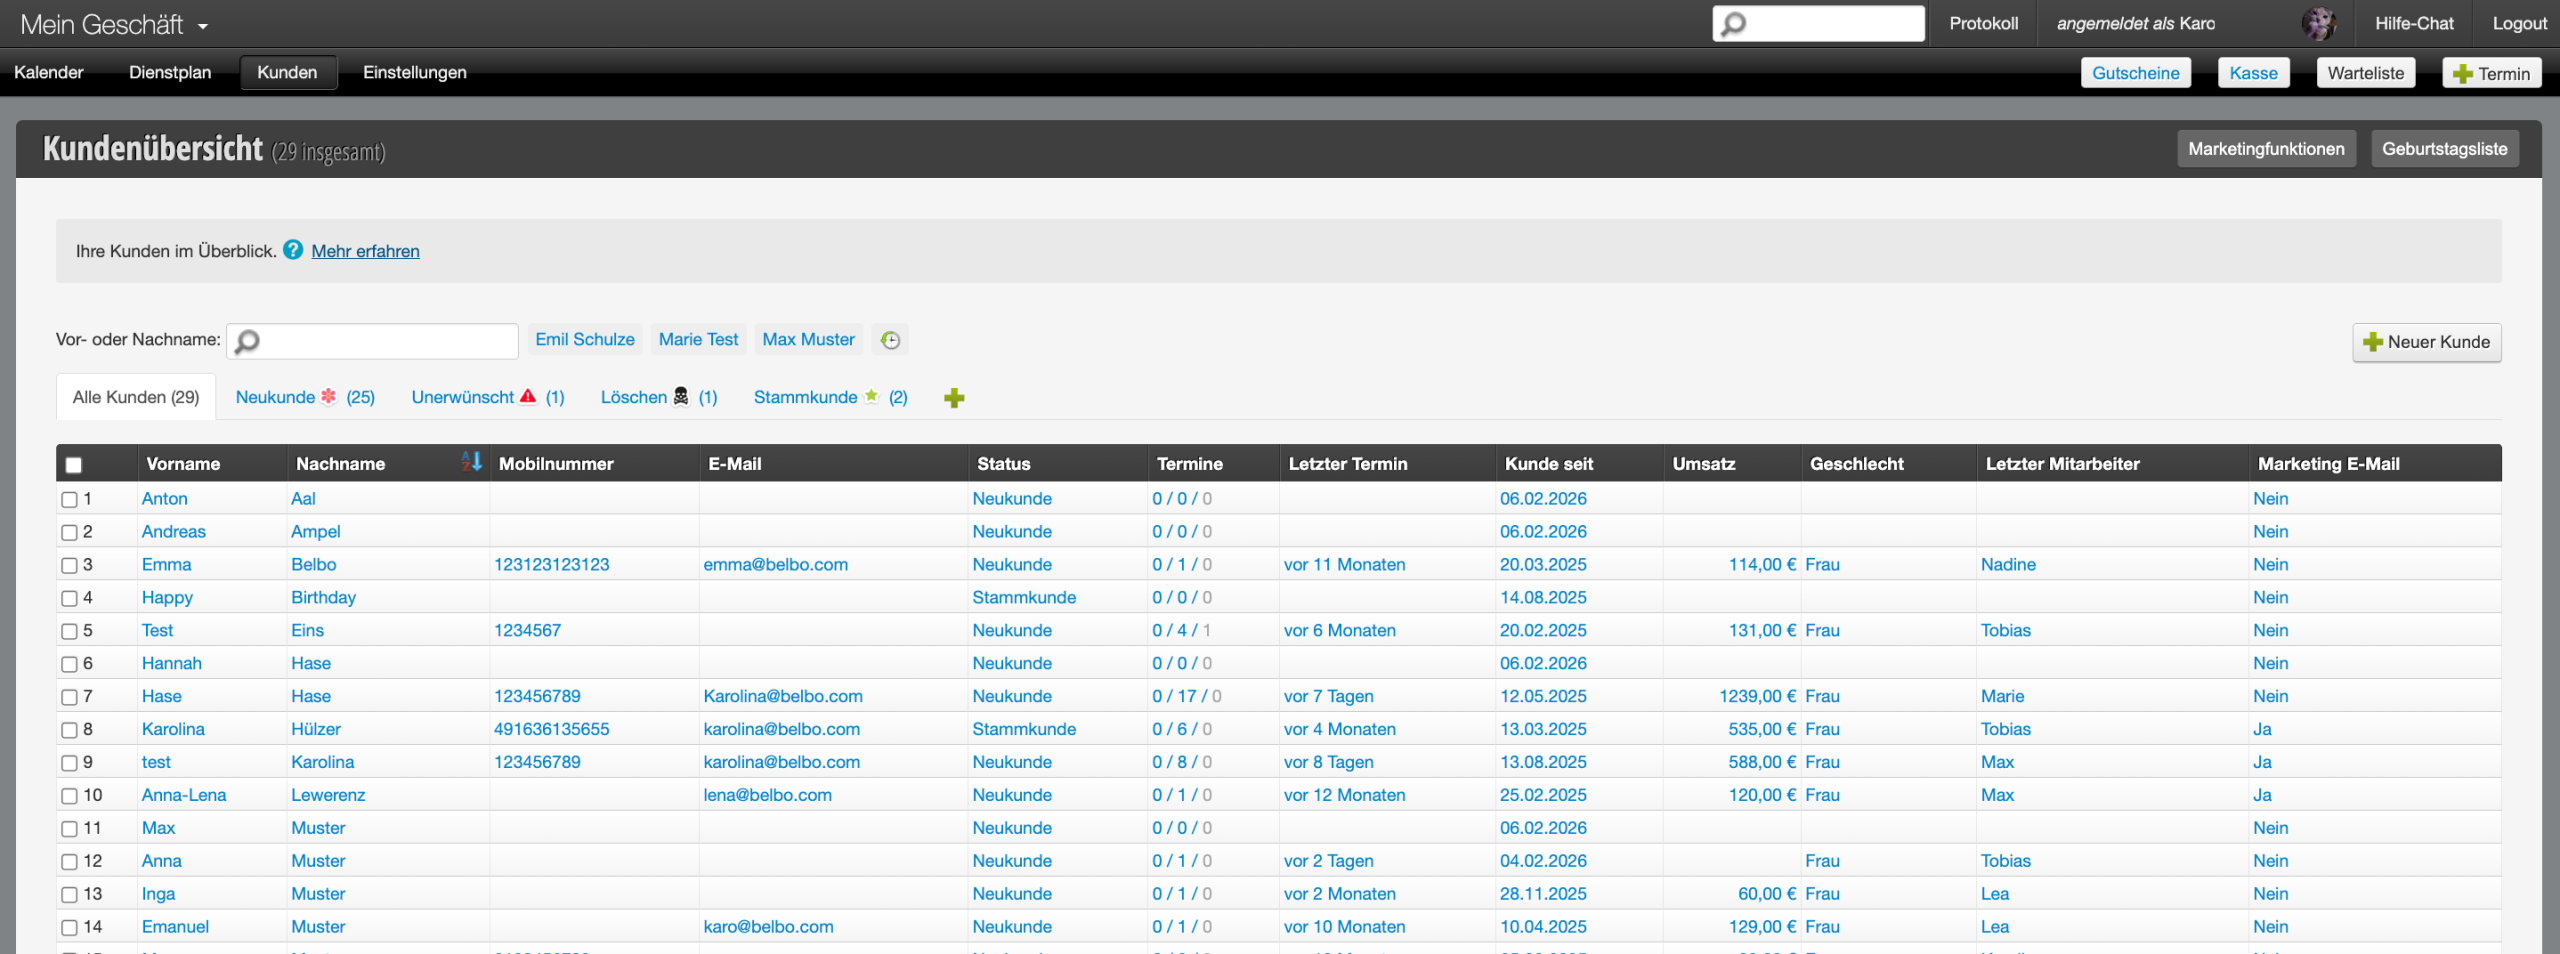
Each customer has their own file, which you can open by clicking on the customer name in the customer overview.
Open customer file in the calendar
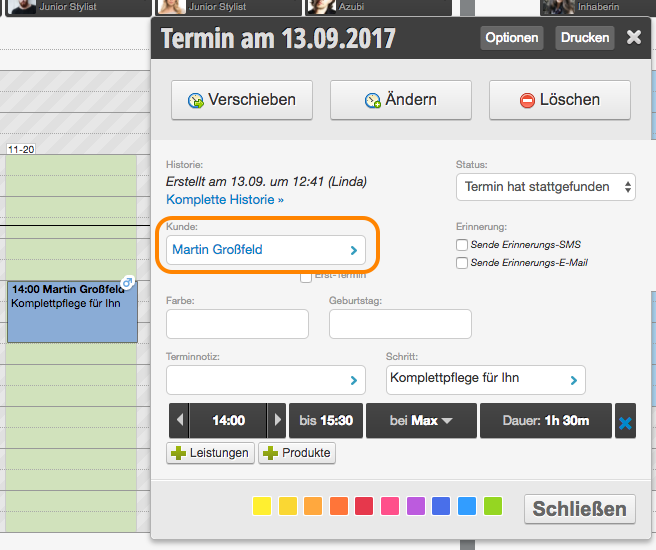
If you click on an appointment in the calendar, you will also reach the customer file when you select the blue linked customer name.
Customer fields
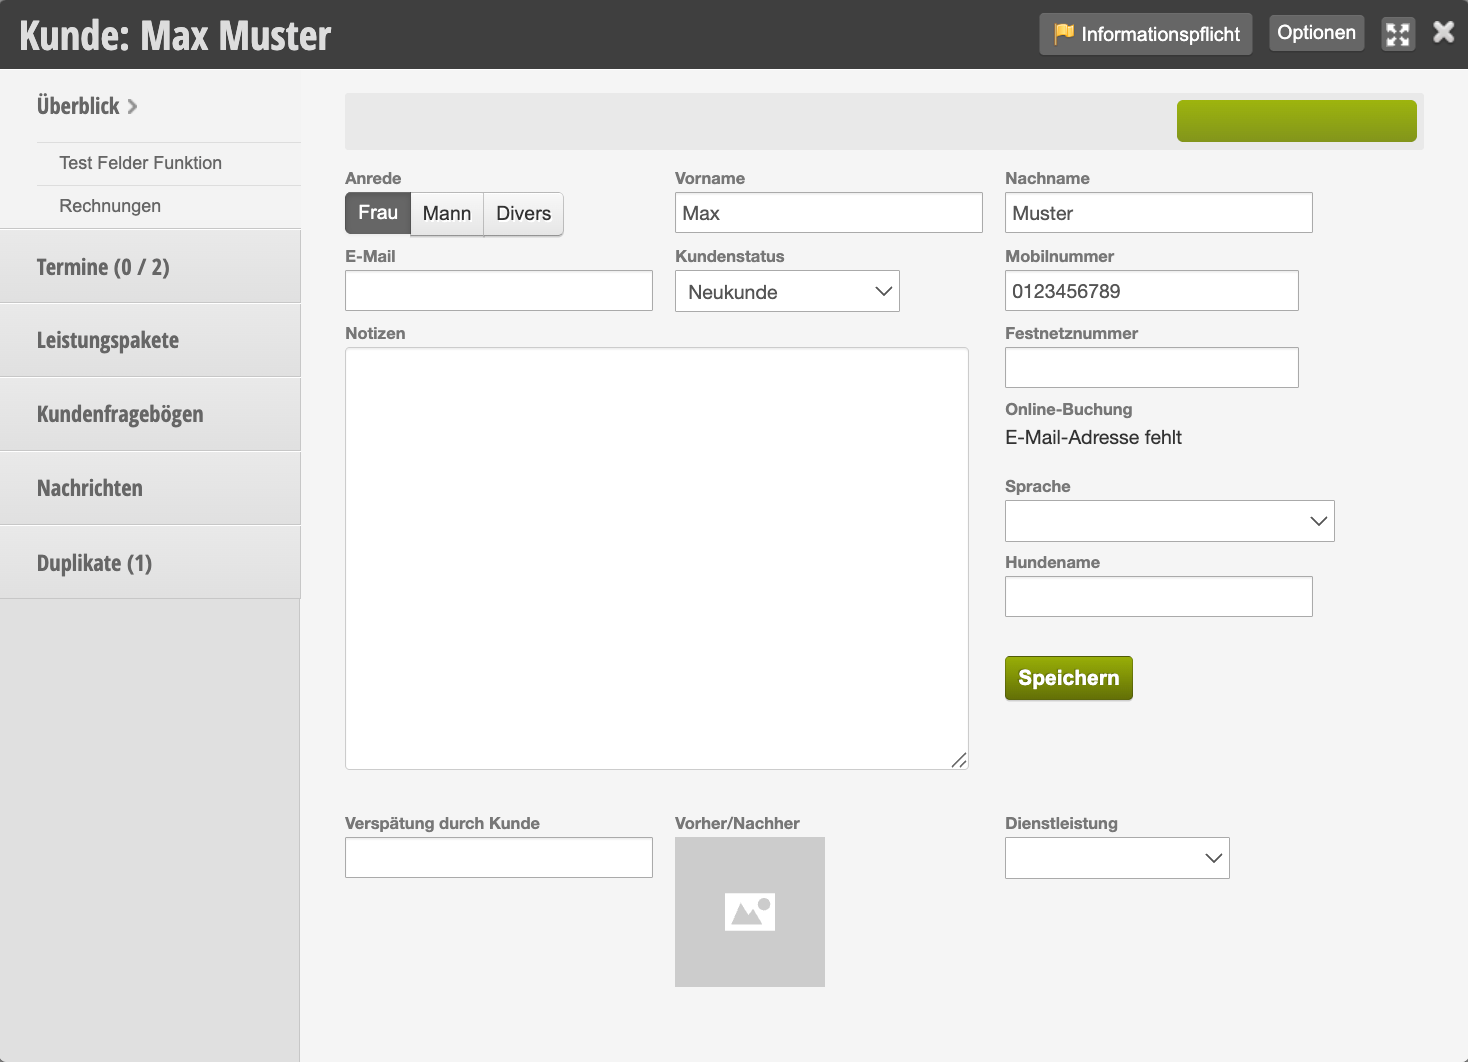
Salutation
If you specify the customer's gender, customer messages such as reminder or confirmation texts can be personalized in the salutation.
Furthermore, you can send targeted messages to male and female customers in the marketing functions.
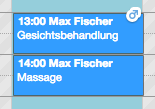
In the calendar, you can see the gender in the form of a pictogram directly on the appointment if you enable this function in the calendar settings.
First and last name
If you provide the customer's name, customer messages such as reminder or confirmation texts can be personalized in the salutation.
Please pay attention to capitalization from the start so that the customer salutation appears professional.
Email
Only if the email address is provided can your customer receive reminder, confirmation and marketing emails.
Customer status
With the help of customer status, you can assign the customer to a specific customer group.
Advantages of customer status:
Identify the customer in the calendar directly as a regular customer, new customer, family member etc.
Create targeted newsletters and round SMS for each customer group
See the number of your customers per customer group in the customer overview
Phone
Only if the mobile phone number is provided can your customer receive reminder, confirmation and marketing SMS.
Notes
Here you can store information and notes about the customer that can be viewed by all staff members. Customers cannot view this information.
Invite customer to online booking
Once you have entered an email address for the customer, you can invite them to online booking with a single click.
This is particularly useful when you
do not allow self-registration in online booking, but only want to enable selected customers for online booking
have convinced a customer on-site of the benefits of online booking and want to send them the access data directly.
Block customers
After you have invited your customer to online booking, you can also block them again. Once blocked, they will not be able to book appointments online using the specified email address.
Add custom customer fields
If you want to supplement the existing customer fields with additional data, you can create new customer fields.
Example use case:
For customer Maria Sommer, you need a bit longer for the "Women's haircut & blow-dry" service due to her very long, thick hair. You can specify the time deviation in the customer file so that future appointments for this customer will always take a bit longer.
Invoices
If you use the Belbo cash register system, you can view the customer's invoices in each customer file.
You can access this area by clicking on the Customers menu item.
In customer management, all your customers are listed. You can see the total number of customers and your customer groups – sorted by new customers and the various customer statuses.
View and edit customer data
Once you click on the customer name highlighted in blue, you will be taken to the customer's customer file where you can view and edit all information about this customer.
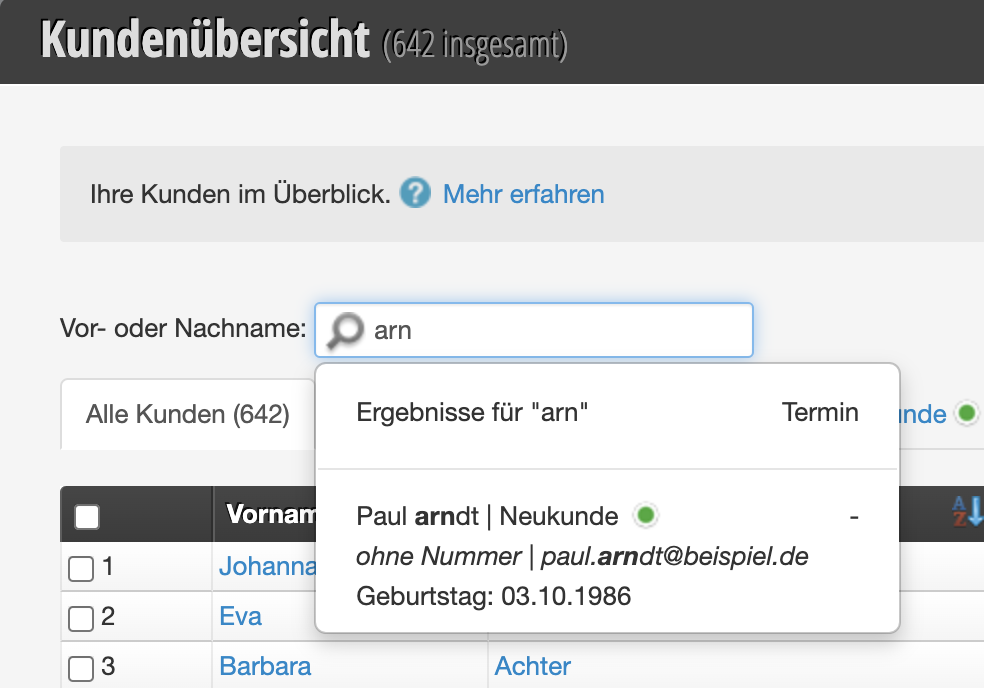
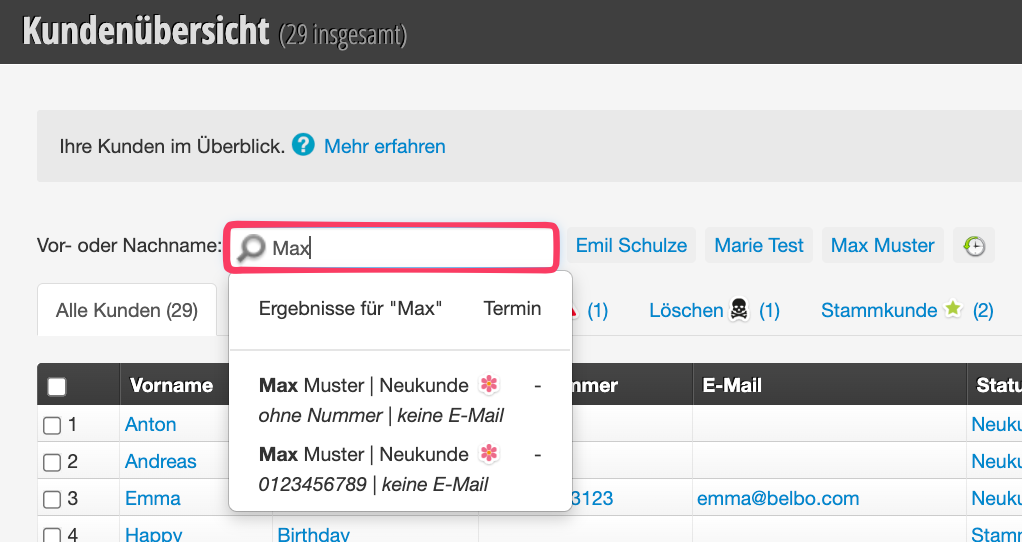
Find customers
To find specific customers, you can use the search field at the top of the page.
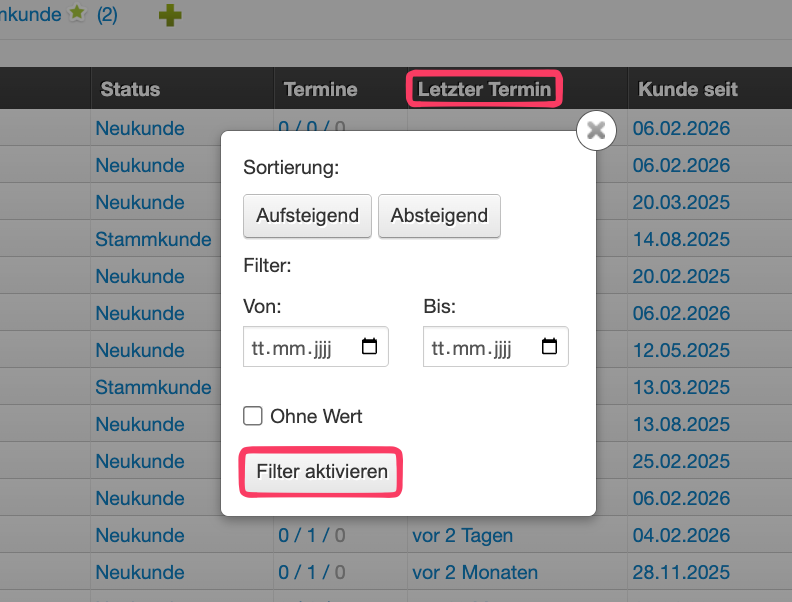
Filter customers
To avoid lengthy searching: Use filter combinations to narrow down your customer list specifically. This way, with just a few clicks, you will see exactly the selection you are looking for.
Search customers with filters
As soon as you click on one of the table columns, you will be taken to the filter overview and can select various filters, for example to search for customers who haven't been there for a while.
Search customers with additional filters
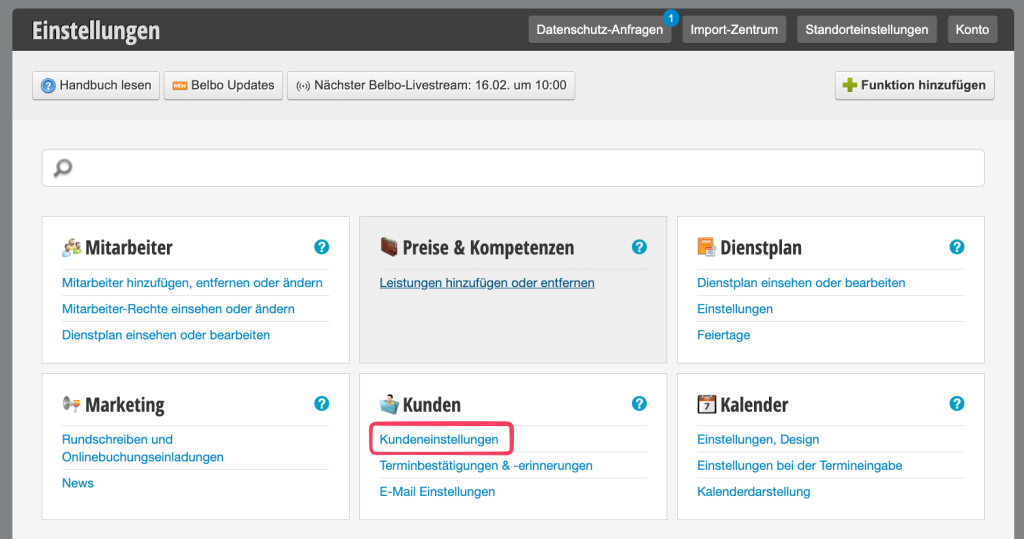
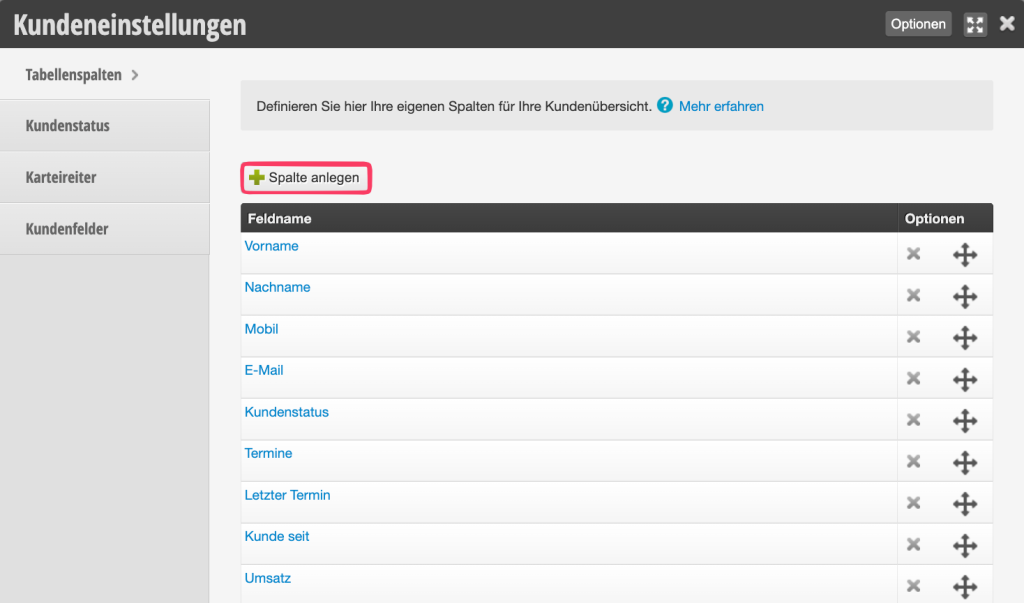
Want to expand your search? For example, if you want to search for your highest-revenue customer, you can do this with the help of additional table columns. To do this, you must go to settings and click on "Customer settings".
In the "Table columns" tab, you will find a "+Create column" button. Here you can select all the table columns you need.
Afterwards, you can return to the customer overview and filter as usual.
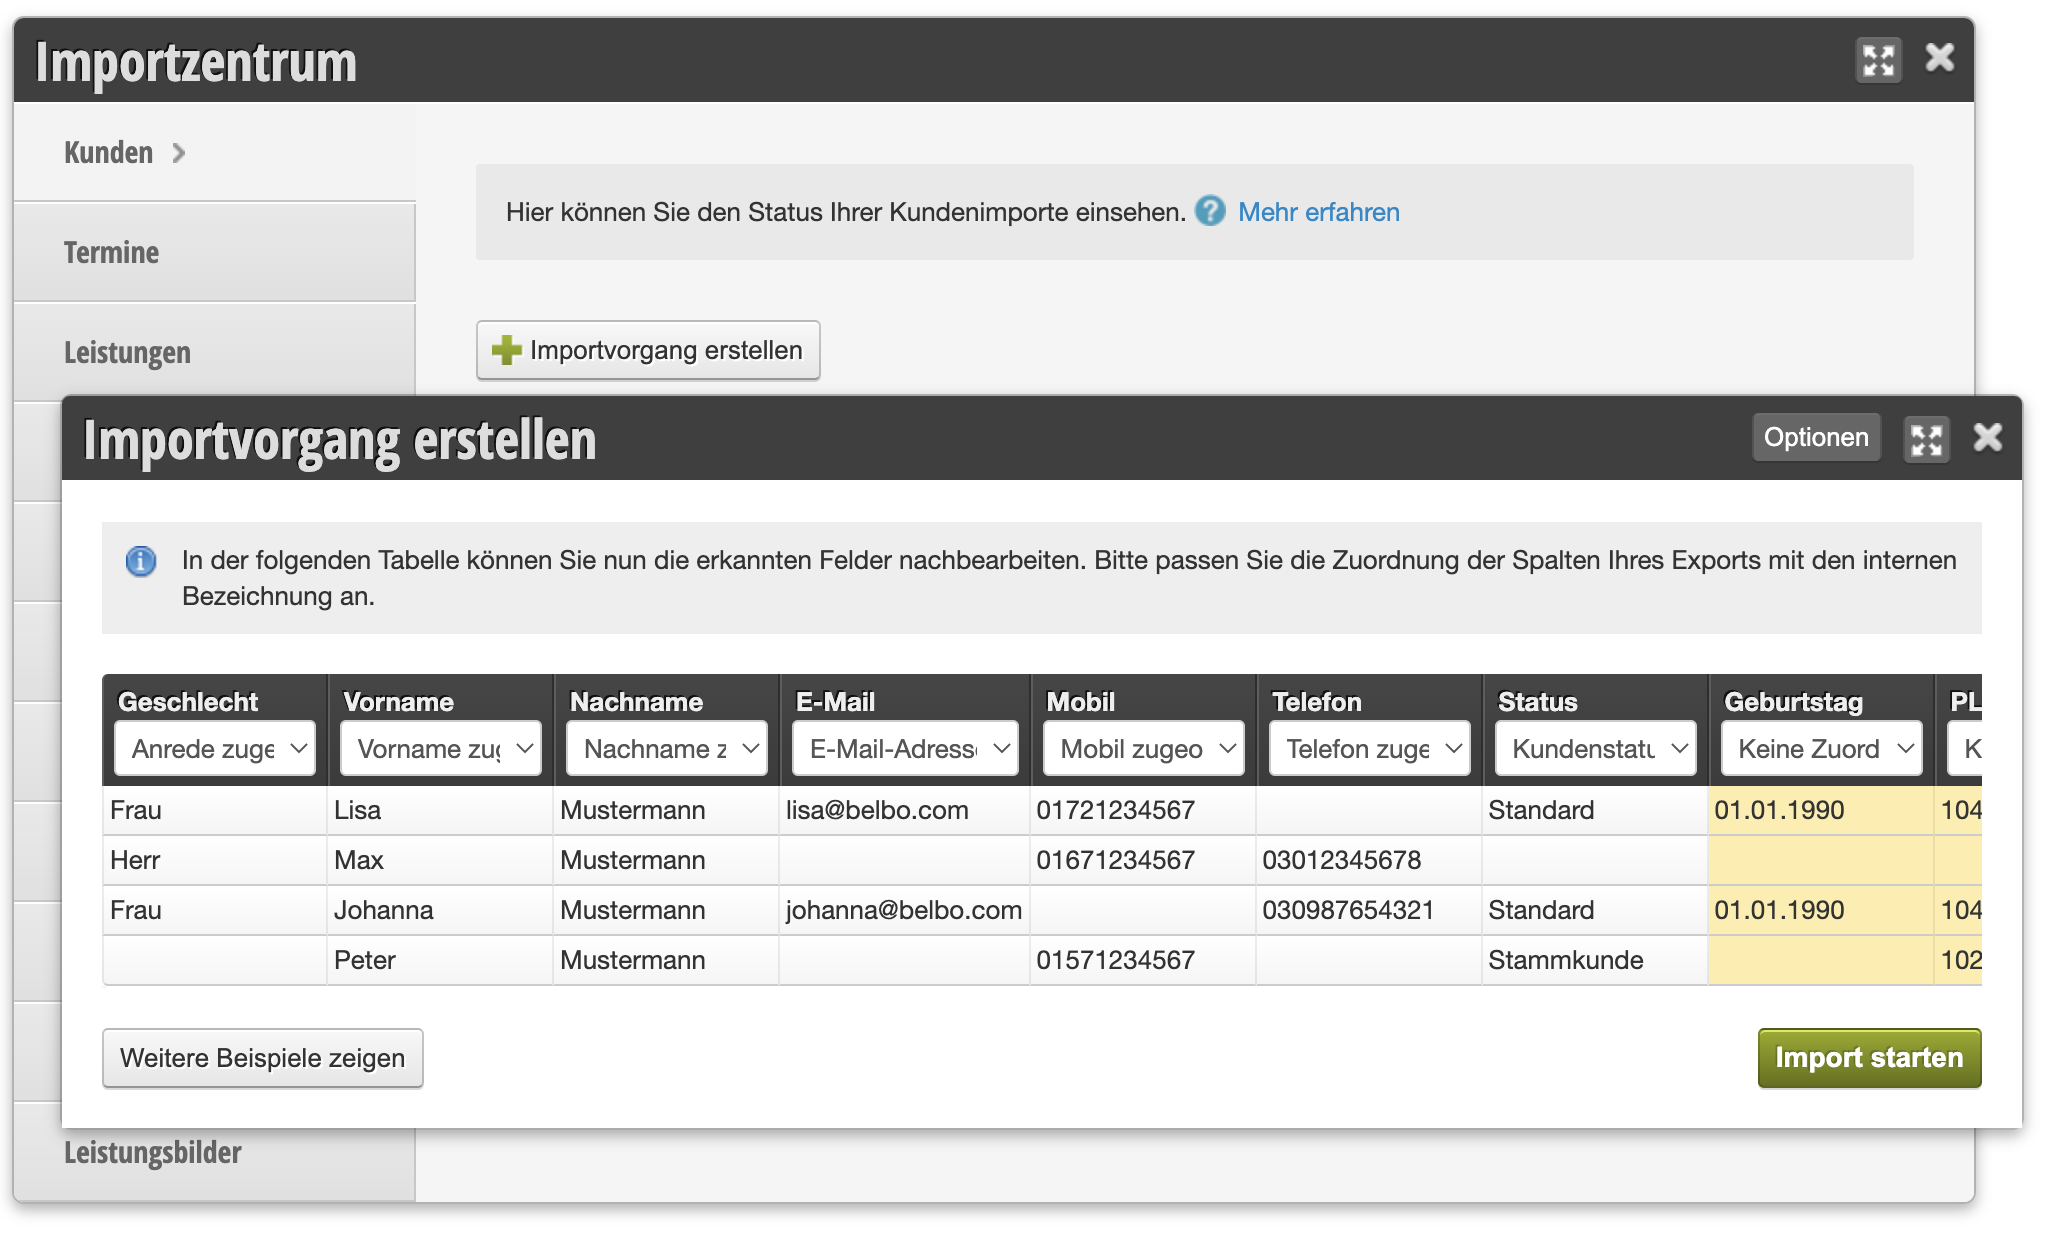
You can access this area via Settings > Import Center > Customers
If this function is not visible, the login you are currently using does not have the necessary permissions.
Note: Importing customers and appointments is technically demanding. We are happy to support you and can carry out the import for you. Just get in touch.
Requirements
Your customer data must be in CSV or Excel format. Note that CSV files can be saved in different ways. You must ensure that the following options are selected in the tool you choose to export the customer data:
Delimiter: ,
Text qualifier: "
Example of a valid customer file in the required CSV format: download
If you have international customers, it is important that you import the mobile number country code in the format 00xx (instead of +xx), otherwise the country code will not be recognized and your country code will be prepended.
Import Process
Create a new import job using the "Create Import Process" button.
Select the file to upload and wait until the process is complete.
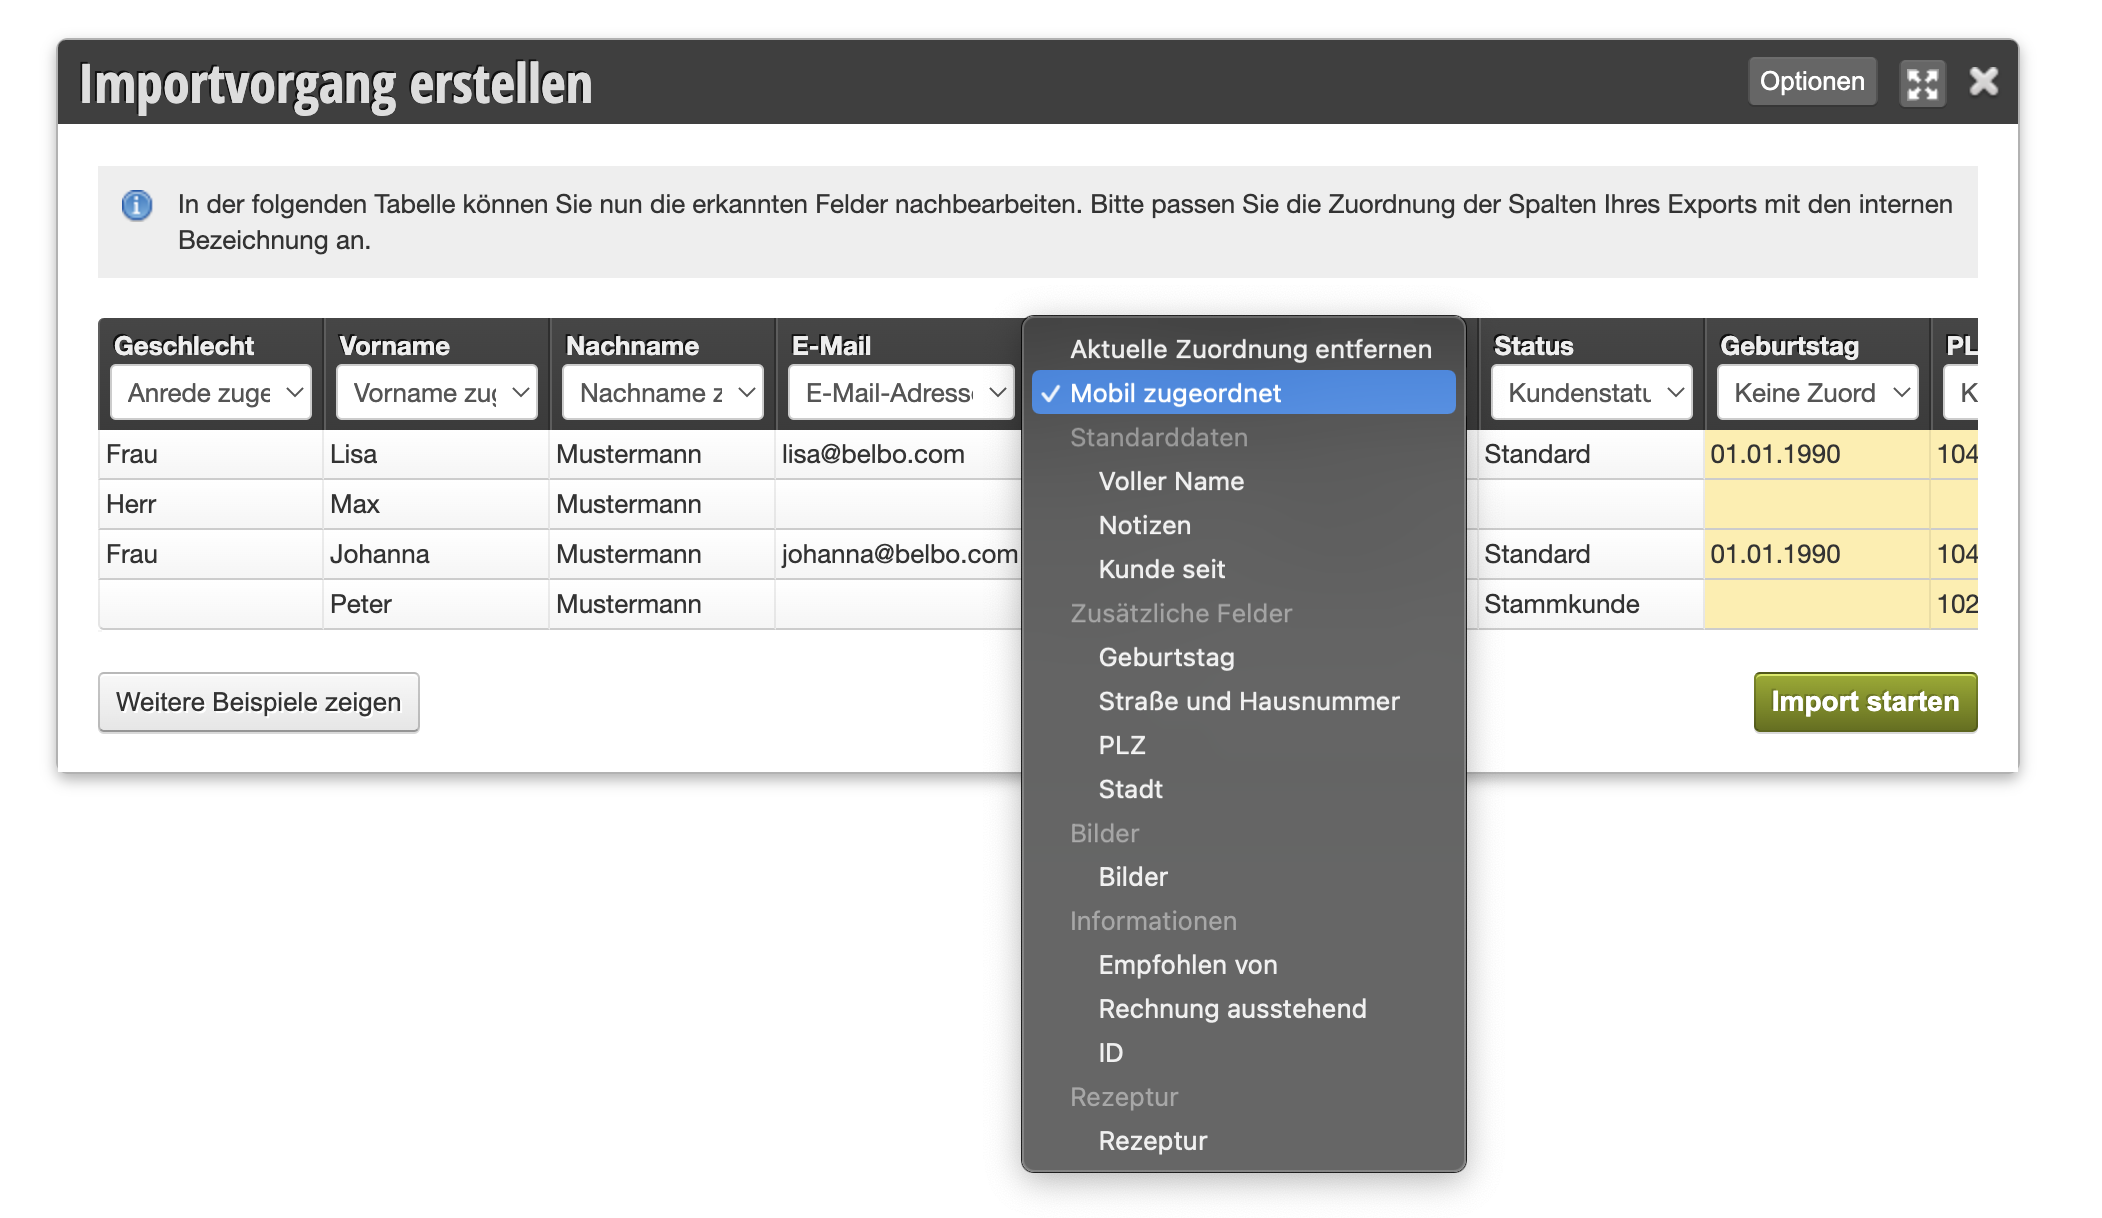
The recognized data will then be displayed. Here you can map the columns of your export to the field names of your online calendar's customer file in the table header (details in the "Map Data Fields" section).
Map Data Fields
In the displayed table, the available data fields in Belbo are listed under the column names of your file.
Select the correct data types here.
Note that the table headers in your file may have a different name for the data type, for example "Mobile Number" instead of "Mobile".
Mapped data columns are displayed in white, unmapped data columns are displayed in yellow. If you do not need certain data from the original file, you can remove the mapping. Yellow marked columns are ignored during the import process and are not imported.
Standard Data
Some data fields are already set up in Belbo. These include name, email address and phone numbers. These can be mapped directly or are recognized directly by the import center.
Please check and correct the data mapping if necessary.
Custom Fields
In Belbo, you have the option to create any number of custom data fields for your customer files.
If information from the export needs to be imported into the calendar that is not yet offered, you can create additional customer fields and map them.
It is important that the type of data field matches the content to be imported (for example, type "Birthday" and not "Date" for the birthday). Please contact us if you need help with this.
Special Cases
Full Name
Some providers export their data so that the customer's first and last name are in one column. In this case, the correct mapping in Belbo is the "Full Name" field. During the import process, the import center separates the name after the first space and creates the data fields "First Name" and "Last Name" from it. This makes importing easier since the table file does not have to be manually edited first. Please check the data afterwards, as there may be inconsistent data in case of multiple first names.
Color Formulas
In the hairdressing industry, color formulas are an important part of customer data and can be imported into Belbo. However, from experience, color formulas are provided by other providers in very different ways. Please contact us if you are unsure how best to import the formulas.
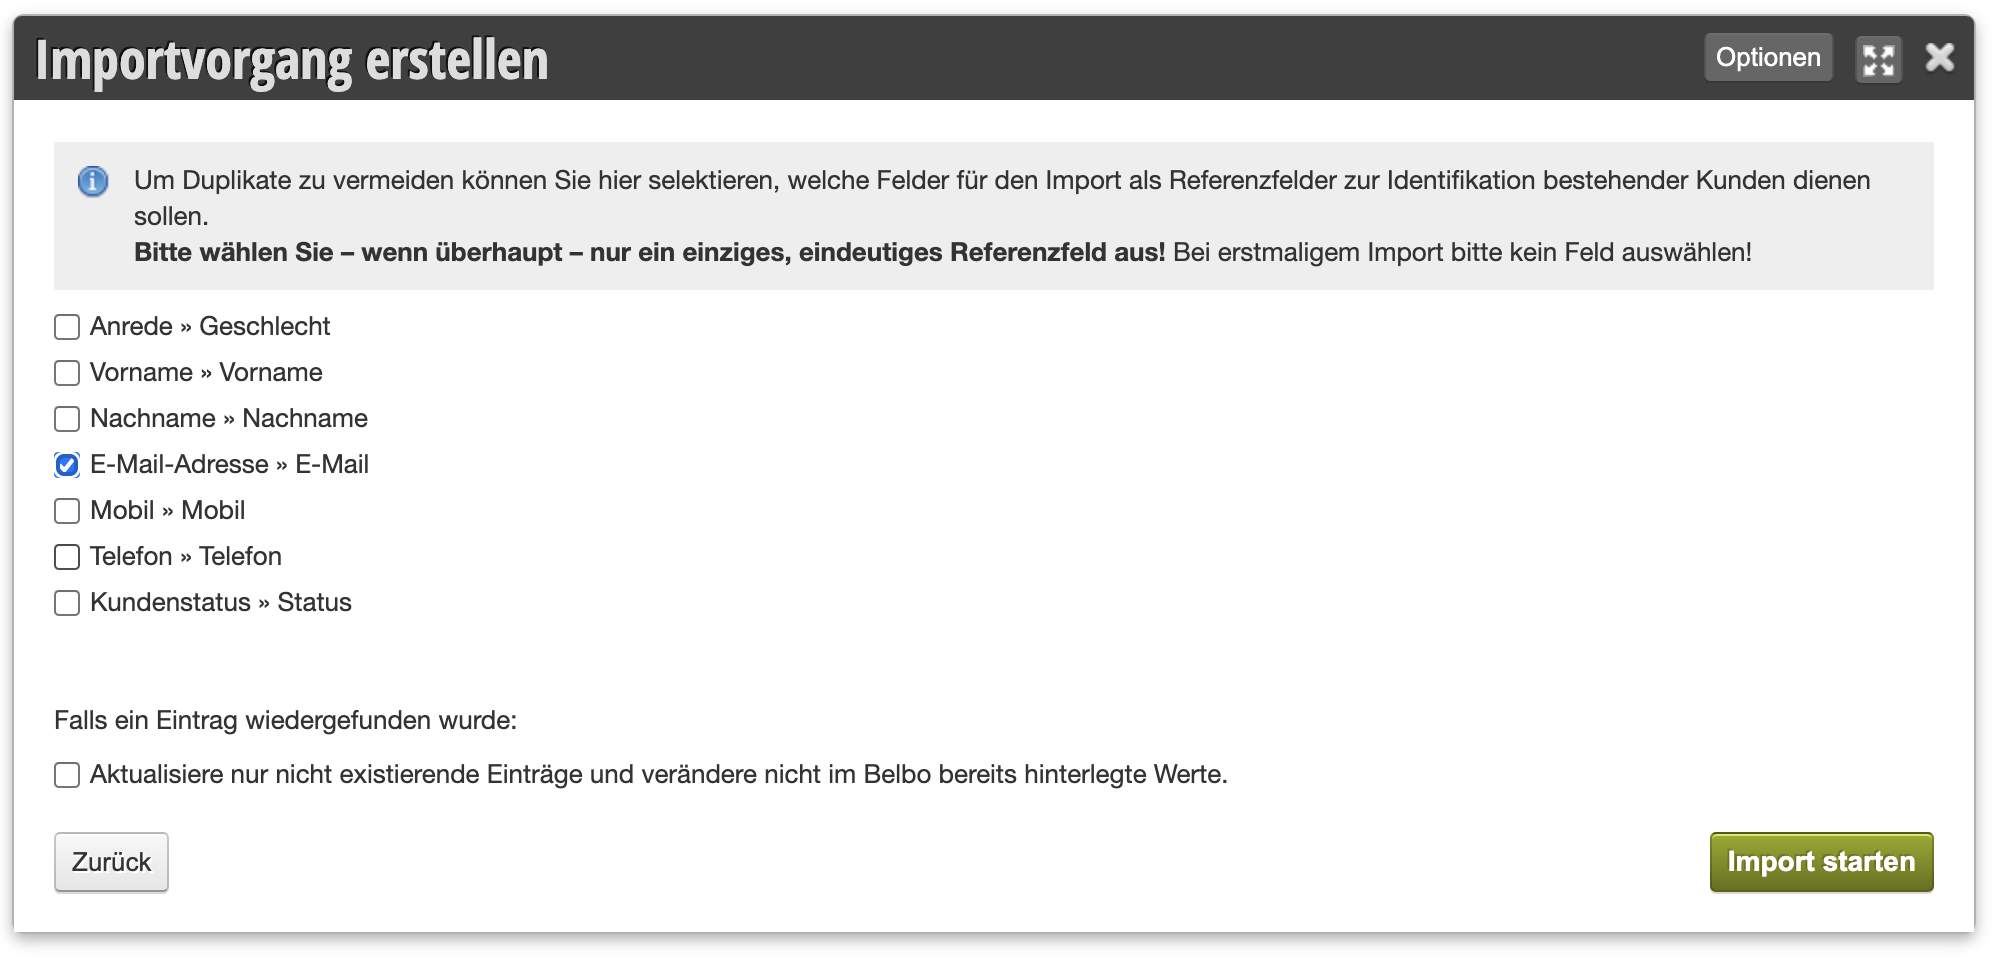
Avoid Duplicates
If your customer file is already populated, you can use the following step to avoid duplicates: Here you can select unique fields (for example: email address or mobile number) as needed, which serve to precisely map existing customer files.
If existing customer files match completely in these fields, all other fields will be overwritten with the values from the export.
Warning: Use unique column combinations so that no duplicates are created on the one hand and no customer files are overwritten with incorrect customer information on the other hand.
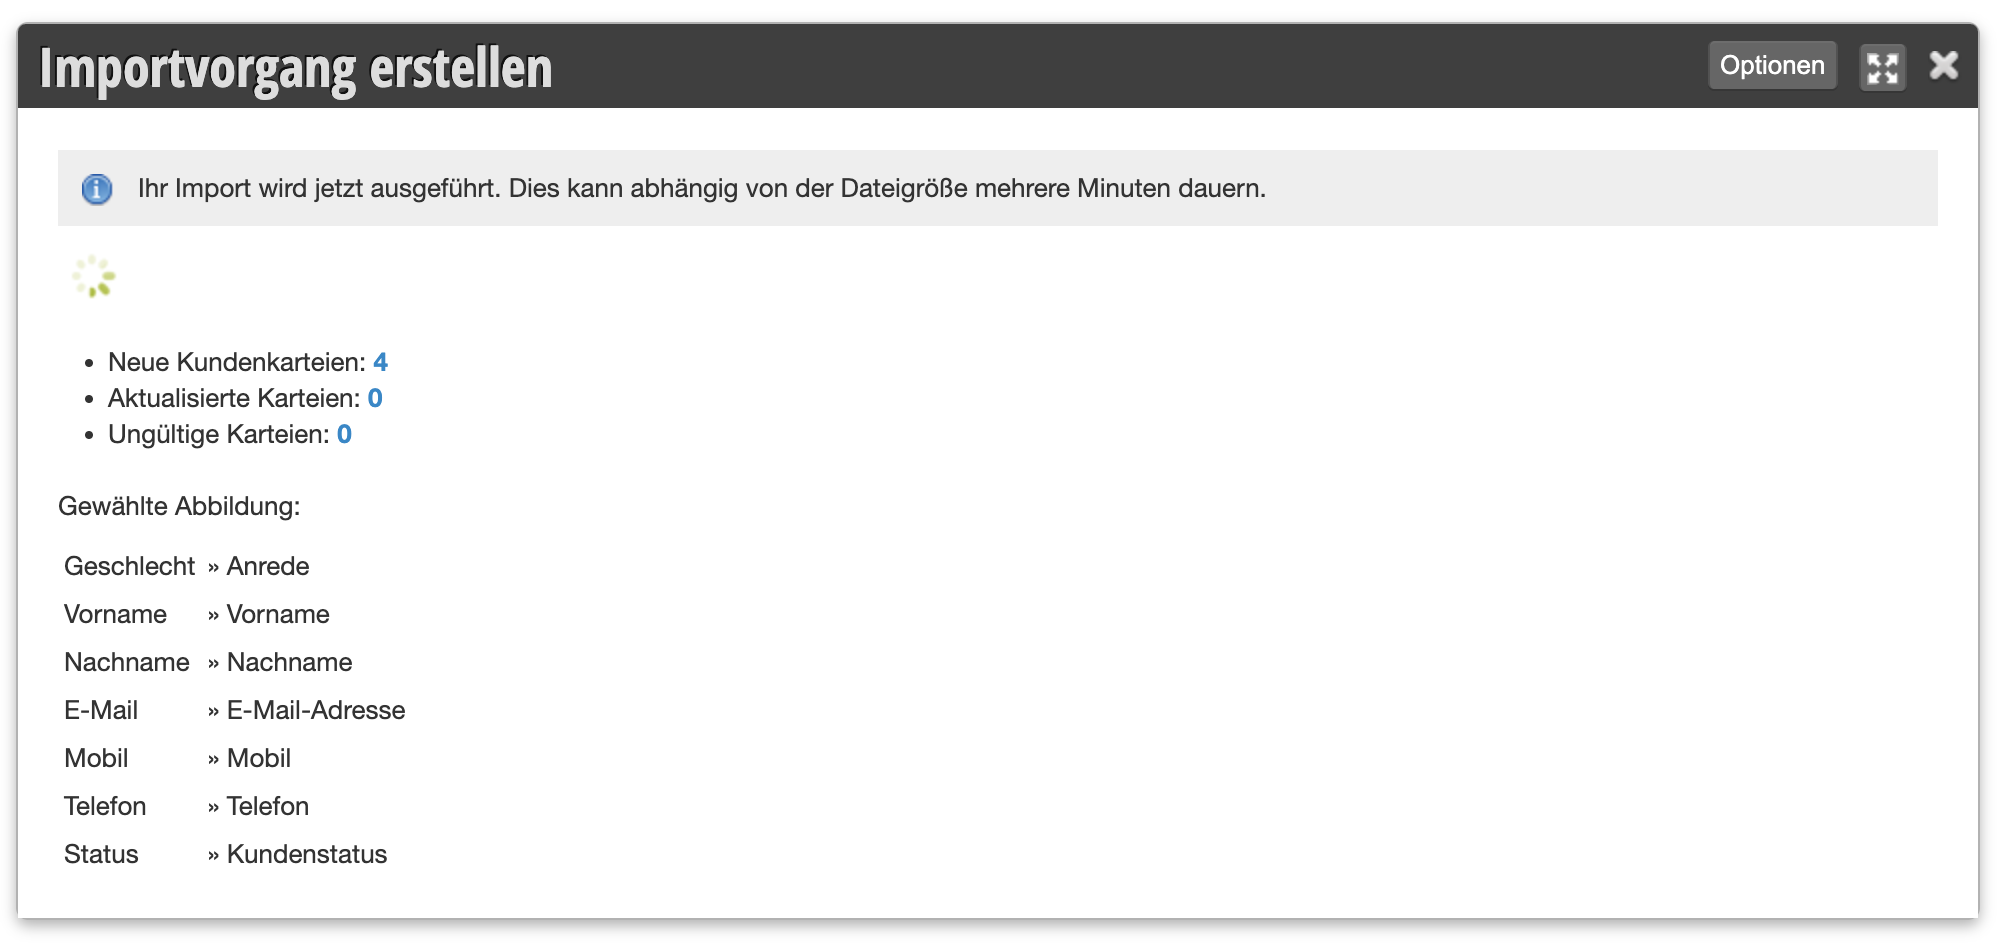
Import Process
Start the import process. This process may take several minutes depending on the number of customer files. You can close the window in the meantime and return to the import center at any time.
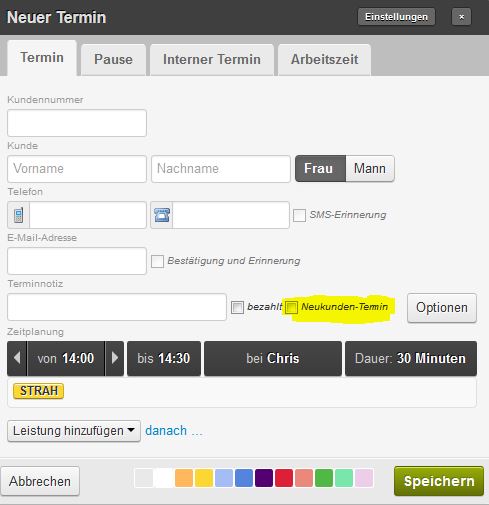
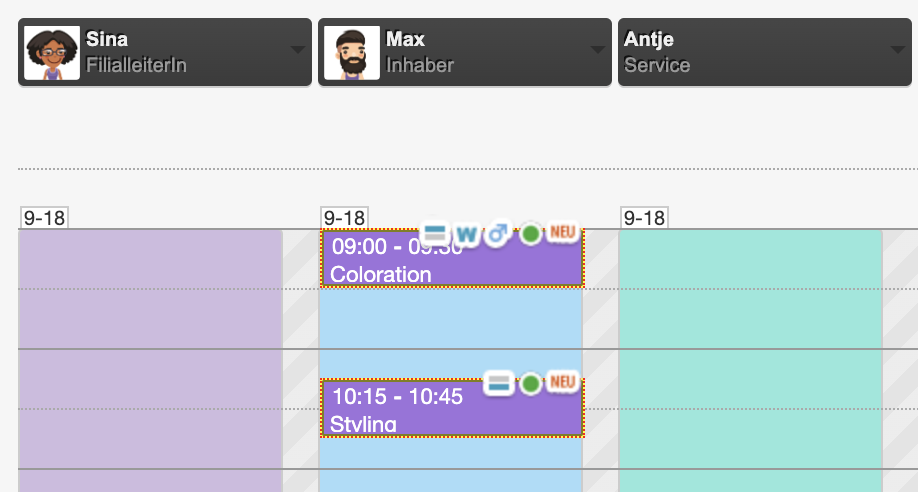
To save that this is a new customer, simply click the New Customer Appointment field during the appointment entry. A small "New" indicator will then appear above the name in the calendar, and you'll know at the first appointment that you might want to introduce yourself a bit more thoroughly.
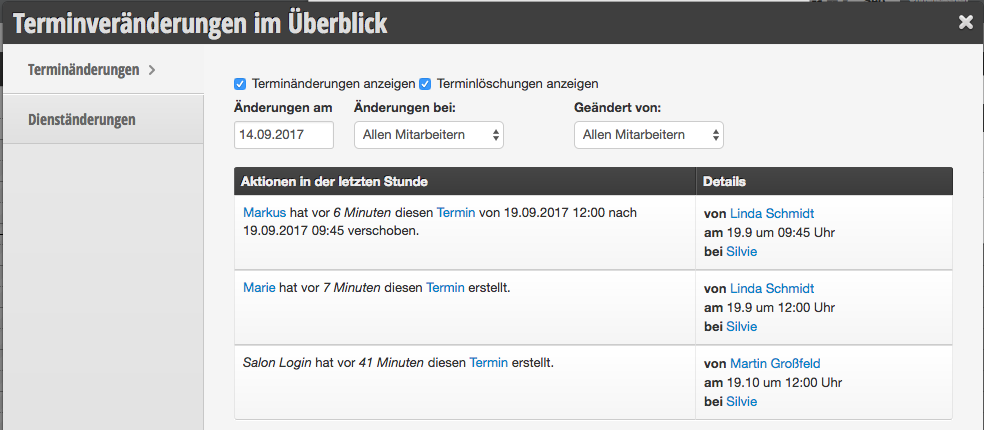
The protocol allows you to track what has been done in your calendar recently. This includes, for example, appointment saves, changes, and deletions.
You can access this area in the header of your calendar.
If this function is not enabled, it can be activated via "Settings > Add function".
Appointments in the protocol
In the protocol, you can view all appointment changes within any time period.
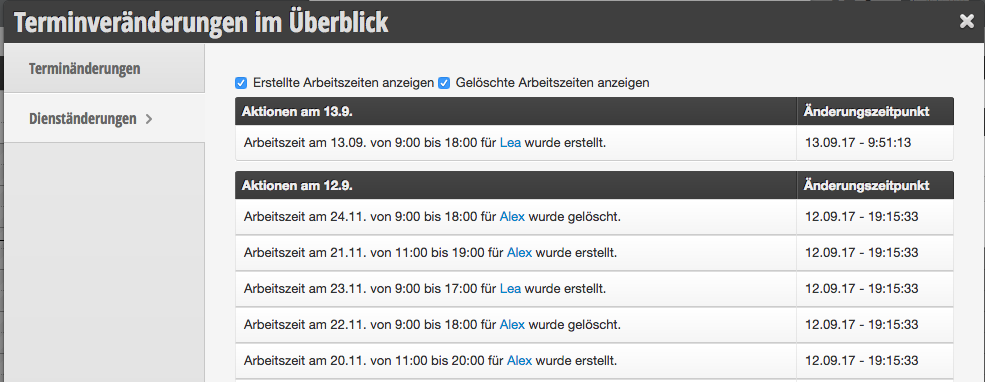
Working hours in the protocol
In the protocol, you can view all working hours changes within any time period.
Appointments removed by unknown users
If you allow booking without prior login, it may happen that you see customers without names in your protocol who perform actions.
The unknown users are non-logged-in customers who click on an appointment in the online booking. This creates an appointment draft in the calendar, which is also visible on-site (transparent dashed). This prevents double bookings.
If the customer decides to change their mind in the next step and clicks on a different time or cancels the booking before logging in, the draft is removed and a corresponding protocol entry is created with an unknown name. The customer's name can only appear in the protocol once the customer logs in or fills in their details in the booking.
Appointments removed by the system
It may happen that you see in the protocol a notice that neither an employee nor a customer cancelled an appointment. This happens exclusively when an appointment is not completed within the time you have set. Typically, this period is 15 minutes.
This can happen in the following cases:
An employee clicks on the calendar at the desired time and begins entering an appointment, but does not complete the process by clicking "Save". She also does not cancel the process via the "Cancel" button or by clicking on the calendar again, for example because she gets distracted.
A customer selects an online time for the appointment but does not complete the booking by clicking "Book now", but only closes the browser window.
In these cases too, clicking on the desired time initially creates an appointment draft, which from that point on is no longer bookable for customers and already appears to colleagues as a "dotted" draft in the calendar. This makes unnoticed double bookings in the calendar impossible.
To ensure that the appointment becomes available again after an improper cancellation of the booking, the draft is automatically deleted after the reservation period (typically 15 minutes).