
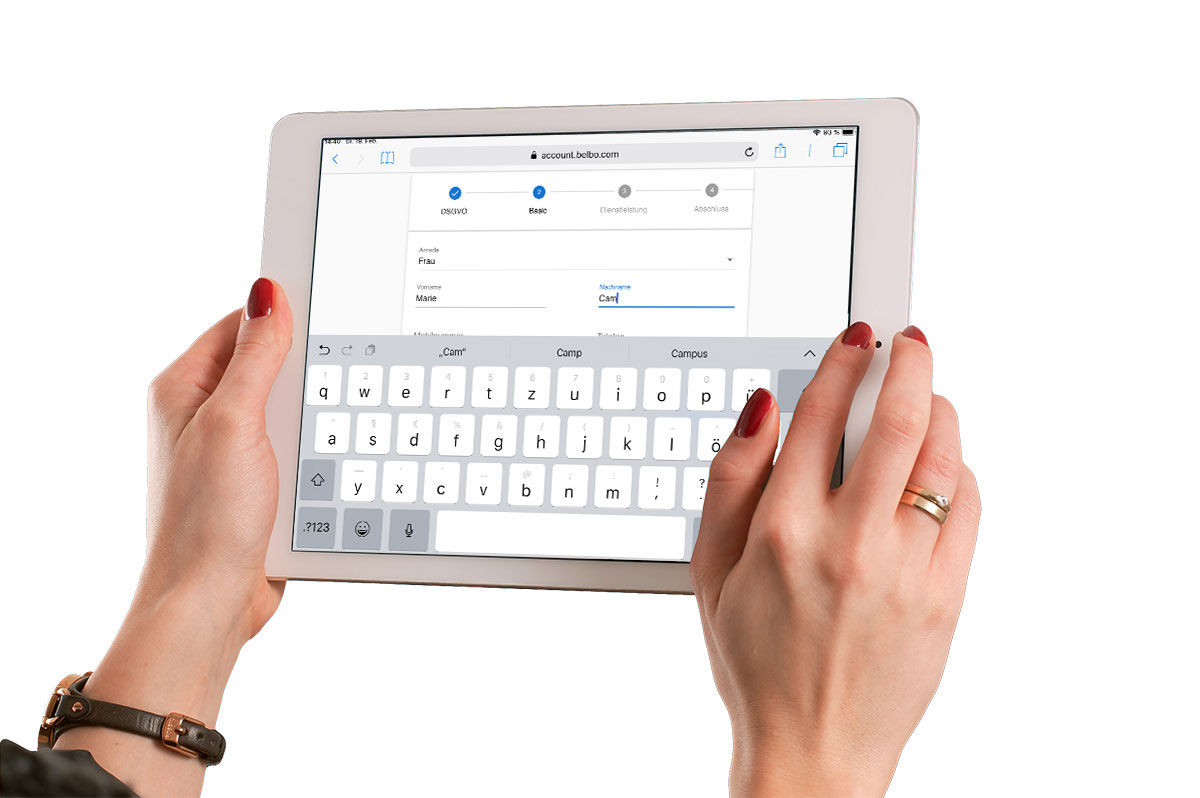
With the customer inquiry, you can easily maintain your customers' master data by having your customers enter or update their own data. You can also query consent for digital data storage or medical history forms here. For this, you need a second device (for example, a tablet) that you can hand to the customer. The customer only has access to their own data and does not see your calendar or other customer files.
Contents
- Step 1: Create customer fields for the inquiry
- Step 2: Create customer inquiry
- Step 3: Add content
- Step 4: Activate devices
- Step 5: Start customer inquiry
- Customer questionnaires in confirmation and reminder emails
- Query history in the customer file
- Employee view
Customer entering their own data:
Step 1: Create customer fields for the inquiry
First, you can determine which fields your customers should fill in during the customer inquiry. You can do this conveniently on your laptop or desktop computer if you wish.
- Click on "Settings".
- Under the main menu item "Customers", click on "Customer Settings".
- Here in the "Tabs" tab, create a new tab, for example "Customer Inquiry".
- Now create the customer fields in the "Customer Fields" tab that should be asked in the customer inquiry. Here, select your newly created tab under "Tab in customer file".
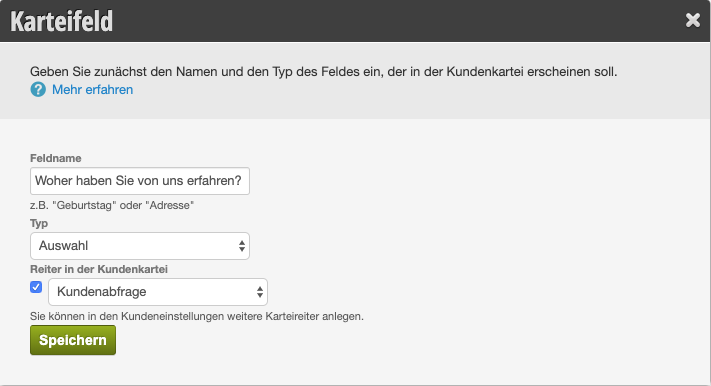
For more information on customer fields, see here. A detailed sample template for structurally creating a customer questionnaire can be found in the article Creating customer questionnaires in practice.
- Please note that master data such as name or email address do not need to be created separately, but can be selected separately for the inquiry.
- If you want to create many questions, you can also divide them into multiple tabs.
- Existing tabs can also be included in the customer inquiry without having to create new tabs.
Step 2: Create customer inquiry
Once you have created all the questions, you can now create the customer inquiry.
- Click on "Settings".
- Click on the "Customer Inquiry" function. If it is not activated, you can activate it under "Add Function".
- In the "Questionnaires" tab, click "+Questionnaire" to create a new inquiry.
- Now set the internal name of the questionnaire.
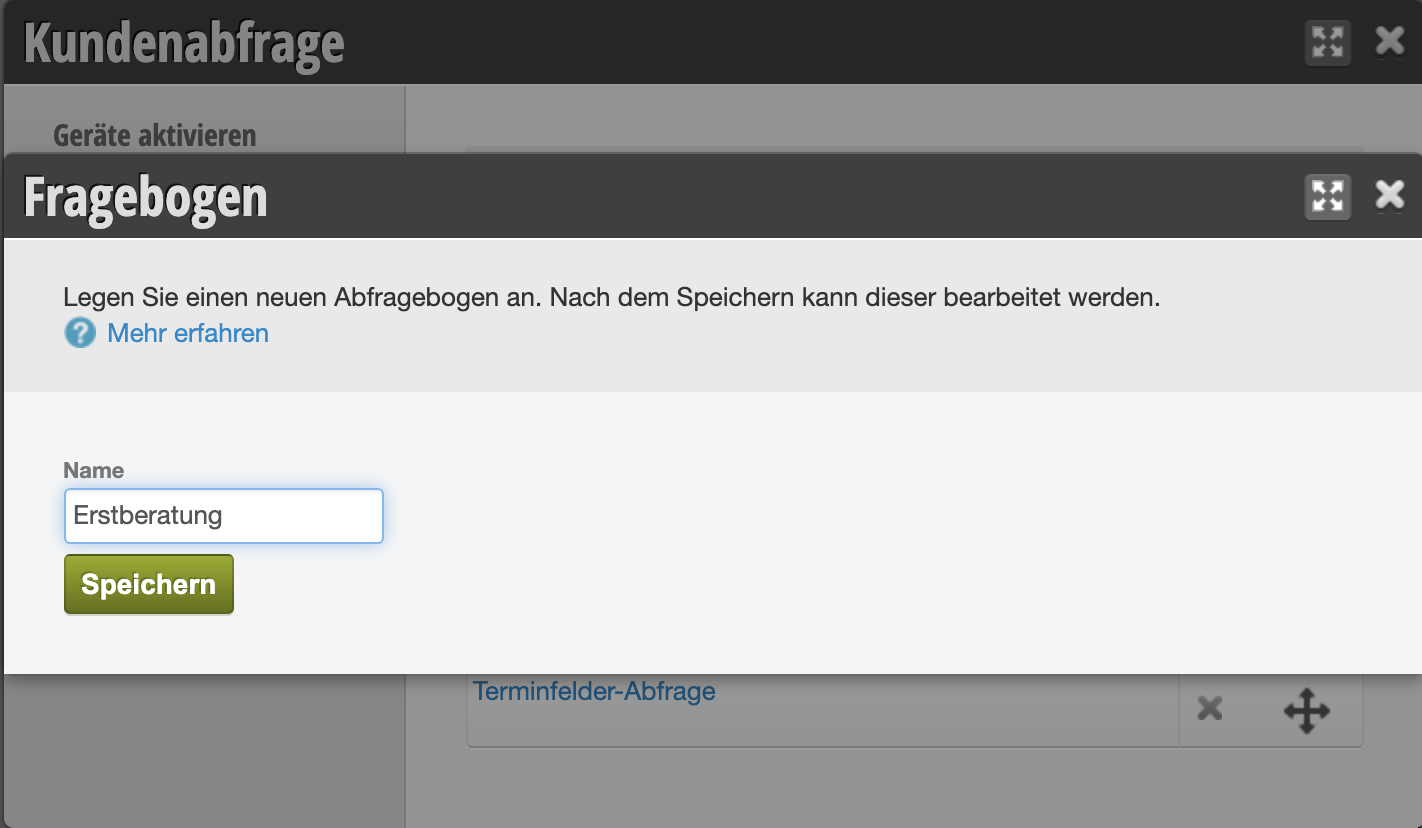
Then set the details for your questionnaire:
- Query master data: Master data such as first and last name as well as phone numbers and email address are also queried.
- Digital storage: Query consent: The customer receives your information text on digital storage, which you acknowledge here and can also sign if desired.
- Closing text: Formulate the closing text of the customer inquiry.
- Signature field in closing: Determine whether the customer should confirm the entire inquiry with their signature. Note: When creating individual steps, it is also possible to insert signature fields.
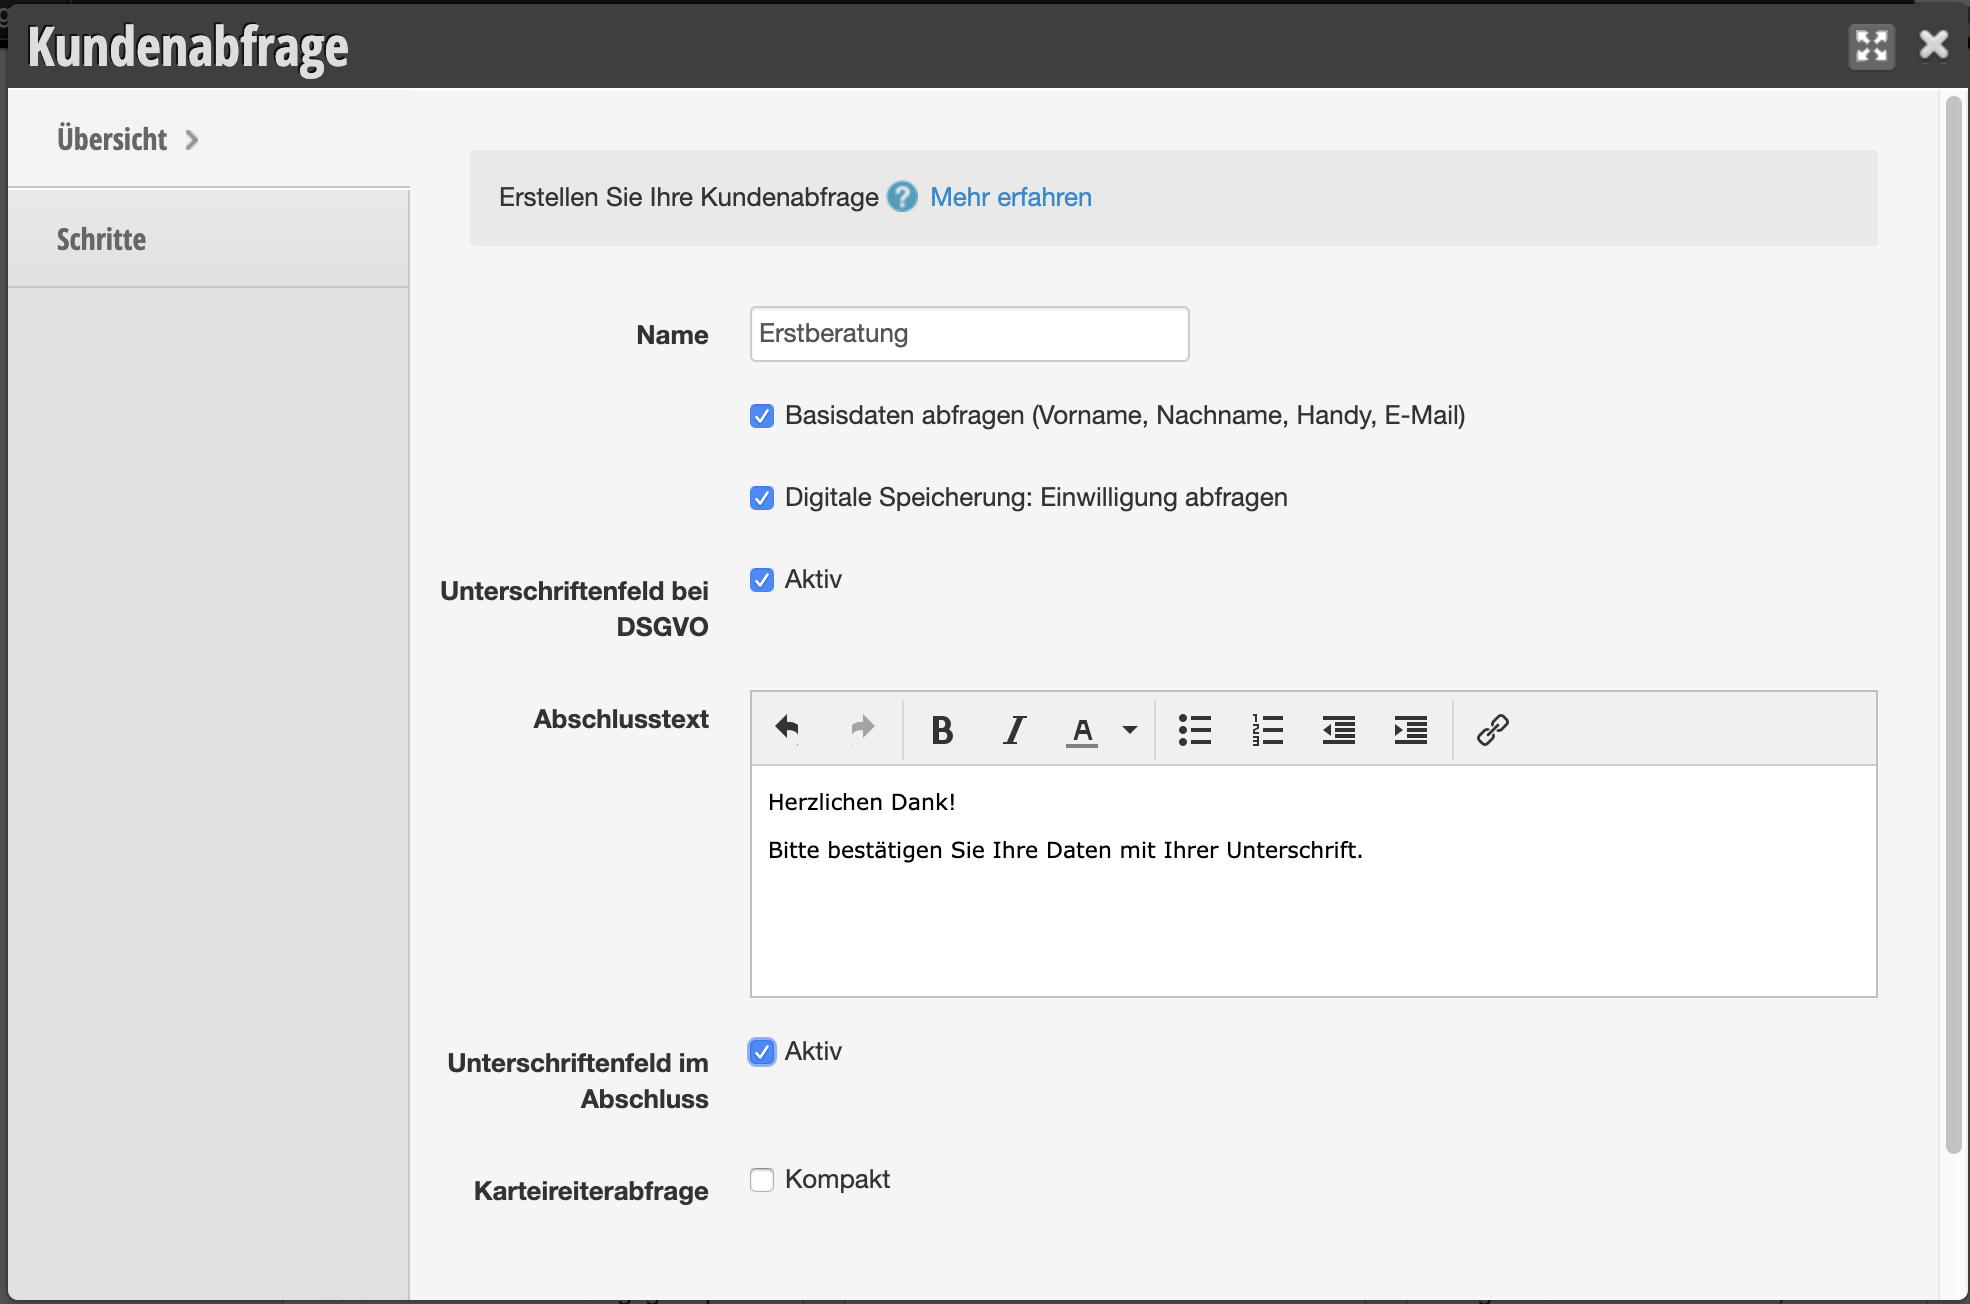
Define multiple inquiry types
Master data maintenance, data protection inquiry or medical history form? If different questionnaires are desired, you can store them.
- Now open the customer inquiry function page on your main device and open the "Questionnaires" section.
- Click on "+ Questionnaire"
- Enter a name for the new questionnaire. It will then appear as soon as you start a customer inquiry.
Step 3: Add content
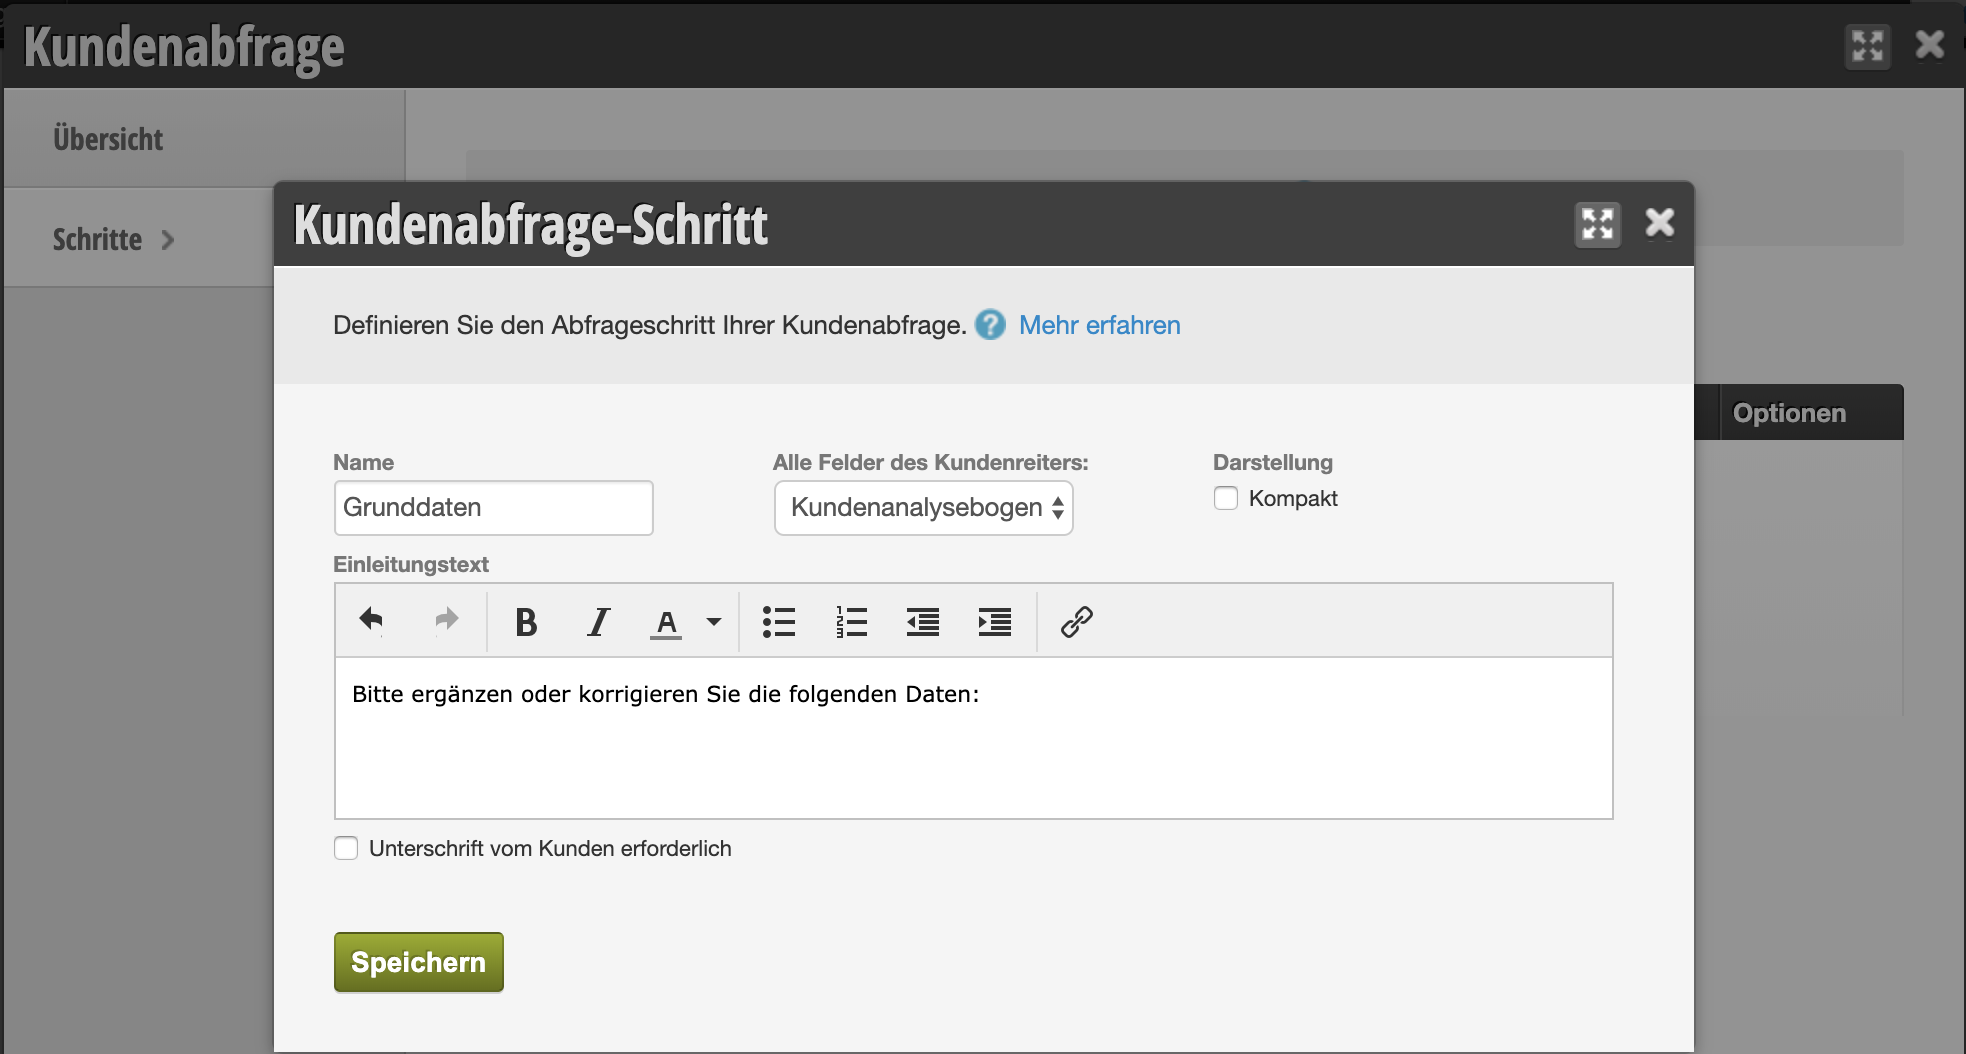
You can then determine which content should be queried. To do this, switch to the "Steps" submenu item in your inquiry. You can add both customer file tabs as well as freely definable texts with links to external documents.
- Click on "+Step" to add a step to the inquiry.
- Determine which customer fields should be queried by selecting the corresponding tab. You can also leave the selection field empty if the customer should only acknowledge the text.
- If necessary, write an introductory text for this step. Within this text, you can also set links to external documents that the customer should acknowledge. To do this, upload the desired document to your web space or an online service and link the desired text passage using the link symbol in the text input.
- Determine whether this step should be confirmed by the customer with a signature and save the step.
You can add any number of steps to each inquiry.
Step 4: Activate devices
- To use this function, you must activate it in the Settings > Add Function area.
- Now you must activate your second device. To do this, visit the following website with the second device (e.g. tablet): https://<Your Customer Domain>.belbo.com/office/display
Tip: Don't you know your customer domain? Just look in your calendar address bar. Your personal customer domain is located there before ".belbo.com"
- Now open the Settings > Customer Inquiry module on your main device and open the "Activate Devices" section.
- Click on "+ Device"
- Enter a name for the device (e.g. "Tablet 1"). This could be useful if you want to use multiple tablets or devices for this purpose.
- Below the name is the "Activation Code" field. Enter this now on the device where you opened the "/office/display" page from step 2.
- The device is now activated and can be used for the inquiry.
Step 5: Start customer inquiry
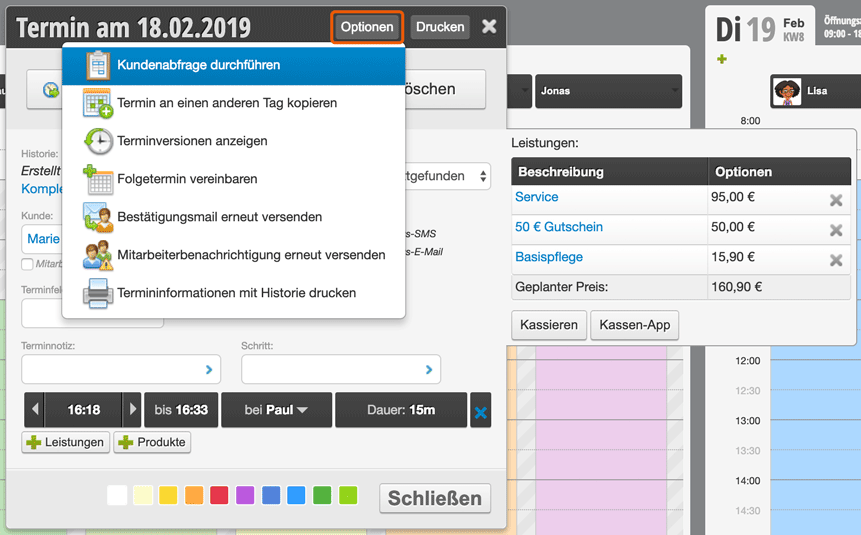
- For data protection reasons, the customer inquiry is always initiated from the main device. Therefore, open your calendar and click on a current appointment for whose customer you want to start the inquiry.
Why can't I select the customer directly on the second device? The reason is that the customer has the device in their hand. After completing the data entry, the customer should not be able to see another inquiry or the names of other customers. A password entry by the employee would also pose a risk/effort.
- In the appointment details, click Options in the top right and select the "Start Customer Inquiry" option.
- The inquiry then starts on the second device.
Customer questionnaires in confirmation and reminder emails
You can link your inquiries in the confirmation and reminder emails to ask your customers to fill out the questionnaires before the appointment. There are placeholders for the created questionnaires that you can place in the email.
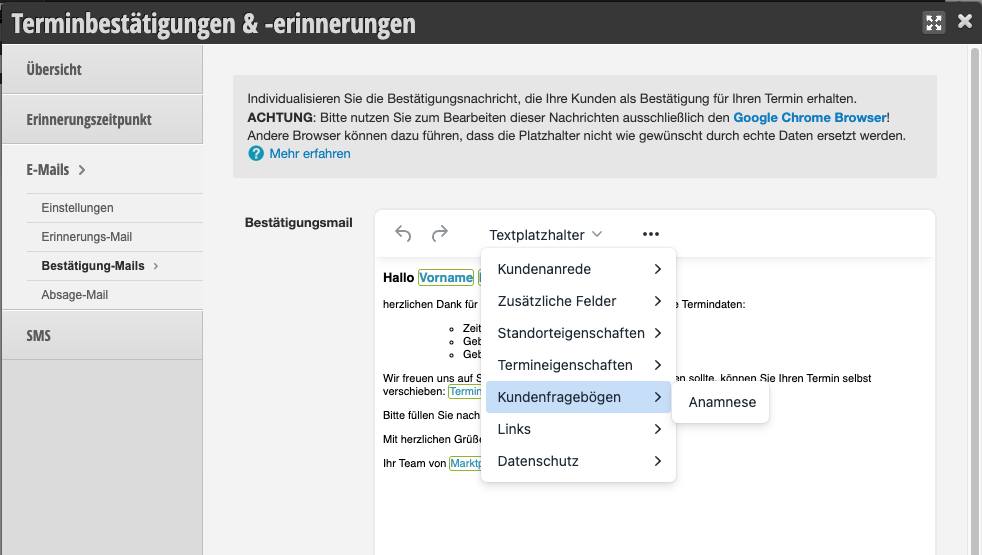
This is particularly suitable for questionnaires that must be completed by all customers.
How you can manually send the questionnaires to specific customers is explained here.
Query history in the customer file
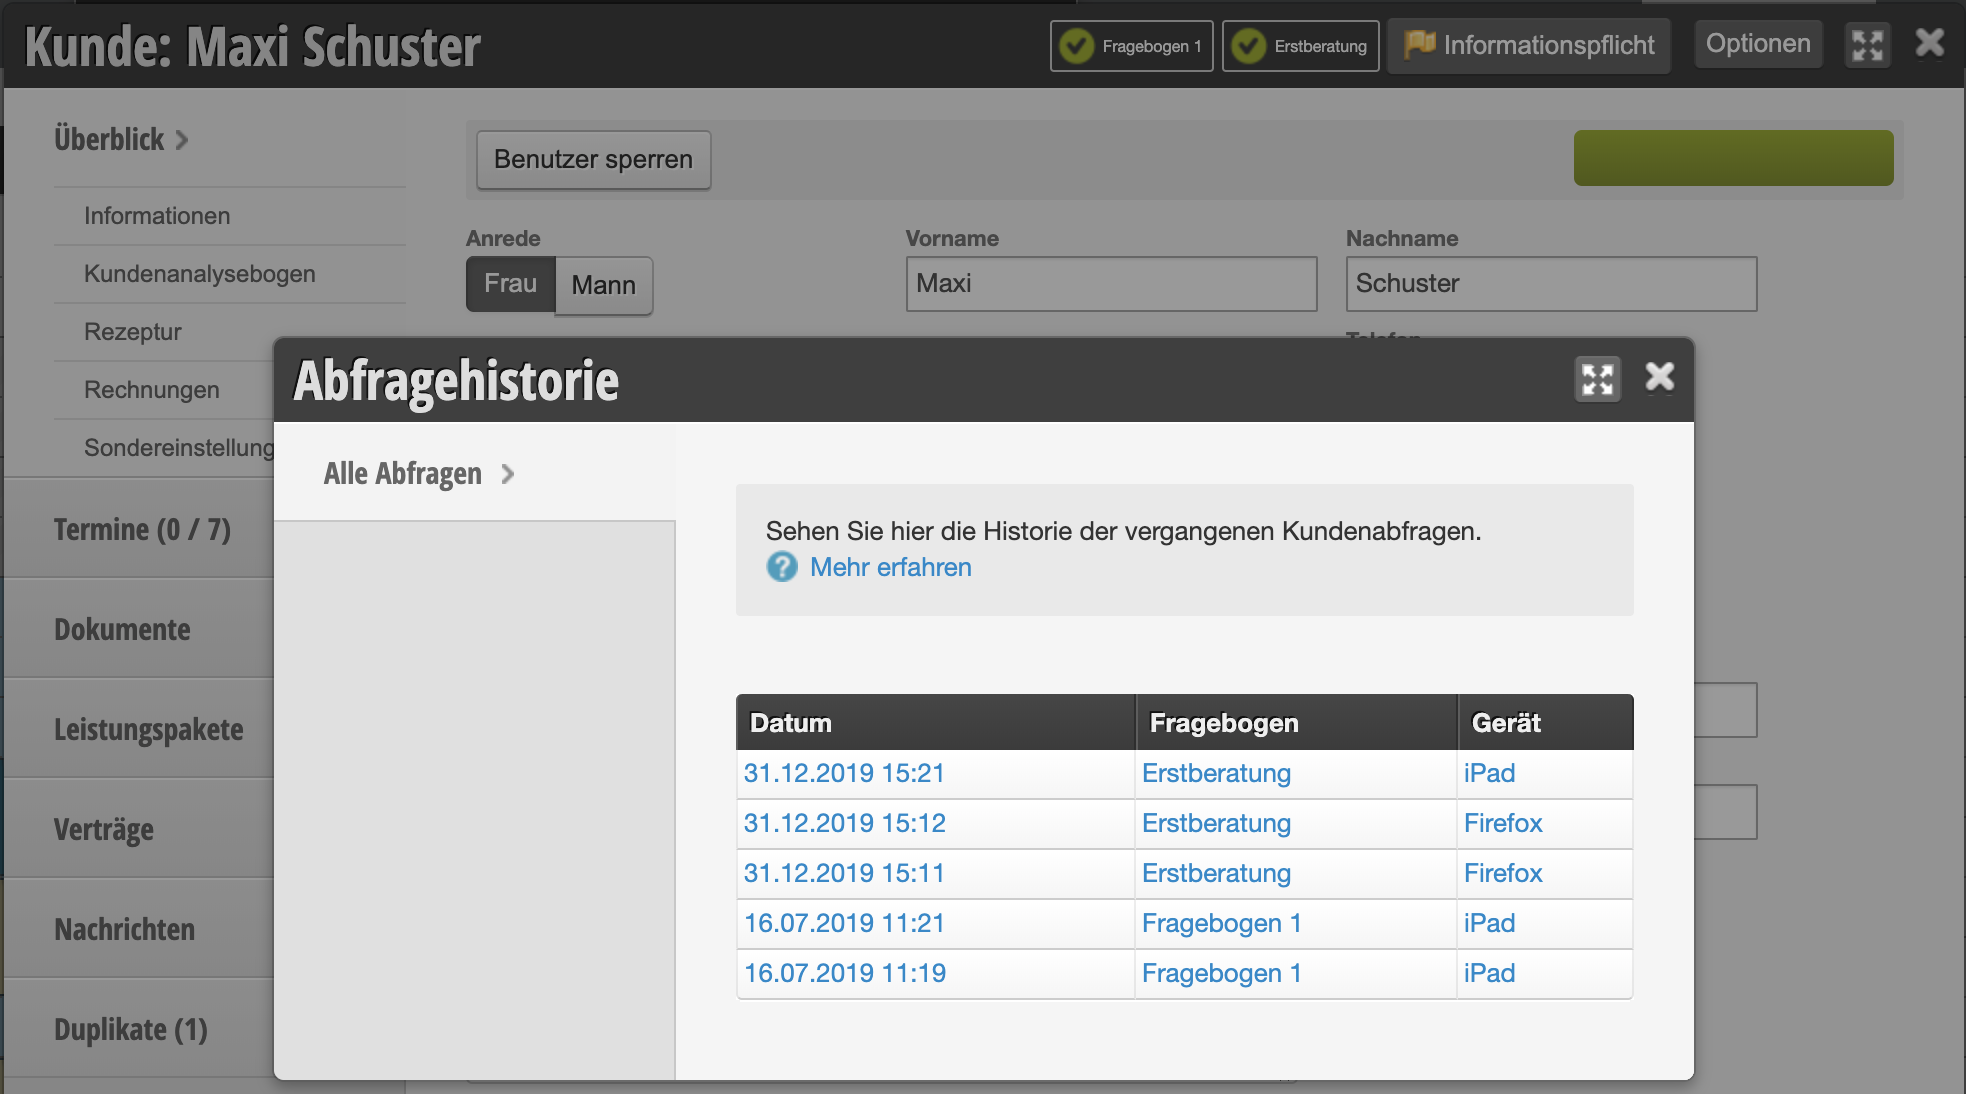
After a customer has filled in the data and completed an inquiry, it can be found in the header area of the customer file. Click on the desired inquiry to view the history if an inquiry was filled in multiple times.
Employee view
You can also use the customer inquiry for employees. You can send the customer file to a second device so that the employee can, for example, store color formulations directly on a mobile device.
- To do this, activate the "Employee View" option under Settings > Customer Inquiry > Settings
- To open the customer file on the second device, you can click on "Options" within a customer appointment and then select the "Send Customer File to Second Device" option
- The customer file will then open on the selected device and can be filled in by the employee.