Everything about: Troubleshooting Hardware
Troubleshooting when using with Mac and mPOP cash register
If you are using the cash register system on a Mac (MacBook, iMac, Mac Pro) in combination with the mPOP cash drawer-receipt printer combination, you can check here how to solve any problems.
Prerequisites Checklist
Is the device properly connected to the computer via USB cable?
Check that the USB cable is connected to the correct port on the mPOP drawer:

Only a single blue light should be illuminated on the mPOP device
- If yes: Everything is fine here
- If no light is on: Is the mPOP device plugged in?
- If a red light is on: Is the receipt drawer properly closed? Is the paper empty or not inserted correctly?
Tip: The receipt drawer can be opened by pressing against it.
Is there a stable internet connection?
- Test: Please open a website that hasn't been opened in a long time.
- If the page does not load (or loads very slowly): Check internet connection.
Restart Satellite
- Right click on Satellite icon > Exit
- Restart Satellite
Printer is available
- Is the mPOP cash register listed in the Mac's printer settings and available?
- To do this, click on the small magnifying glass (top right in the menu bar) and search for "Printers & Scanners".
- Open System Preferences from the suggestion list and check the list of installed printers.
Possible Problems and Solutions:
Red light on the mPOP cash register is lit: Is the receipt roll empty?
- Is the receipt roll inserted correctly?
- Is the paper empty?
- Solution: Insert a full receipt roll correctly and close the receipt drawer properly.
Tip: The receipt drawer can be opened by pressing against it.
Error message during checkout: "Printer not available"
- The mPOP cash register is probably being accessed simultaneously by another device. It can only be used either on the computer or via iPad.
Chinese characters are displayed on the receipt
Umlauts or images are not printed correctly
Receipt is not cut off
- Log in to the Office and open or activate the "Printer Connection" module in Settings
- In the "Printer Type" module check (if something other than mPOP is selected, correct it)
- Deactivate the module again
Cash drawer does not open
- Log in to the Office and open or activate the "Printer Connection" module in Settings
- In the "Printer Type" module check (if something other than mPOP is selected, correct it)
- Deactivate the module again
Cash drawer opens, but receipt is not printed
- Log in to the Office and open or activate the "Printer Connection" module in Settings
In the "Printer Type" module check (if something other than mPOP is selected, correct it)
- Deactivate the module again
Test the printer again. If problems persist:
- Under Settings > Cash Register > Receipt Design > Receipt Structure check if anything is entered.
- If yes: Cut text and save locally (for example in a Word document)
- Save completely empty receipt structure field
- Test printing again and correct receipt structure outside of operating hours.
- The "Open Cash Drawer" button in the checkout process does not work
- Log in to the Office, open the "Printer Connection" module in Settings and activate the checkbox "Offer Open Cash Drawer button in Dashboard".
- Printing sometimes does not work or only works the second time
- After prolonged inactivity, your browser may have activated power saving mode. This can be disabled.
- For Chrome, you can find this setting here: Chrome Browser Settings -> Performance -> Disable Memory Saver Mode
Is the printer paused?
In that case, it needs to be resumed in the Mac's print queue.


Support via AnyDesk – macOS
In order for Belbo Support to see your screen and take control of your mouse and keyboard if needed, AnyDesk is used. The setup takes about 5 minutes – the most difficult part is granting macOS permissions.
Step 1 – Download and install AnyDesk
- Open anydesk.com/de/downloads/mac-os and download AnyDesk.
- Open the downloaded .dmg file and drag the AnyDesk icon to the Applications folder.
- Start AnyDesk from the Applications folder.
Step 2 – Grant permissions (important!)
On first launch, AnyDesk displays a yellow warning icon next to your AnyDesk ID. This means: macOS has not yet granted permissions, without which support cannot access your screen.
Click on the warning icon to open the System Permission Status window. There you will see three permissions:
2a – Screen Recording
- Click "Open Screen Recording preferences" in AnyDesk.
- macOS automatically opens System Settings → Privacy & Security → Screen Recording.
- Click the lock icon at the bottom left and enter your Mac password.
- Check the box next to AnyDesk.
- Confirm the restart of AnyDesk if macOS asks.
2b – Accessibility
- Click "Request Accessibility" in AnyDesk.
- macOS automatically opens System Settings → Privacy & Security → Accessibility.
- Unlock the lock and check the box next to AnyDesk.
Step 3 – Share your AnyDesk ID with support
After successful setup, AnyDesk displays a 9-digit ID (e.g., 123 456 789). The warning icon is now gone or green.
Share this ID with Belbo Support – by phone or chat. Support will then connect from their side.
Permissions not working?
If AnyDesk still shows a warning icon after checking the boxes:
- Completely quit AnyDesk (Menu bar → AnyDesk → Quit AnyDesk) and restart it.
- Check in System Settings to make sure the checkbox next to AnyDesk is really checked – sometimes it reverts.
- If the checkbox is grayed out: Unlock the lock again, then check the box.
- On some Macs, AnyDesk must first be allowed as a background app via Settings → General → Login Items.
Troubleshooting Call Tracking Usage
If your call tracking was working and suddenly stopped working, there can be many reasons for this. This article lists reasons for a sudden malfunction if your call tracking suddenly stops working. If you have problems and questions about the setup, you will find help here: Enable call tracking
Is the Satellite running?
The most common problem is that the Satellite has not started properly. This can be due to a system update. Often this problem can be fixed by restarting your computer. You will find information on this here: Install Satellite
Is the computer in the same network as the Fritzbox?
Check whether your computer is in the same network as the Fritzbox. Otherwise call tracking cannot work. Using a guest WLAN is also a reason for call tracking not working.
Fritzbox update?
If your Fritzbox has been updated, call tracking may need to be enabled again. You will find information about this here: Enable call tracking
Check call tracking settings
Check and disable any special settings if necessary and reset filters. If your phone number has changed or something else, a filter function may prevent call tracking from working.
Disable antivirus scanner
Check and disable your manually installed antivirus scanner via McAfee or similar and then restart your computer.
Do you have multiple computers with Satellite installed at the location?
The Satellite with call tracking enabled may only be active on one computer. If you experience problems with call tracking suddenly not working or only working "temporarily", you should try switching off the other computers or disabling the Satellite there.
Are you using a WLAN repeater?
WLAN repeaters are sometimes used to amplify a weak signal. However, this can cause difficulties when installing call tracking. If you enter the following IP in the address bar of your Chrome browser, you should go directly to the admin page of your Fritz!box: 169.254.1.1.
Problemlösung bei Nutzung von Mac und Epson-Drucker
Wenn Sie das Kassensystem über einen Mac in Kombination mit der Epson-Bondrucker und separater Kassenlade nutzen, können Sie bei Problemen hier nachsehen, wie diese zu lösen sind.
Troubleshooting SEPA File Uploads
If you use the direct debit function, you can export your SEPA files in XML format to upload them to your bank. If you have poorly maintained data, error messages may occur.
If you receive an error message after uploading the file, please read the error text carefully. Normally, it contains information about where the error is located. As a rule, the text will point out a specific line.

Opening the file
Open the XML file on your computer. It is important that you use a program in which the lines of the file are numbered. A suitable program is, for example, Brackets.
In our example error message above, there is mention of a problem on line 417. We can see from the file that this line belongs to the customer "Marie Mustermann". The lines belonging to a customer are highlighted in green here:

Now we can search for errors in this customer's contract.
Typical sources of errors
- A direct debit mandate is not stored in the correct location in the contract.
- A direct debit mandate is stored but not active (active checkbox is missing).
Troubleshooting for EC Terminal Usage
This article helps you troubleshoot when payments are not being transferred correctly to your card terminal. If you are using a SumUp device, this article is not relevant for you.
Below you will learn which basic points you should check – including the communication test, the stability of the network connection, the correct IP address and port, and possible device settings such as login mode. In addition, it explains how you can test the connection with simple tests.
First Step: Perform Communication Test
To narrow down the problem, it is important to know whether the payment has already worked before. If this is the case, it is likely a network problem, which can be confirmed by the communication test in the "Card Terminal" function. Please first perform the communication test in the function and send this screenshot to the help chat or email to info@belbo.com, or take a photo with your phone if you cannot proceed on your own.
Examples
The screenshot created could look something like this:

In this case, the device is basically ready for use. Please check in a checkout process whether the payment arrives at the device. In principle, you can already click the "Display Text" button at the bottom left to check whether "BELBO" appears on the terminal's display. If this is the case, the communication is perfectly set up and payments will work. If this is not the case, the problem is with the terminal and can be analyzed using the terminal hotline.

An example of a status where the installation of the Satellite needs to be checked.

Here is a classic example of the terminal not being on the same network as the computer, possibly due to a WiFi switch.
Below are tips for resolving each test level of the communication test:
Level 1: Check Network Access in Browser
Depending on which step a problem occurs, you may be able to resolve the problem yourself. For example, it is necessary to use Chrome, Edge or Firefox and allow access to the local network in this browser. Please check with the help of the video whether access is allowed: https://www.youtube.com/watch?v=jIqkwOoKNHg.
Level 2: Check Belbo Satellite
Is the Belbo Satellite started and running? Check whether the Satellite is properly installed and running depending on your operating system: Installation Guide
Level 3: Check Device Accessibility
If the problem is that the device cannot be reached, there are the following options:
- Most common cause: You are not on the same WiFi as the device. Check whether the computer has accidentally switched to a guest WiFi.
- The card terminal has received a new IP address, the router has been changed
- Then you need to determine the IP address of the device again. This is described in detail in the setup article.
- If necessary, contact your network administrator to verify that the device's IP address is still correct.
Other Tips
The communication test is successful, but the payment process is not being transferred. A symbol of a crossed-out cash register appears on the device.

The communication test is successful, but payment processes are (partially) not being transferred to the device.

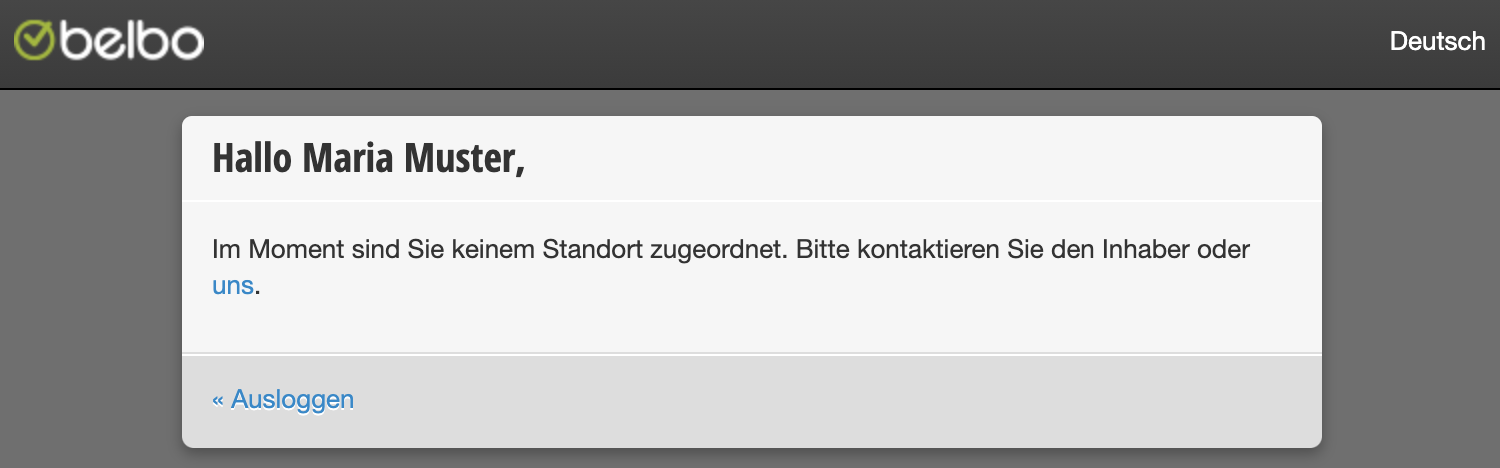
Login is not assigned to any location
If you see the following message in your calendar after logging in, you are using an email address that is not registered as a login address for this account.

Solution 1) Find the correct address
Basically, you can log in with all logins that are registered under Settings > Employees > Permissions.
Contact the owner of the company and ask them for the correct email address that you can use for login.
Solution 2) Add email address
If you wish to have a new address registered for login, you can inform a person who has the necessary permissions to do so. Under Settings > Employees > Permissions, additional email addresses can be added, which can then also be assigned the desired permissions. Learn more about creating employee logins here.
Solution 3) Check login permissions
If the address you are using is already registered and you still cannot log in with it, it may be that no permissions have been assigned to the login. Ask a person who has the necessary permissions to check under Settings > Employees > Permissions and add permissions if necessary.
Problems & Troubleshooting with Socket Mobile Scanner
Questions or problems? Write to us in the help chat!
I cannot connect my device to the scanner. What should I do?
It is possible that your scanner is still connected to another device or that the wrong mode is active. Make sure you disconnect the scanner from all devices in the Bluetooth settings.
Then scan this code, it will reset the scanner to its factory settings.
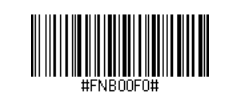
(If scanning does not work, print this page and try again. These barcodes are also in the manual that comes with the scanner.)
Now scan the barcode that activates keyboard mode:
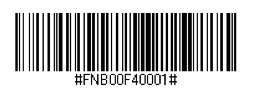
You can now connect the Mobile Socket Scanner CHS 7Ci with a Bluetooth-enabled device, as described in the instructions above.
I want to connect my scanner to an iOS device, what should I do?

Continue to change the distance and angle from which you scan until you hear multiple beeps (this time the scanner will not shut down).
After you have heard approximately 3 beeps, you can go to iPad > Settings > Bluetooth and select your device there.
I want to connect my scanner to a second device, what should I do?
The Mobile Socket Scanner CHS 7Ci can only be connected to one device at a time. To connect it to another device, you must disconnect it from the first device in the Bluetooth settings:
- Turn on the CHS.
- Hold down the trigger.
- Hold down the power button.
- Release both buttons after 3 beeps have sounded.
The CHS will be unpaired and automatically shut down. The next time you turn on the CHS, it can be detected.
Login to online booking not working anymore
If a customer suddenly reports that they can no longer log in, this can have many reasons. Please check the following options together with the customer:
- The customer has changed their password and is wondering why the old saved password no longer works.
Help: Open your own online booking page and click on "Forgot Password". Then enter the customer's email address. The customer will receive an email with a link to reset their password. - The customer used a wrong email address. For example, the customer registers with "peter.lustig@googlemail.com" and tries to log in a month later with "peter.lustig@gmail.com". This will result in an error and the customer must use the original email address.
- The login hangs without an error message: This is always a device problem. The customer has most likely set the browser to Private mode. This technically prevents the customer from logging in. Private mode or also Incognito mode is the most common reason for a sudden login problem.
- The customer is locked. If the customer receives a message in online booking that online booking is currently not possible, they may have been locked. Check in Belbo in the customer's file to see if this is the case. If it was a mistake, you can unlock them again within the customer file.