
belbo
  • Overview
    • Getting to know Belbo
    • Location Settings
    • Switch to Belbo
    • Calendar View & Navigation
    • Recurring Appointments & Courses
    • Appointment Entry & Management
    • Tasks
    • Overview
    • Multiple Locations & Head Office
    • Manage Employees
    • Logins
    • Rights
    • Overview
    • Absences & Holidays
    • Working Hours
    • Time Tracking
    • Overview
    • Data Protection (GDPR)
    • Customer Communication (Email, SMS)
    • Customer Management & Records
    • Overview
    • Bonus & Loyalty Programs
    • Campaigns (Newsletter & SMS)
    • Marketing Consents (GDPR)
    • Tracking & Analytics
    • Overview
    • Services & Prices
    • Service Packages & Subscriptions
    • Vouchers
    • Products
    • Purchasing & Suppliers
    • Inventory & Stock Counts
    • Scanning & Sales
    • Goods used & Costs
    • Overview
    • Design & Texts
    • Setup & Settings
    • Integration (Website, Google, Instagram, Facebook)
    • Online payment
    • Overview
    • Accounting & Exports
    • Cash Register Settings & Hardware
    • Checkout process
    • Daily Closing & Reports
    • TSE & Cash Register Anti-Tampering Ordinance
    • Overview
    • Export Overview
    • Employee Utilization
    • Revenue & Reports
    • Belbo Satellite
    • Printer
    • EC Terminal & Card Payment
    • Troubleshooting Hardware
    • Scanner & POS Devices
    • General Settings
    • API & Integrations
    • Notifications & Emails
    • Contracts & Legal
Skip to content
Hardware & Technology›EC Terminal & Card Payment

Card payments with SumUp

Feature: Cash Register › SumUp › Settings

Please note that currently only SumUp Solo can be connected.
SumUp Light does not have the required interface.

You can easily and quickly connect your SumUp Solo device to Belbo in 3 steps.

1. Prepare Device

If you have already used the device, make sure you are not logged into your SumUp account. The device should NOT show the amount entry, only the SumUp logo and an arrow at the top of the screen pointing downwards. Check the screen to see if amount entry is possible.
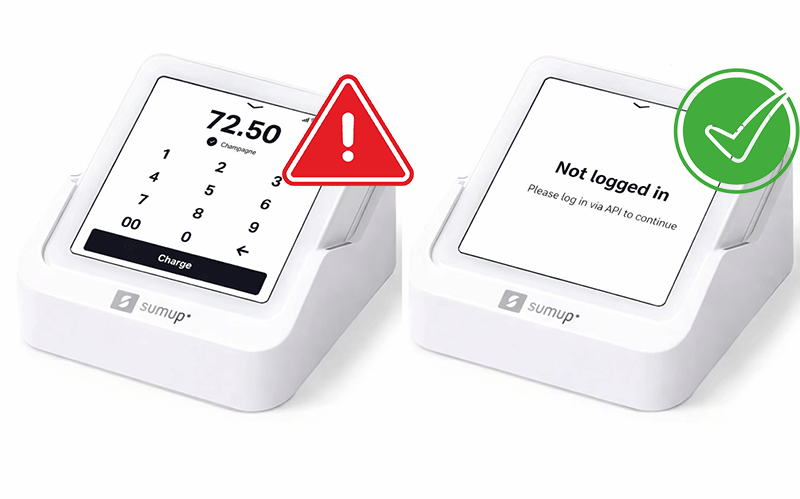
Important! If you are already logged into your SumUp account on your device, you must log out first:
Settings -> Info -> Logout. Here is a video on how to log out if you were already logged in: Logout on SumUp Device

2. Connect SumUp with Belbo

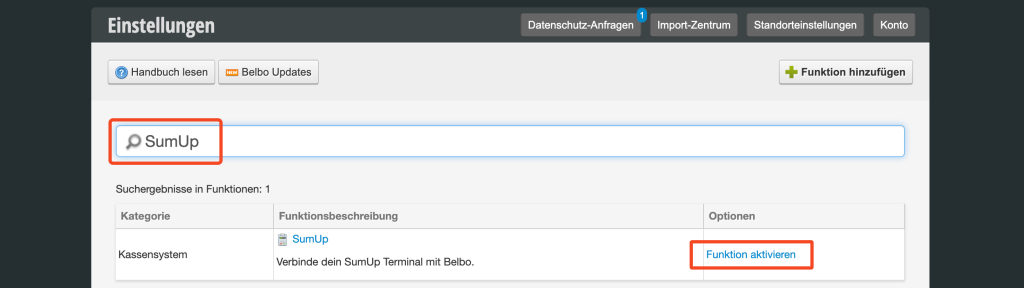
Activate the SumUp function in Belbo under Settings:
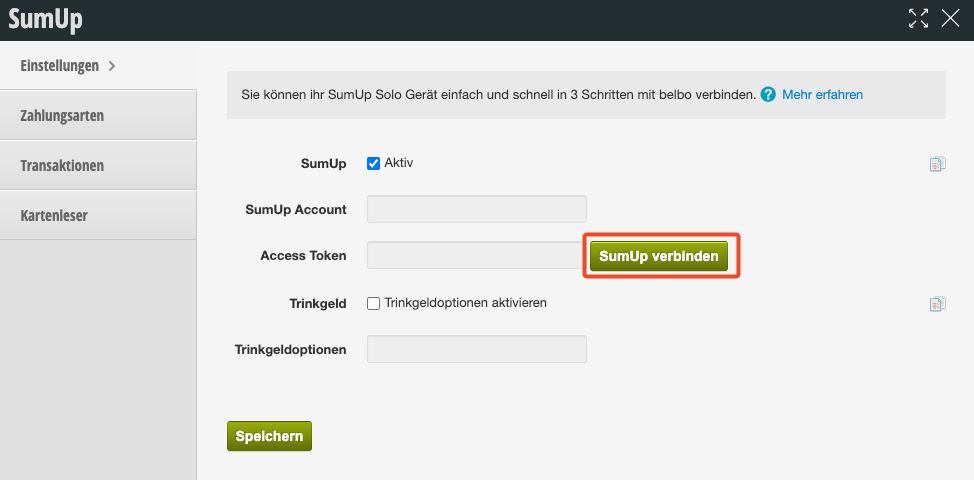
Click on "Connect SumUp". In the next step, you will need to log in with your SumUp account and authorize the Belbo integration.
3. Connect Device
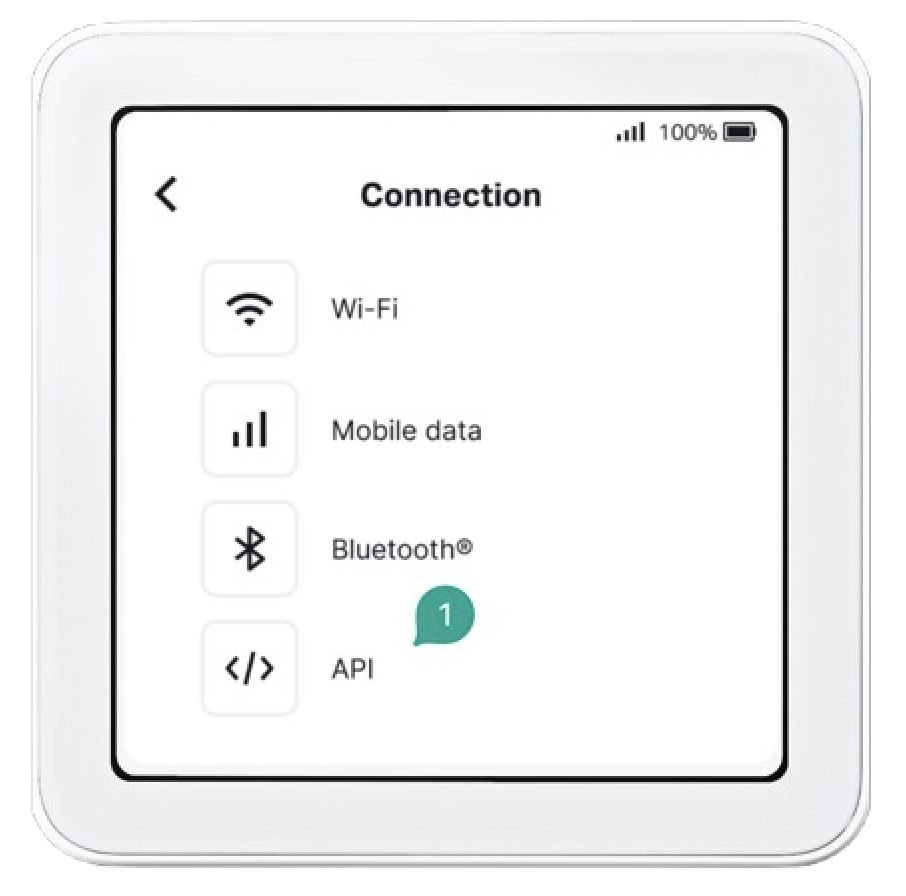
Once you have linked your SumUp account to Belbo, you can activate your device. To do this, switch to the "Card Readers" tab in Belbo. Click on "+Card Reader". Belbo now needs the pairing code of the device.

You can obtain this as follows: Click the down arrow on the device, then click Connections > API. Enter the generated activation code in the open Belbo window. Add a name for the device and press "save".

The SumUp device will now connect. Once this is done, you can close the window in Belbo.

Note: Currently only one Solo device can be used per location. If you operate multiple locations, one Solo device can be assigned per location.

4. Link Payment Method

We generally recommend adding a new payment method named "SumUp" beforehand if necessary.
Switch to the Payment Methods tab and link a payment method with SumUp.
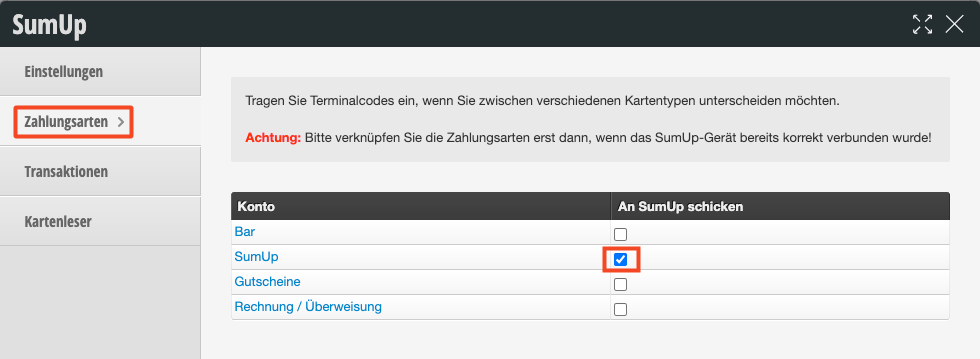
Done! Payment will be automatically sent from all devices (iPhone, iPad, computer, laptop, etc).

Categories: EC Terminal & Card Payment

Have a question? Ask it here.

This manual is a service by belbo. Legal notice