
In the appointment display, you will find numerous setting options to customize the display of your appointments to your needs.
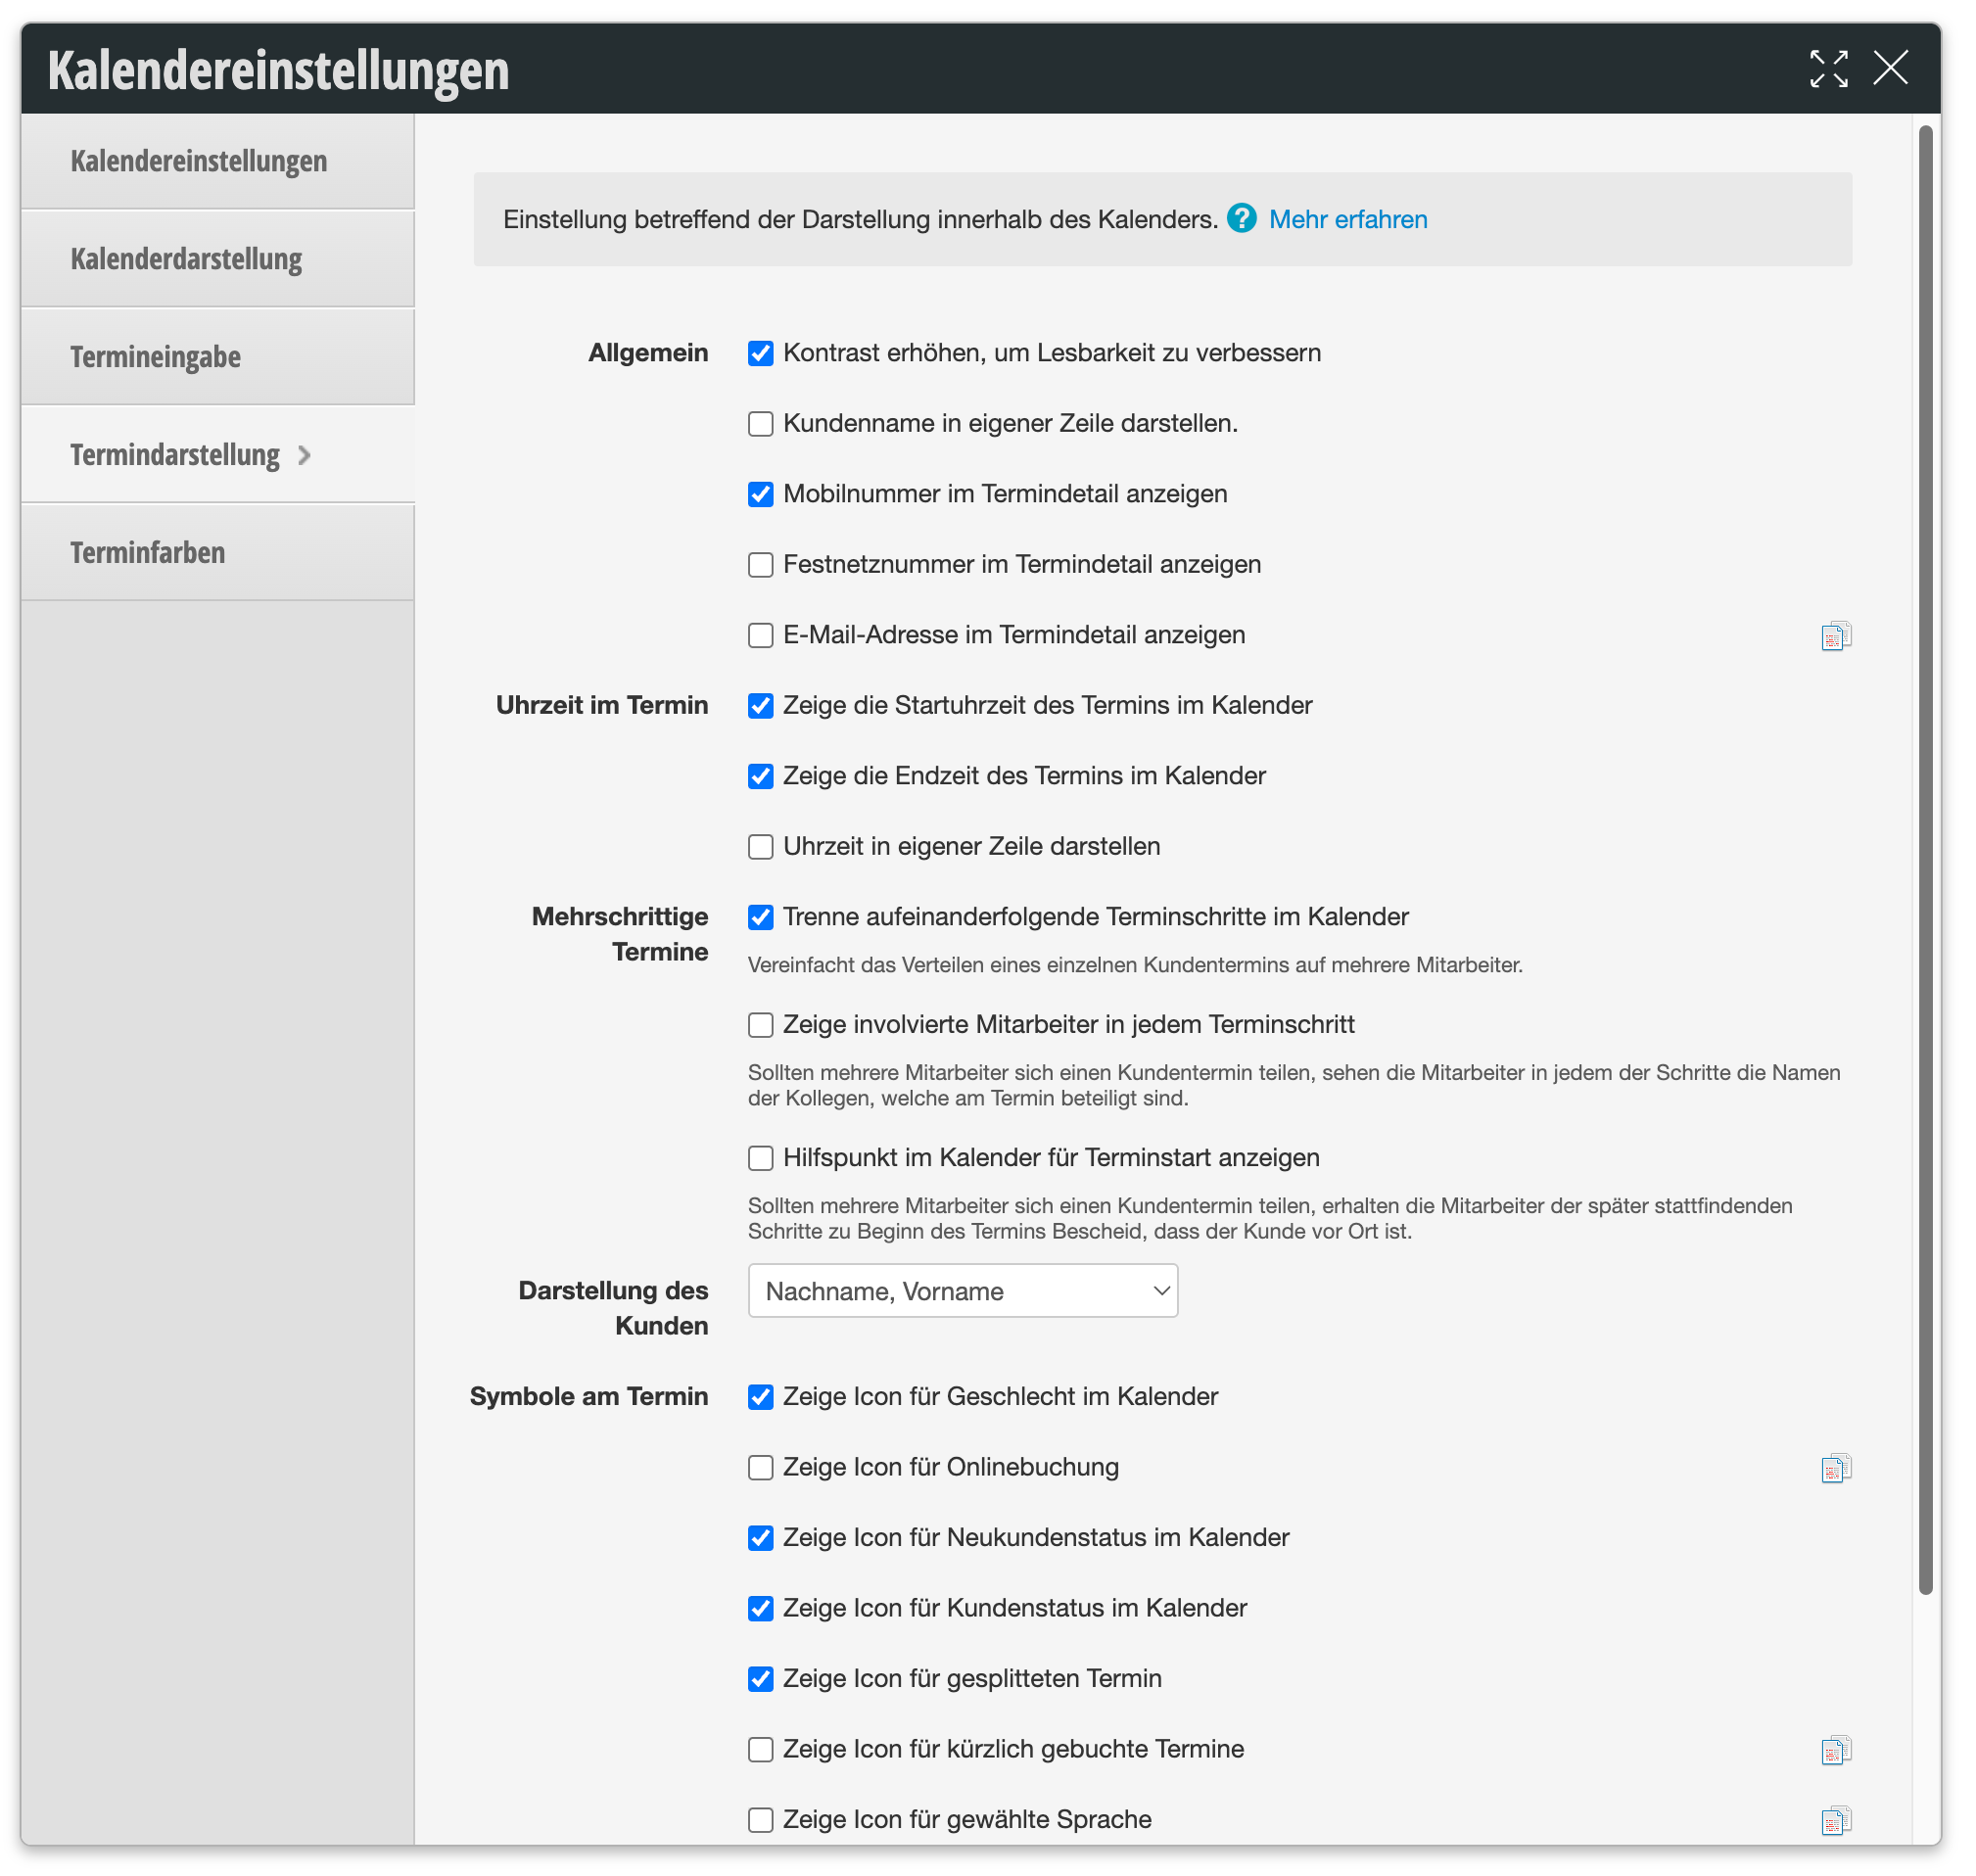
The following table provides an overview of all available setting options:
| Setting | Description |
|---|---|
| General | Increase contrast to improve readability Stronger contrast of your appointments in the calendar. |
| Display customer name on its own line You can give the customer name its own line below the time. This is clearer but takes up more space. | |
| Show mobile number in appointment details Show or hide the customer's mobile number in the appointment details. | |
| Show landline number in appointment details Show or hide the customer's landline number in the appointment details. | |
| Show email address in appointment details Show or hide the customer's email address in the appointment details. | |
| Time in appointment | Show the start time of the appointment in the calendar Displays the start time directly in the appointment. |
| Show the end time of the appointment in the calendar Additionally displays the end time of the appointment in the calendar. | |
| Display time on its own line Displays the time on its own line instead of integrating it into the first line of the appointment. This is clearer but takes up more space. | |
| Multi-step appointments | Separate consecutive appointment steps in the calendar When you create multi-step appointments, these steps can be displayed individually. If this option is disabled, even multi-step appointments appear as a single block. Simplifies distributing a single customer appointment across multiple employees. Example of separated (l) and connected (r) appointment steps: 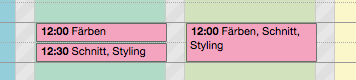 |
| Show involved employees in each appointment step If appointments in your business are often split between different employees, you can display in each step which colleagues are still involved in the appointment. | |
| Show helper point in calendar for appointment start The helper point appears in your column as soon as a customer is being served with whom you will work later. This way you can greet the customer and clarify that a later service will be provided by you. Helper point with multi-step appointment with different employees: 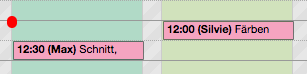 | |
| Customer display | Determine which parts of the name you want to display in the appointment and how they are arranged (e.g., "Last name, First name"). |
| Icons on appointment | Show gender icon in calendar Displays a small symbol for the customer's gender directly on the appointment so you can learn more about the customer at a glance. Example of an appointment with gender and customer status icons: 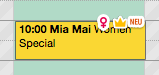 |
| Show icon for online booking Marks appointments that the customer booked themselves online with a special symbol. | |
| Show icon for new customer status in calendar Displays a symbol if this is a new customer. | |
| Show icon for customer status in calendar Displays the customer status (e.g., regular customer) as a symbol on the appointment. | |
| Show icon for split appointment Marks appointments that have been split across multiple employees with a special symbol. | |
| Show icon for recently booked appointments Highlights appointments that were recently booked so you can quickly recognize new bookings. | |
| Show icon for selected language Indicates in which language the customer booked online or communicated. | |
| Text | If you insert line breaks in the appointment free text field, you can set these to be displayed in the appointment as well. This is clearer but takes up more space. |
| Break color | Breaks always have the color set here. |
| Appointment color | Appointments always have the color set here. |