
If you work with contracts, you can store them in the calendar and assign them to your customers.
Activate Contracts
After you have activated the customer contract function, you can make basic settings:
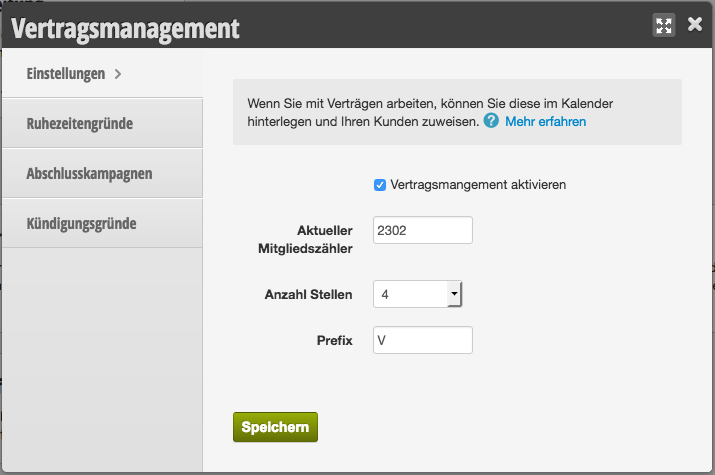
Settings
Here you can make the following basic settings:
- Member counter
- Number of digits for the contract number
- Prefix of the contract templates
Break Periods
In order to be able to store break periods for contracts for individual customers, they must first be created as a template. For each break period reason, you can specify whether it is contribution-free.
Closing Campaign
Store the promotional activities you carry out here. When entering a contract, you can then select these to keep statistics on where a contract came from.
Termination Reasons
Store reasons for termination here. You can allow termination to be applied extraordinarily.
Create Contracts
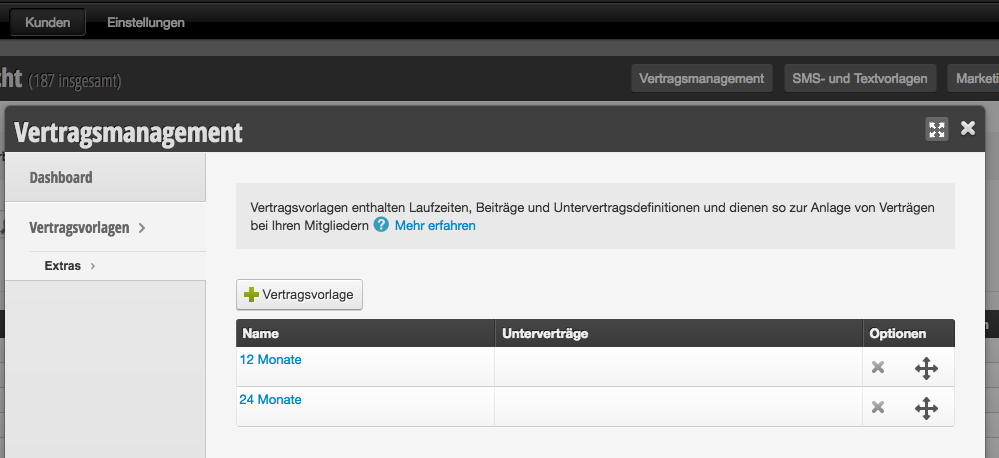
After the function has been activated, you will find the contract management in the customer overview. Click + New Contract Template to create a new contract and fill in the contract data.
Contract Name
Enter the name of the contract type you would like to add here. This will be shown to you and your staff when you want to assign a contract to a customer.
Automatic Customer Status
You can specify that customers to whom this contract is assigned automatically receive a certain customer status. With the help of the customer status, you can, for example, control how many appointments a customer is allowed to book per week or which booking process is offered to them in online booking.
Contract Duration, Termination Notice, Renewal
Specify how long the contract is valid. Select the type of time period (days, weeks, etc.) and enter the value of the duration.
Contribution Frequency and Payment Frequency
Specify how the contract is paid. If you use the Belbo cash register system, you can select how payments are recorded from an accounting perspective.
Assign Contracts
In each customer file you have the option under Contracts to select your contract templates.
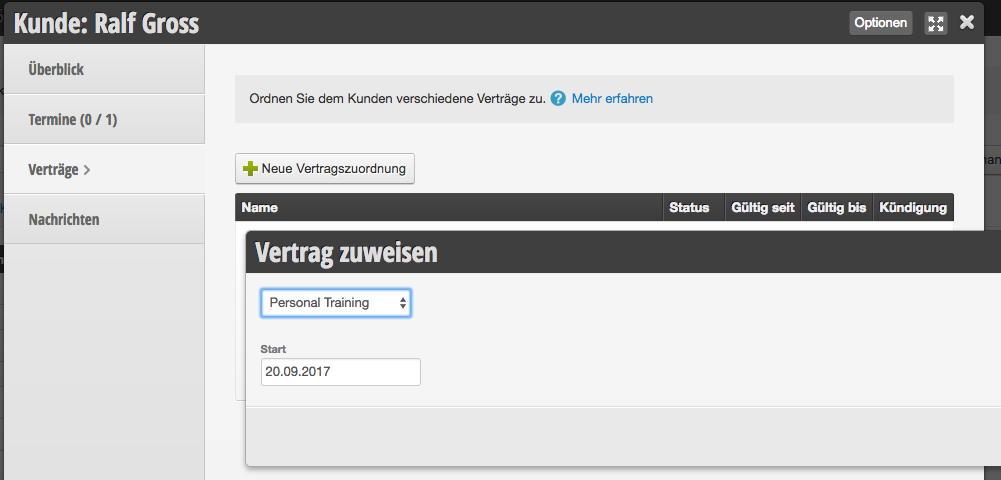
Modify or Edit Contracts
In each customer file you will find the contracts assigned to the customer. If you click on a contract, you have the following setting options:
Overview
Here you can view and supplement the assigned contract.
- Contract name, amounts, payment frequency: View the basic data of the assigned contract here
- Closing reason: You can enter the marketing campaign that led to the customer's conclusion of the contract
- Extras: Specify if the customer has received extras
Durations
Here you can see when the contract started and how long the contract duration, termination notice and renewal are. Note: Only enter a contract end date if the contract does not renew automatically, as automatic renewal will not take effect otherwise. The date is automatically filled in when you record a termination in the next section.
Termination
- Termination date: In the event of a termination by the customer, enter the date on which the contract was terminated.
- Termination reason: The termination reasons stored in Settings > Contracts can be selected here. If you wish, a comment on the termination can be added.
- Comment: If you wish, a comment on the termination can be added.
The date of recording a termination is automatically captured.
Contribution Overview
Here you can see the payment status and the contribution amount of individual billing periods. Please note that the payment frequency must be set first!
Document
Upload documents relevant to this contract here.