With two-factor authentication (2FA), you protect individual logins with a time-limited security code in addition to the password. This makes unauthorized access to sensitive data such as customer data, sales and reports significantly more difficult, even if a password falls into the wrong hands.
You can access this area via Settings > Employees > Click on desired employee > Login
Prerequisites
You need a smartphone with an authenticator app, for example:
Google Authenticator
Microsoft Authenticator
Authy
These apps generate a new security code every 30 seconds and work even without an internet connection.
Enable 2FA for a login
Open the file of the desired team member under Settings > Employees.
Open the Login section in the profile.
Enable two-factor authentication there.
Scan the displayed QR code with the authenticator app on the smartphone.
The app is then ready to use immediately and continuously displays new security codes.
From now on, when logging in with this login, the current code from the authenticator app will be requested in addition to the password.
For which logins can 2FA be enabled?
2FA is activated individually per login, not globally for the entire calendar. This allows you to specifically secure logins with extensive rights – for example, those of admins or owners – with additional protection. A shared team login can also be secured with 2FA, but each person using the login will then need access to the same device with the authenticator app.
Das Recht Umsatzzuordnung nachträglich ändern ermöglicht es, in einem bereits abgeschlossenen Kassiervorgang im Nachhinein das Teammitglied zu ändern, das den Umsatz einer Leistung erbracht hat.
If you want to allow your employees to log in to your Belbo calendar on their personal mobile phone, for example, they can receive their own logins. This type of login can be restricted in many ways. In everyday work, the Team Login continues to be used on the company computer.
Use case example:
Your employees can see their own calendar column, their overtime or sales on their own mobile phone, but not those of other team members. They also cannot log in to time tracking from on the go.
Especially for logins that are used on private mobile phones, it is recommended to additionally activate two-factor authentication (2FA). This keeps the login protected even if the password falls into the wrong hands.
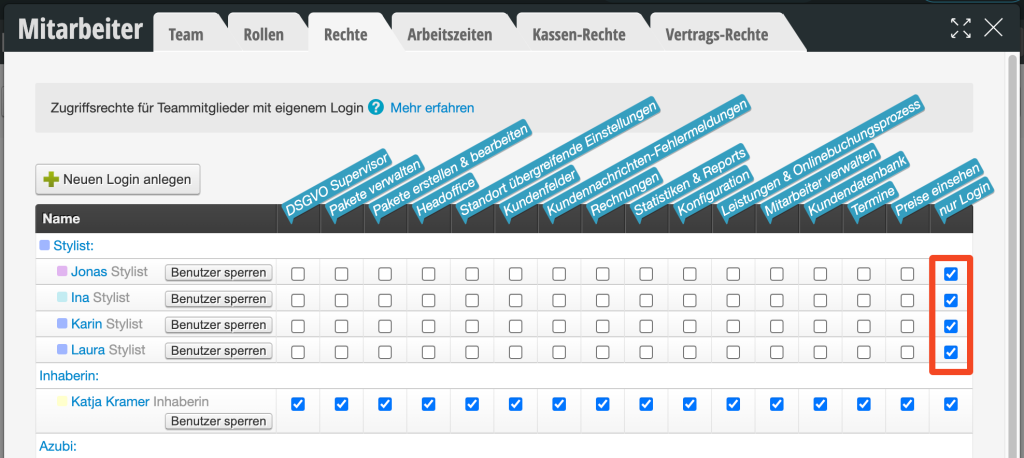
Permissions in the Permissions Overview
We recommend giving private logins only the "login only" right. Management or admins are of course exempt from this. Logins with only this right can view and create appointments, but cannot log in to time tracking or see the cash register function.
If you as an admin do not have this right yourself to grant it, please contact us via the help chat or info@belbo.com.
Permissions in the Employee Profile
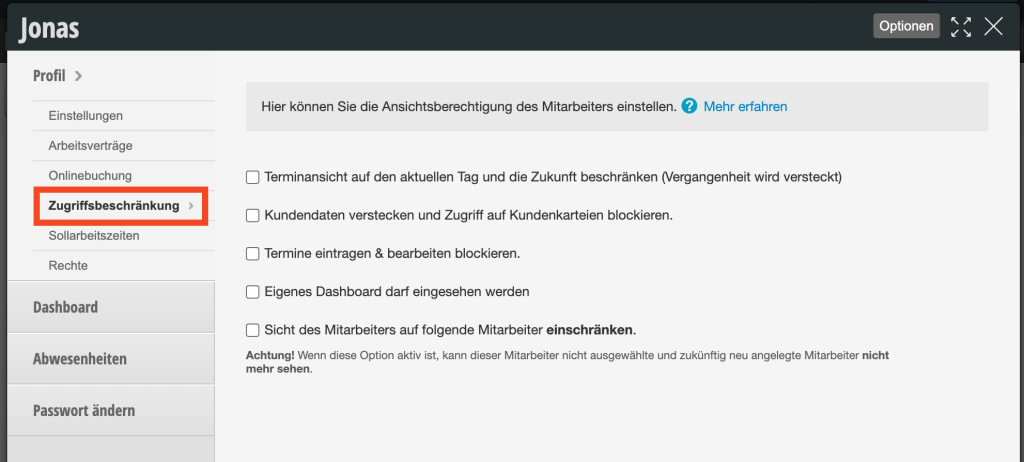
In addition to rights, further restrictions or permissions can be stored in the person's profile under "Access Restrictions", after the login has been created.
Restrict Appointment View
If you want a login to not be able to browse in the past, but only see today and the future, activate this restriction in the team member's profile.
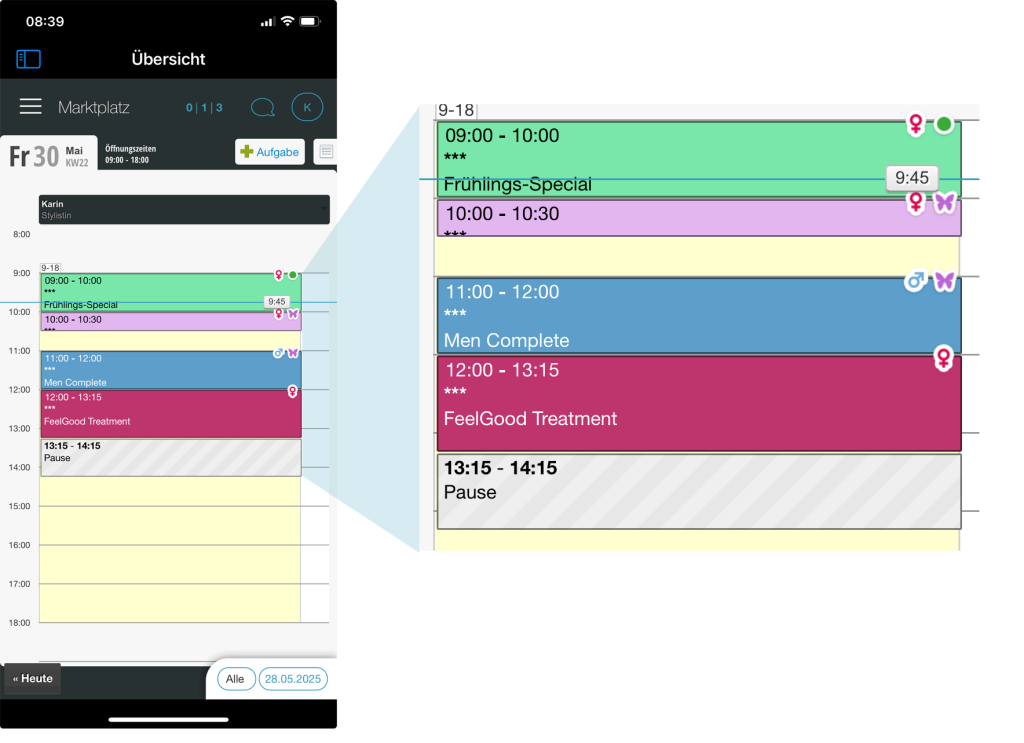
Hide Customer Data
If you do not want a login to have access to customer data, but only to see upcoming appointments, you can activate "Hide customer data and block access to customer files". This way, customer data cannot be viewed and appointments cannot be opened or entered. Example view in the iOS app for a login with this restriction:
Block Entering & Editing Appointments
If customer names are allowed to be seen but appointments should not be edited or created, you can activate this right.
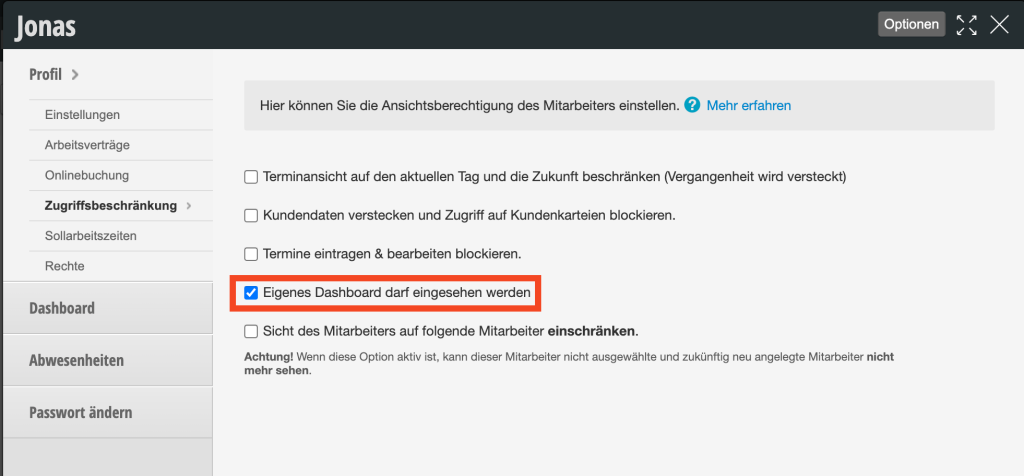
Enable Access to Own Dashboard
An employee's dashboard displays numerous data such as sales, time tracking including overtime or minus hours, reports and more. If employees should have access to parts of this data, you can activate the "Own dashboard may be viewed" option.
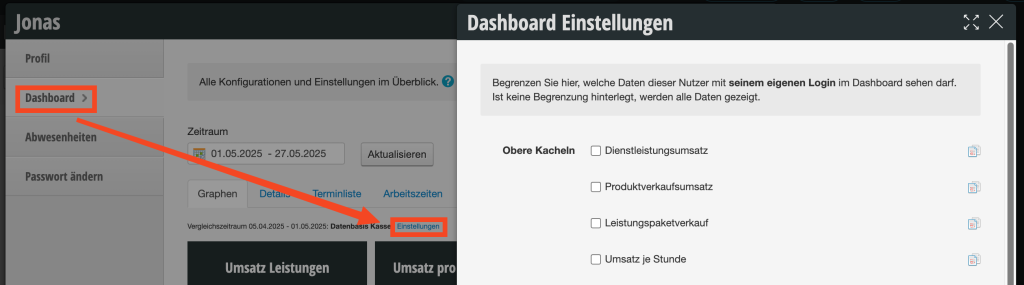
You can then define in this person's dashboard which data they are allowed to see there. This is done directly in the dashboard by clicking on "Settings":
Select the tiles and tabs that this login should have access to. If no restriction is set, all data will be displayed.
Restrict Employee View to Specific Employees
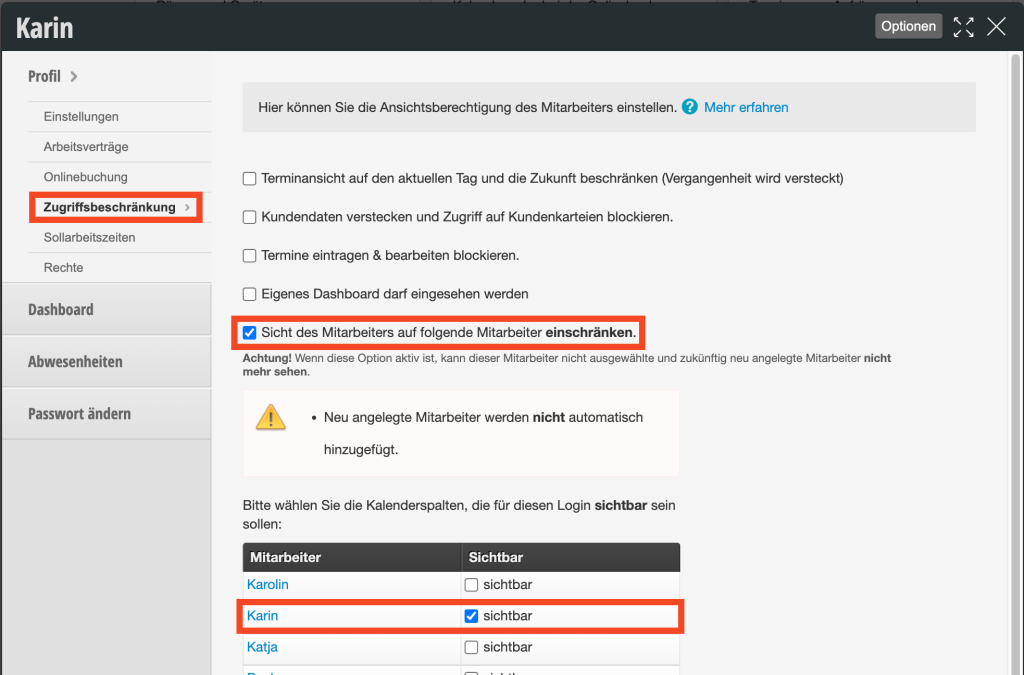
If you want a login to only see certain calendar columns (usually their own), you can activate this option. Important: Then select the allowed calendar column(s):
You can set up employee logins so that they can only log in from a device of your choice.
Use case example:
Your employees know the login credentials (email address and password) to your Belbo calendar, so they can log in in the morning and see appointments. However, you want to prevent employees from logging in with this data over the weekend or from their private mobile phone.
You can access this area via Settings > Login Access Restrictions
If this function is not activated, it can be activated via "Settings > Add Function".
Set up access restrictions
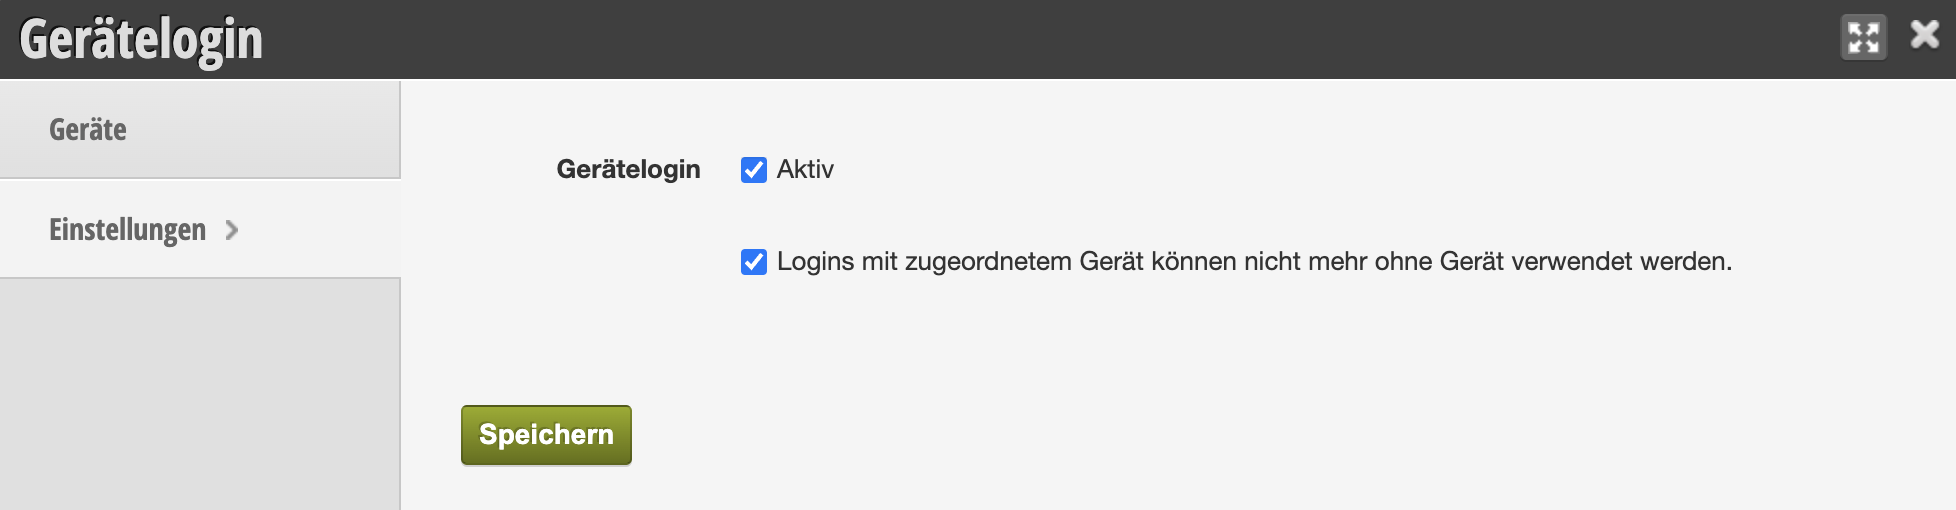
After you have activated the function, you can enable the option "Logins with assigned device can no longer be used without device" in the Settings tab. Only then will logins from other devices be prevented.
If you uncheck the box, all logins from all devices will have access again, even if restrictions have already been set up under "Devices".
Restrict individual logins
To prevent individual logins from accessing other devices, proceed as follows:
Log in with your admin access from the device that should be allowed for a specific login. For example, the computer in your company that is used by your employees.
Use the browser (Google Chrome, Microsoft Edge) that your team uses in everyday work.
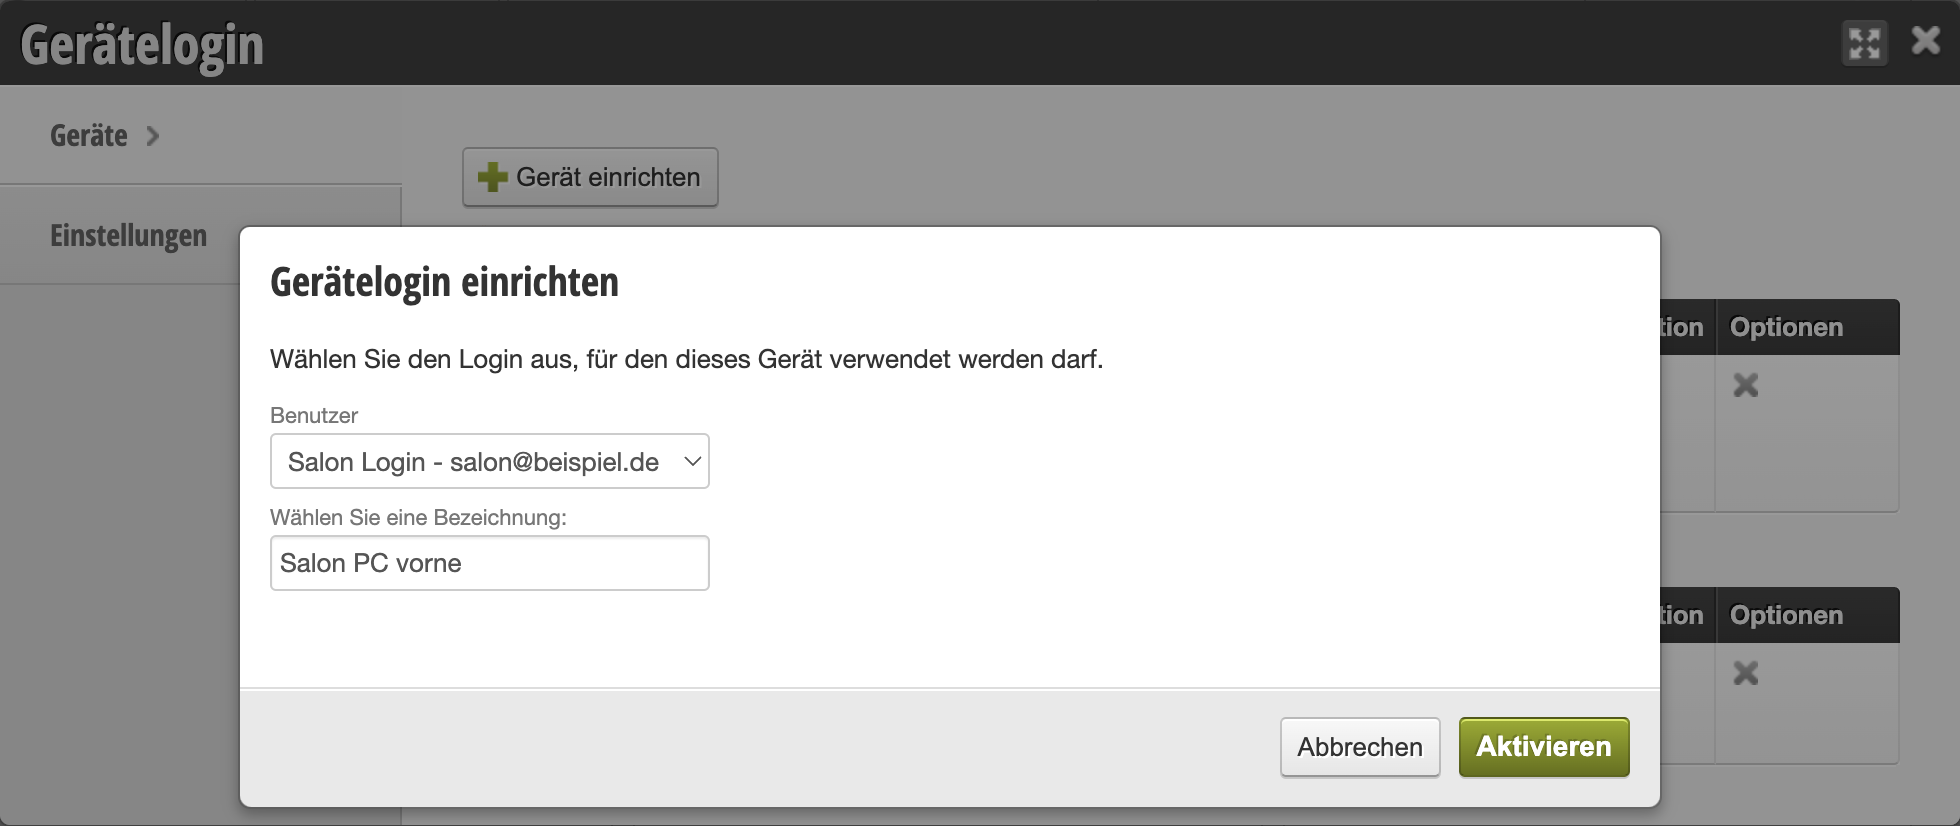
Open the "Login Access Restrictions" function and click "+ Set up Device" under "Devices".
Select the login that should be restricted.
Assign a clear name for the computer you are currently using.
Save your entry.
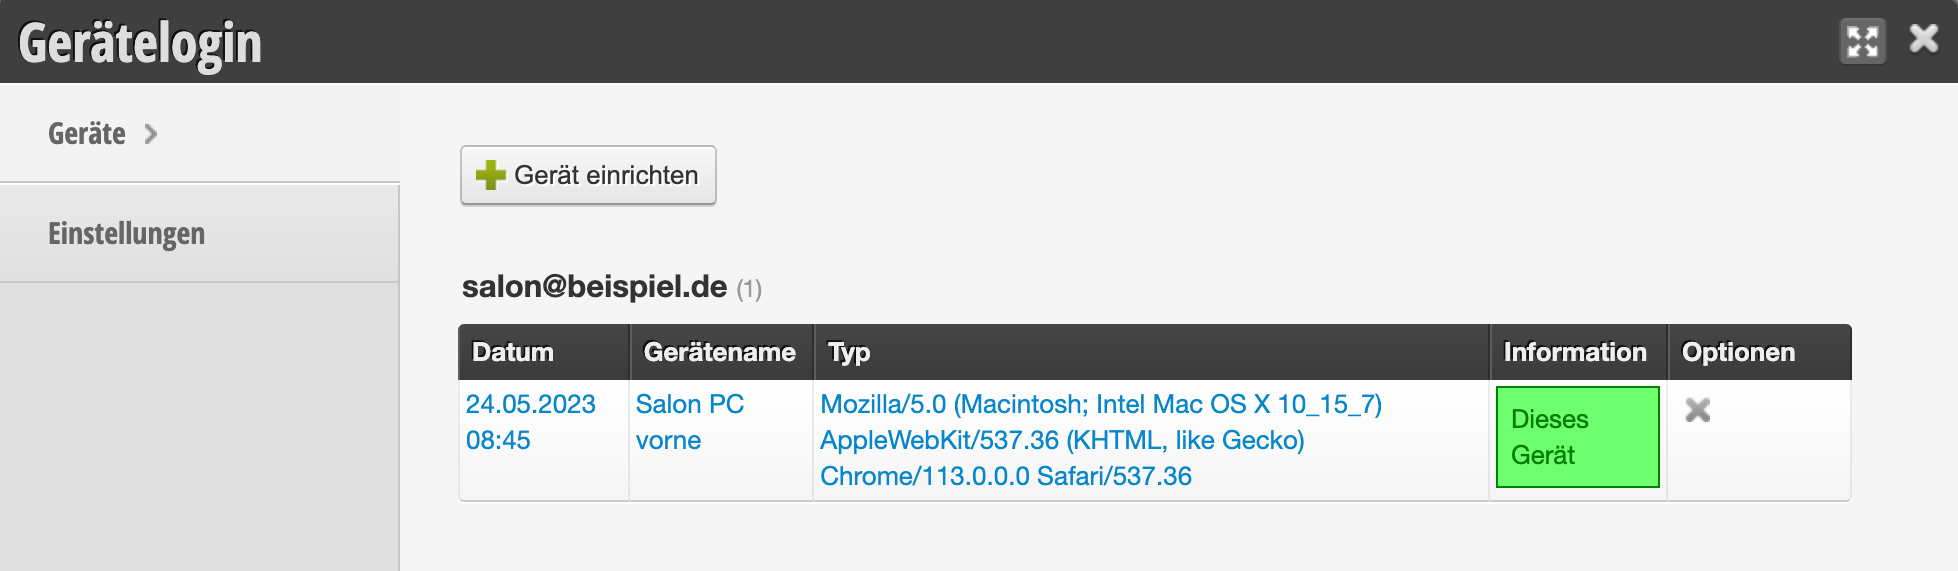
You will then see the list of restricted logins and the associated devices.
To assign additional devices to the same login, repeat this from the desired additional device. Users who subsequently log in from one of the assigned devices will see that it is a recognized device.
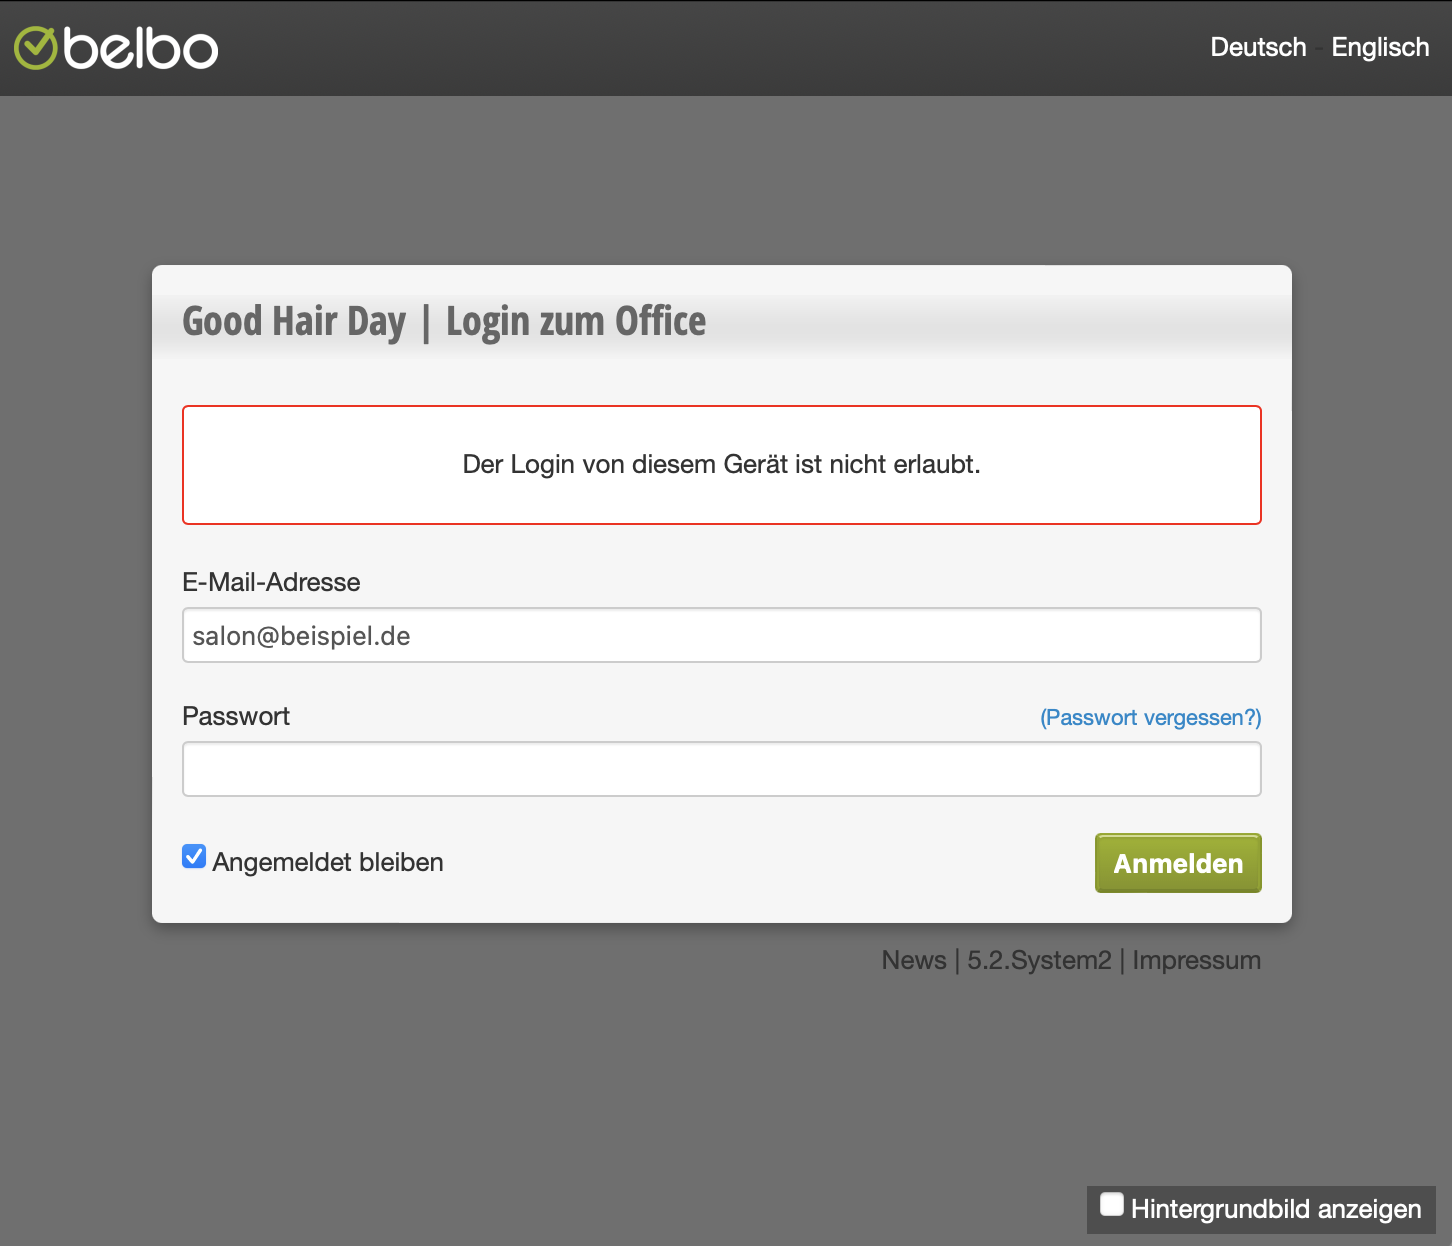
Users who log in with the restricted login from another device will see an error message and will not have access to the calendar. Note: This also applies to other browsers on the same device!
Recommendations
We recommend using this function for the Team Login, as well as for additional logins that you have assigned to your team members. This is useful, for example, if you want to prevent employees from checking in on their way to work.
Additionally: Two-Factor Authentication
Login access restrictions limit which device a login can log in from. If you additionally want to prevent a compromised password from being sufficient for login, you can additionally secure the affected login with two-factor authentication (2FA).
You can access this area via Settings > Employees > Cash Register Rights
This right refers to the cash register system.
Logins with this right are forwarded directly to the tax advisor access upon login.
Attention: This right should not be granted or revoked manually, but is essentially set by the "Tax Office" function.
It is displayed here for information purposes only to know what permissions a login has. In individual cases, it may make sense to grant the tax advisor access additional calendar rights so that it also has access to the normal calendar or cash register.
Example of use:
Recommended for logins for the tax office.
For an overview of the meaning and assignment of rights please see here.
You can access this area via Settings > Employees > Cash Register Rights
This right refers to the cash register system.
Logins with this right can create entries that appear in the DATEV export but should not affect the cash book. With manual entries, you can create opening entries to set, for example, the initial cash register balance.
This functionality is not recommended for daily use and should remain disabled.
Application example:
Recommended for logins with cash register responsibility.
For an overview of the meaning and assignment of rights, please see here.
You can access this area via Settings > Employees > Cash Register Rights
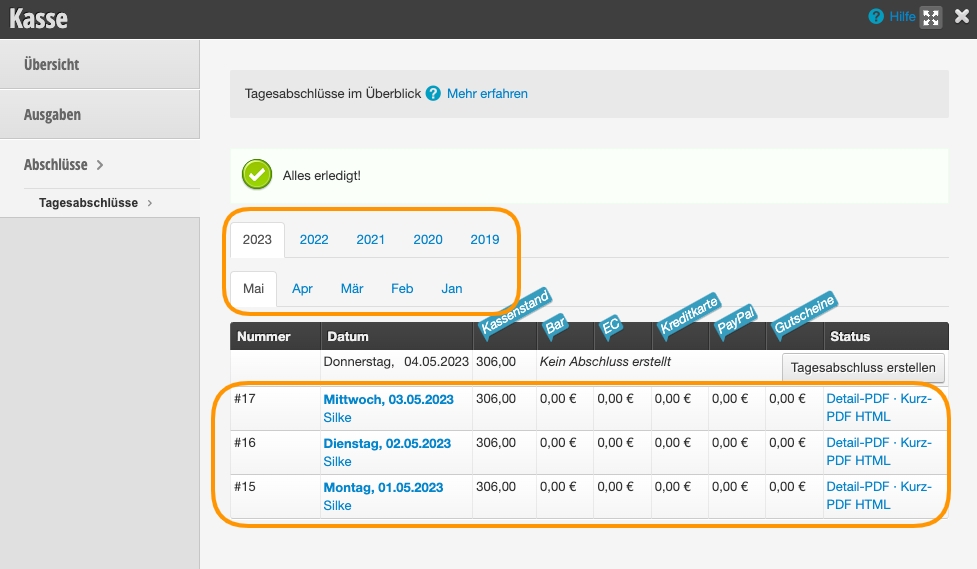
With this right, a daily closing can be deleted and recreated retroactively. Attention for users in Germany: Any retroactive change constitutes a violation of GoBD. Users without this right will receive an error message when attempting to delete.
There are individual cases where it might make sense to reopen the previous day:
For example, if EC transactions are missing. However, all changes are logged and can be traced. This is particularly relevant for users in Germany.
A saved daily closing contains fundamentally incorrect information that must be corrected. In this case, it may make sense to recreate a past daily closing. All retroactive transactions receive an additional invoice number, which - if the day is far in the past - can create confusion. We recommend only deleting a daily closing if it is no more than 1 week old and does not cross the monthly boundary.
Please note that when making changes to the daily closing that affect the cash balance, all subsequent cash closings must also be recreated. You can learn more about this here. Therefore, it is advisable not to make retroactive changes to transactions that affect the cash balance. If you proceed carefully when counting the cash daily and use the counting protocol, this usually cannot happen in the first place.
If the daily closing is very far in the past or crosses the monthly boundary, we strongly recommend sending the changes directly to your tax advisor so they can correct the accounting.
EC/Cash mix-ups (Note: Enable the counting protocol requirement to prevent this in the future.)
Forgotten to collect payment for an appointment (Note: only collect retroactively in a real emergency, otherwise book to today's date and inform the tax office about the payment receipt.)
Important: The changes are logged and can be traced in all exports for the tax authorities. Only owners and senior team members should have this right.
You can find an overview of the meaning and assignment of rights here.