
belbo
  • Overview
    • Getting to know Belbo
    • Location Settings
    • Switch to Belbo
    • Calendar View & Navigation
    • Recurring Appointments & Courses
    • Appointment Entry & Management
    • Tasks
    • Overview
    • Multiple Locations & Head Office
    • Manage Employees
    • Logins
    • Rights
    • Overview
    • Absences & Holidays
    • Working Hours
    • Time Tracking
    • Overview
    • Data Protection (GDPR)
    • Customer Communication (Email, SMS)
    • Customer Management & Records
    • Overview
    • Bonus & Loyalty Programs
    • Campaigns (Newsletter & SMS)
    • Marketing Consents (GDPR)
    • Tracking & Analytics
    • Overview
    • Services & Prices
    • Service Packages & Subscriptions
    • Vouchers
    • Products
    • Purchasing & Suppliers
    • Inventory & Stock Counts
    • Scanning & Sales
    • Cost of Goods & Expenses
    • Overview
    • Design & Texts
    • Setup & Settings
    • Integration (Website, Google, Instagram, Facebook)
    • Online payment
    • Overview
    • Accounting & Exports
    • Cash Register Settings & Hardware
    • Checkout process
    • Daily Closing & Reports
    • TSE & Cash Register Anti-Tampering Ordinance
    • Overview
    • Export Overview
    • Employee Utilization
    • Revenue & Reports
    • Belbo Satellite
    • Printer
    • EC Terminal & Card Payment
    • Troubleshooting Hardware
    • Scanner & POS Devices
    • General Settings
    • API & Integrations
    • Notifications & Emails
    • Contracts & Legal
Skip to content
Staff›Manage Employees

Employee File

Feature: General › Employees › RightsFeature: General › Employees › Team

In the employee file, you can view and modify all essential data of a team member.
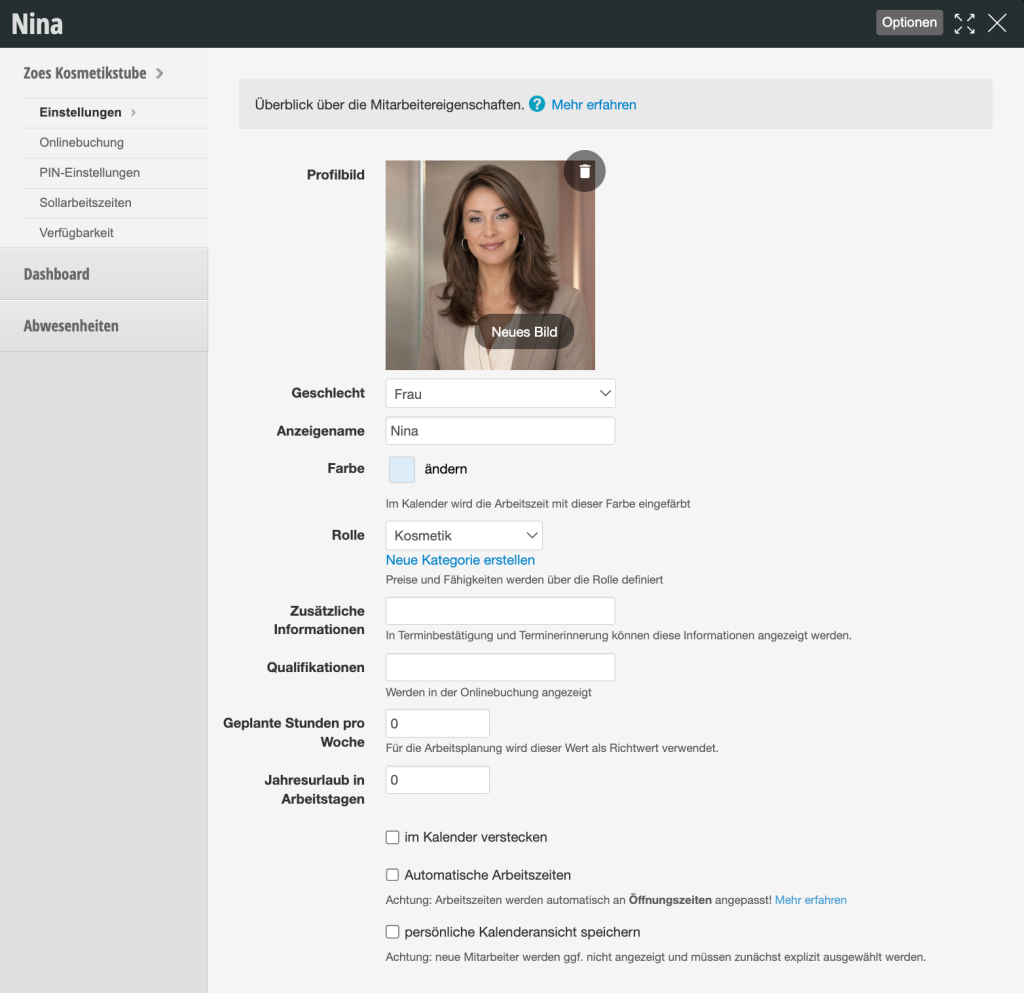
Employee file settings with profile picture, name Nina, gender, role cosmetics and additional fields for qualifications and working hours

Basic Settings

Settings
In the settings, you can set the image, name and gender. Additionally, there are other settings:

  • Calendar color: Set the color that the working hours of this team member will have in the calendar
  • Role: Assign an appropriate role to enable the team member to be assigned to calendar groups or competencies
  • Additional information: Information about this team member that can be displayed to the customer in reminder and confirmation emails
  • Scheduled hours and annual leave: Note the contractually agreed times here so you can check them at any time.
  • Hide in calendar: Hides the team members from the calendar without deleting the profile
  • Save personal calendar view: Shows a defined view that may differ from the basic settings. A detailed description can be found here.

Online Booking
Specify here whether the team member can be booked online by customers. Note that they will remain bookable even if "Online bookable" is disabled, as long as the "Any employee" function is still active. A detailed description of this topic can be found here.

Access Restriction
If you want the team member to only see the current day and the future and not be able to edit past appointments, select "Restrict appointment view to current day and future".
If the team member may only see selected colleagues, restrict the team member's view. Note: When you add new team members, they may need to be activated here so that this team member can see them.

PIN Settings
Set the PIN of the team member and the associated rights here. With the PIN, they can identify themselves in the future. More information about the PIN can be found here.

Absences
If you have entered absences for this team member in the schedule, you can view them here.

Dashboard
In the dashboard you will find information about total revenue, revenue per working hour and working time. You can also view revenue details and appointments for this team member. This data can be filtered by date, allowing you to view any time period.

Delete Team Member
In the top right of the file, you will find the "Options" button where you can delete the team member. In the following steps, you can decide whether you really want to delete the team member's data or just deactivate the person. You can find more information in the article Delete team member.

Team members can only be deleted if all future appointments have been completely removed from the team member's column.

Create Login

If your team member should have their own login to log into the calendar from home or mobile, for example, set it up under Options » Create Login. Please remember to check the rights for this access under Settings > Employees > Rights after creating the login. More information about creating a new login can be found here.
After you have created a separate login, you can change the team member's password at this location.
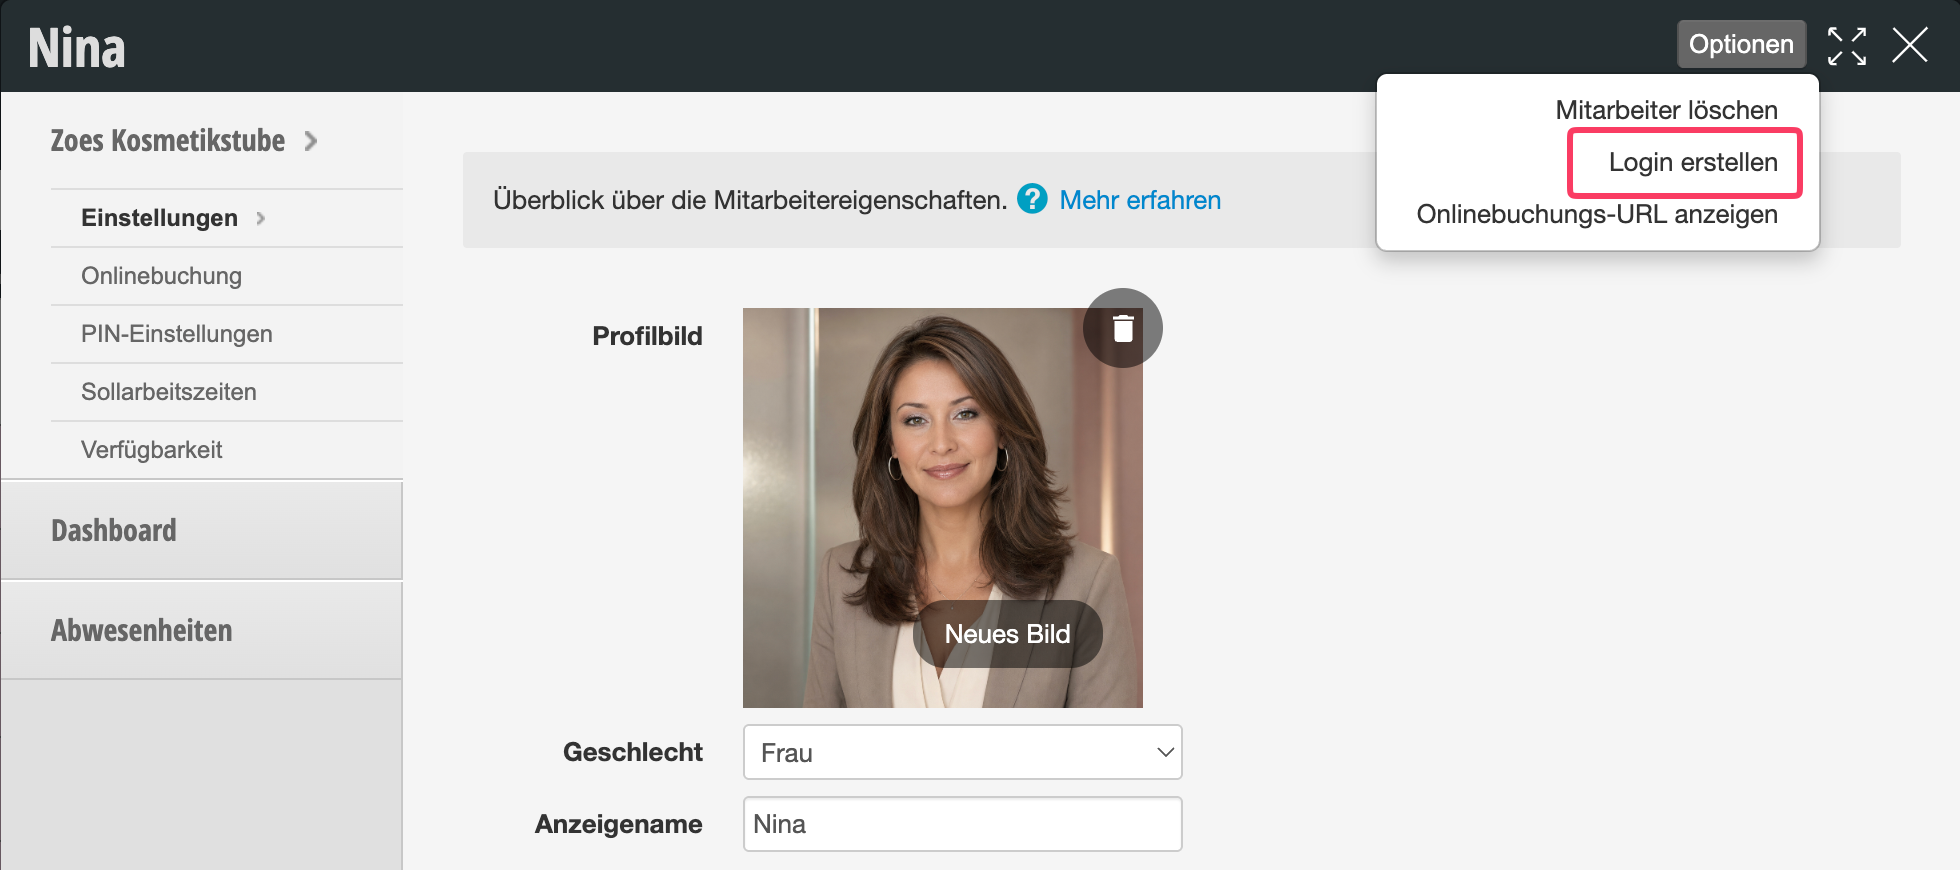
Employee file of Nina with profile picture, gender field and display name. A dialog to delete the employee with 'Create Login' option in the top right.

Name and Display Name

Once you have assigned your team member their own login, you can distinguish between name and display name. The name should be filled with real data and is invisible to customers (e.g. "Silke Schmidt"). The display name is used in the calendar and online booking and can also be a nickname by which colleagues and customers know the team member (e.g. just "Silke").

Data Protection

Important: Your team members have a right to data protection. Therefore, ensure that you use your team members' data in accordance with regulations. This includes, for example, the use of photos and names on your website or in online booking, which may only be done with the explicit consent of the affected team member. It is best to have a consent form signed for this.

    • Images: The photo is shown to colleagues in the calendar and to customers in online booking and serves as a guide. If your team member does not agree to publication, you can replace it with an avatar, for example, a cartoon image similar to the team member that you can create for free online.
    • Name: In the Belbo profile, a distinction is made between name and display name. Even if you assign the correct name in the file, you can choose a different display name to show to customers and colleagues when booking. This can be, for example, the first name or a nickname to protect the full name of the team member.

Team Members at Multiple Locations

Once you have assigned your team member their own login, you can add them to additional locations. Your team member can then access both locations with the same login credentials.
In this case, the file also distinguishes between locations and you can make different basic settings for all locations.
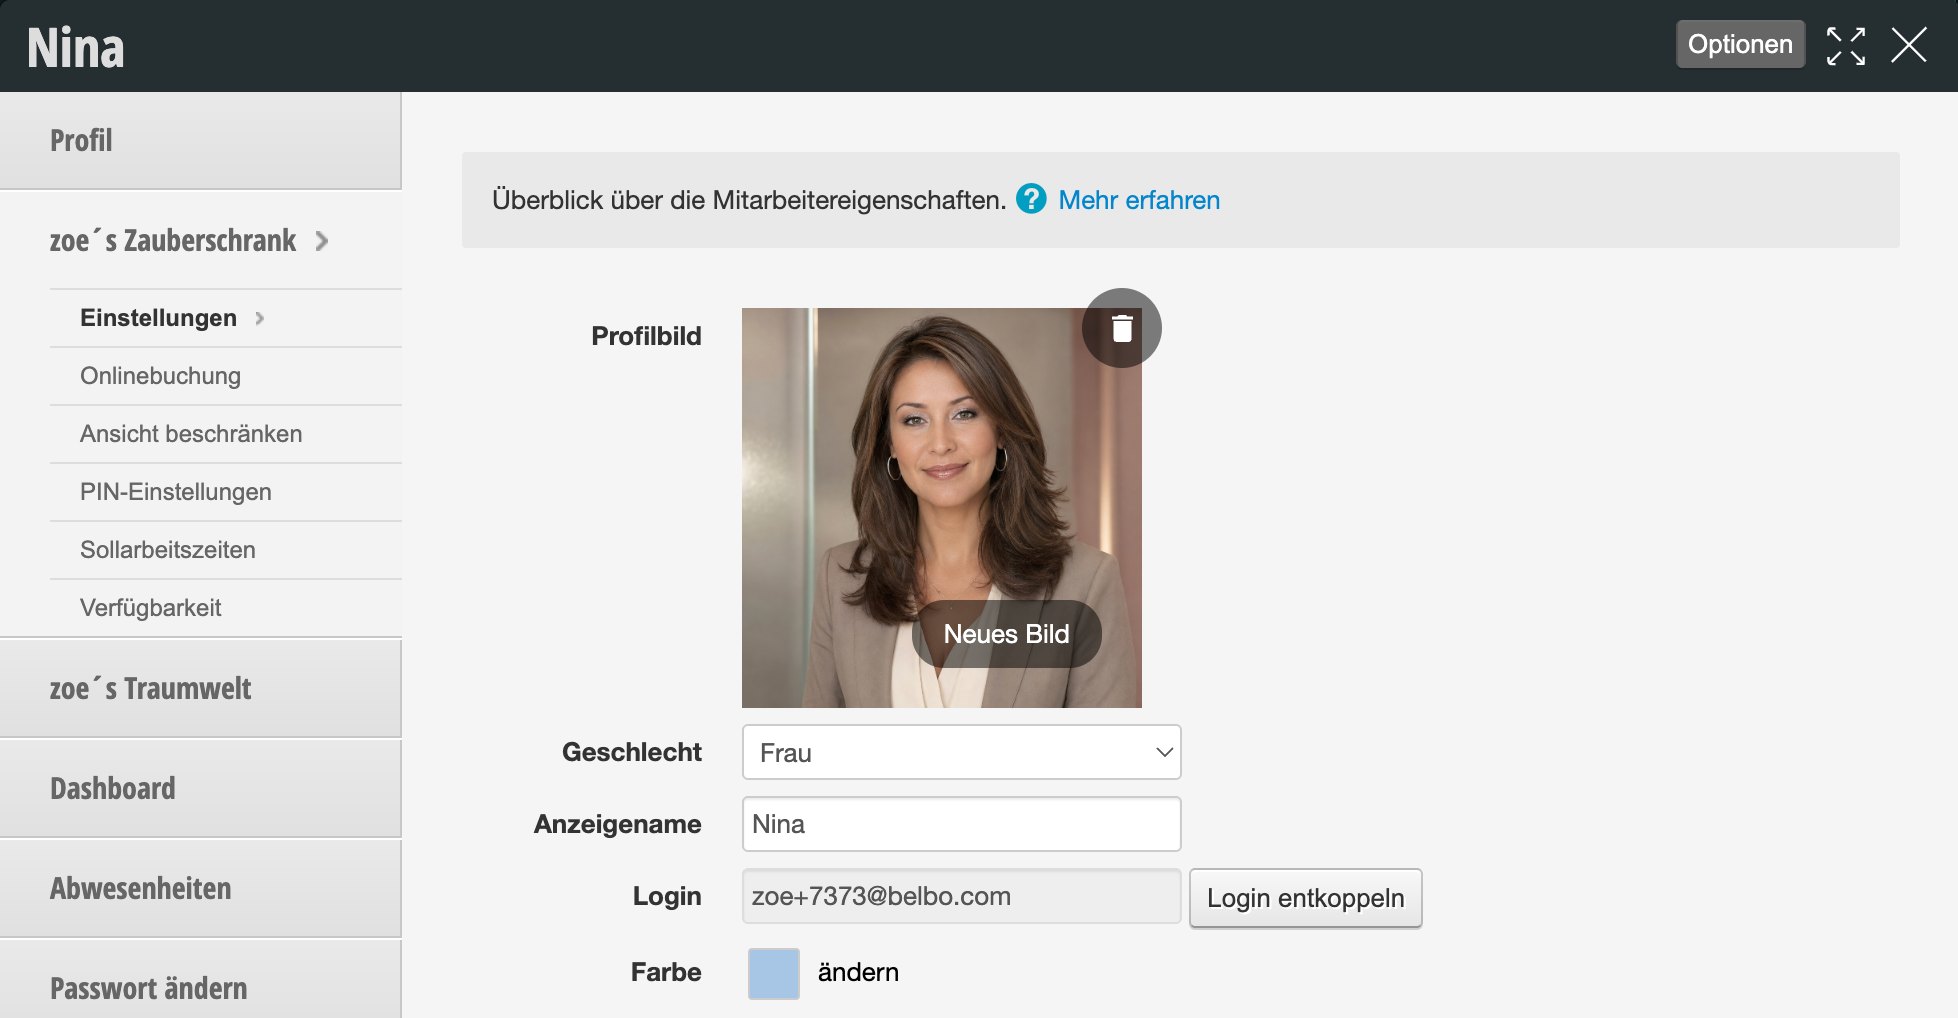
Employee profile settings for Nina with profile picture, gender, display name, login details and color selection

Categories: Manage Employees
Tags: Akte, Mitarbeiter

Have a question? Ask it here.

This manual is a service by belbo. Legal notice