belbo
  • Overview
    • Getting to know Belbo
    • Location Settings
    • Switch to Belbo
    • Calendar View & Navigation
    • Recurring Appointments & Courses
    • Appointment Entry & Management
    • Logins & Permissions
    • Multiple Locations & Head Office
    • Manage Employees
    • Absences & Holidays
    • General
    • Working Hours
    • Time Tracking
    • Data Protection (GDPR)
    • Customer Communication (Email, SMS)
    • Customer Management & Records
    • Bonus & Loyalty Programs
    • Campaigns (Newsletter & SMS)
    • Marketing Consents (GDPR)
    • Tracking & Analytics
    • Overview
    • Services & Prices
    • Products
    • Service Packages & Subscriptions
    • Vouchers
    • Purchasing & Suppliers
    • Stock & Inventory
    • Scanning & Sales
    • Materials & Costs
    • Design & Texts
    • Setup & Settings
    • Integration (Website, Google, Instagram, Facebook)
    • Online payment
    • Accounting & Exports
    • Cash Register Settings & Hardware
    • Checkout process
    • Daily Closing & Reports
    • TSE & Cash Register Anti-Tampering Ordinance
    • Export Overview
    • Employee Utilization
    • Revenue & Reports
    • Belbo Satellite
    • Printer
    • EC Terminal & Card Payment
    • Troubleshooting Hardware
    • Scanner & POS Devices
    • General Settings
    • API & Integrations
    • Notifications & Emails
    • Contracts & Legal
Skip to content

Everything about: Scanner & POS Devices

mPOP Cash Register Installation for Mac


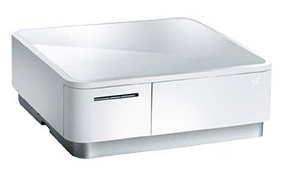
Here you will learn how to install your mPOP cash drawer on a Mac computer and connect it to Belbo. If you are using Windows, please read this article.

You can connect your mPOP cash register to Belbo to print receipts faster and open the cash drawer with one click.

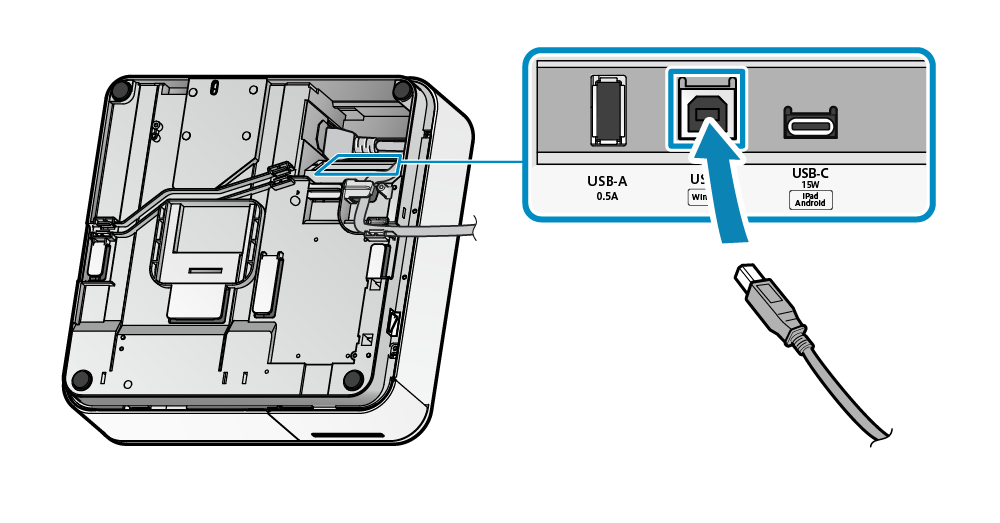
The Star mPOP cash register must be connected to the computer via a USB cable. This cable is not included in the scope of delivery and must be ordered separately; it requires a USB-B connector on one end and USB-C on the other (for newer Macs).


Step 1 of 3: Install printer

  1. Using the mPOP cash register is possible on current MacOS without extra drivers. If you experience problems, you can use the official driver.
  2. Connect the cash register to the computer using the USB cable.
  3. Now turn on the printer: The switch is located on the left side, slightly below the casing. A blue light should now be continuously illuminated on the top of the cash register.
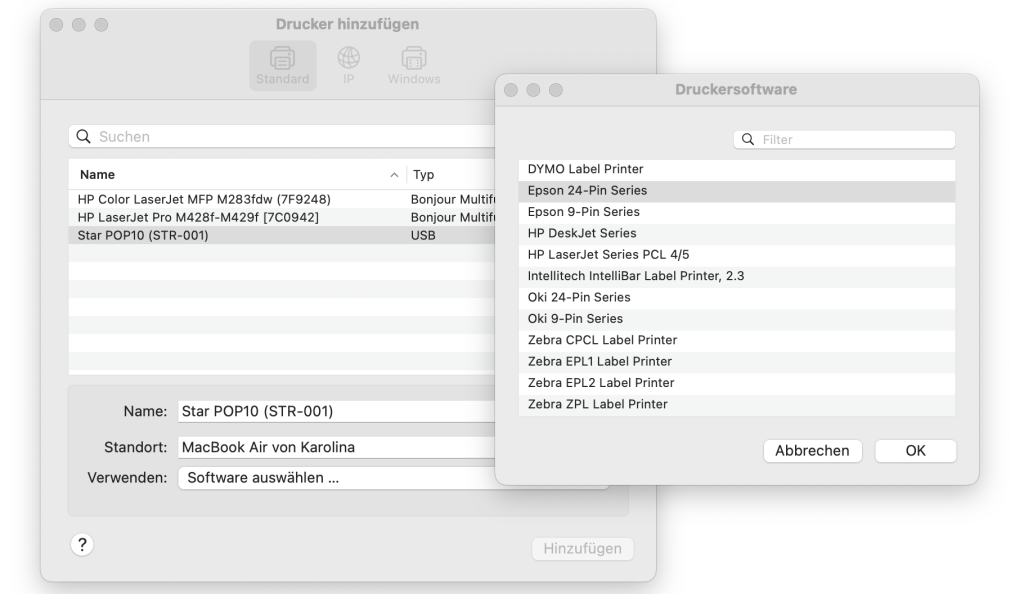
  4. On the computer: Click the magnifying glass in the top right and search for "Printers & Scanners".
  5. The printer should be offered immediately here. Select "Epson 24-Pin Series" as the driver and add the printer.
Step 2 of 3: Install Belbo Satellite

  1. Install the Belbo Satellite software before proceeding to the next step:

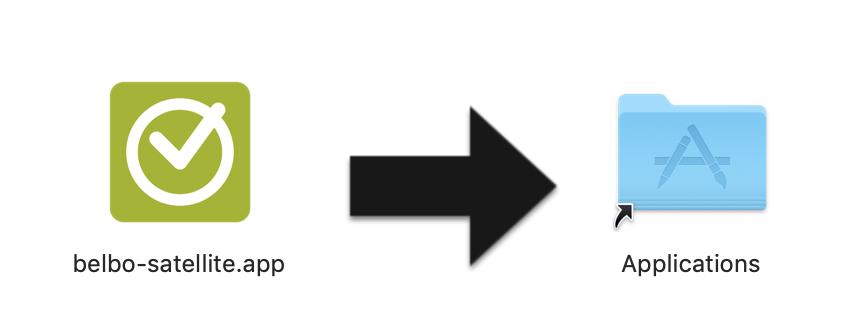
    • After the download, double-click on the .dmg file you downloaded. The following dialog will open:
      belbo-mpop-mac-treiber1.png
    • Drag the Satellite app into the Applications folder as shown in the image and then double-click on the blue folder icon to open the folder.
    • Right-click on the Belbo Satellite icon and select "Open" and confirm the installation again by clicking "Open". If your computer displays a warning, please confirm with "OK" that you want to run the application.
    • After that, you will see a Belbo icon in the top system menu bar. By clicking on the icon (see image), you can see the available options. Enable autostart here so that the application is automatically available after restarting your computer. To do this, click once on "Autostart". If the option is grayed out, click on the Belbo Satellite icon again, as enabling the option on first startup may take a moment before this option becomes available.

  2. Open the "Settings" menu item in your Belbo calendar and enter "Printer connection" in the search field to access the module. Activate this function if it is not already active.

Step 3 of 3: Activate printer connection

  1. Go to "Settings" in your Belbo calendar.
  2. Enter the term "Printer connection" in the search field at the top of the page and open the "Printer connection" function.
  3. Switch to the "Printer configuration" tab.
  4. Click on "Set up printer" to find the installed printer.
  5. Select the printer and then add it to Belbo.

Now you can check in the "Test printer" tab whether printing works.
mPOP Cash Register Installation for Windows


Learn here how to install your mPOP cash drawer on a Windows computer and connect it with Belbo. If you are using Mac, please read this article.

You can connect your mPOP cash register with Belbo to print receipts faster and open the cash drawer with a click. Please follow these steps:

  • Step 1: mPOP Installation and Test
  • Step 2: Install Belbo Satellite
  • Step 3: Printer Connection

Your Star mPOP cash register can be connected to your computer via USB cable. This cable is not included and must be ordered separately. You can do this here.


Step 1 of 3: mPOP Installation

  1. Important: Do not plug the USB cable into the computer before you run the installation, otherwise the installation will fail.
  2. Download the mPOP driver software. Download Driver or here
  3. Extract the installation file and then run the "setup.exe" file in the "setup" folder.
  4. Select the "Typical" option and complete the installation. If you receive an error message:


Installation was unexpectedly terminated
Check if the USB cable is connected. If it is, remove the cable and restart the installation process.
Error message 'Microsoft.VSC80.CRT'
If you receive an error message with the text "Microsoft.VSC80.CRT", you can try the following installation: Windows Visual C++ Redistributable. You must restart your computer afterwards

  • Now turn on the printer. The switch is located on the left outside, slightly below the casing.
  • Now connect the computer to the cash register via the USB cable.
  • Source: https://www.star-m.jp/products/s_print/mpop/manual/en/installing/connectingUSBCable.htm

  • The device should now appear in Windows in the Settings > Devices > Printers area once the device is connected to the USB port.
  • You can now proceed to Step 2 "Test".
  • Test on a Windows Computer

    If the installation and setup were successful, you can test this. To do so, open any text editor and try to print on the printer. Only if this print is successful can you use the printer in the Belbo system.

    1. Open the "Notepad" software and enter a short test text, for example "Test".
    2. Then select "File" in the navigation and "Print".
    3. Do you see your printer in the printer selection? Good sign! Select and print. Otherwise check the driver installation or repeat it if necessary. 
    4. Has the receipt arrived? Very good, then proceed to step 3.
      The printer was not recognized
      If no printing occurs, it may be that you already connected the USB cable before installation. Please plug the cable into another free USB port and test again.

    Step 2 of 3: Satellite Installation and Connection to Belbo

    Did the test print work? Then everything is ready to go. Now you just need to connect the printer to Belbo.

    • Install the Belbo Satellite software before proceeding to the next step.

    Step 3 of 3: Printer Connection in Belbo

    1. Go to "Settings" in your Belbo calendar.
    2. Enter the term "Printer connection" in the search field at the top of the page and open the "Printer connection" function.
    3. Switch to the "Printer Configuration" tab.
    4. Select your printer model under "Printer type".
    5. Click "Set up printer" to find the installed printer.
    6. Release your printer and then add it to Belbo.
    7. A detailed description of the printer connection can be found here.

    Now you can start a cash register transaction and print a receipt.


    Help! Something is not working!

    Please note that you must complete the settings step by step. If you have problems, read through exactly what needs to be done. If that doesn't help, we're happy to support you. To help you efficiently with the installation, please install the browser "Chrome" (if not already installed) and enable the extension "Chrome Remote Desktop". Once you've logged in with your Google account, we can connect to your computer over the phone and check the installation. Just call us at "030 / 57709641".


    Post navigation

    Newer posts →
    This manual is a service by belbo. Legal notice