

You can connect your mPOP cash register to Belbo to print receipts faster and open the cash drawer with one click.
The Star mPOP cash register must be connected to the computer via a USB cable. This cable is not included in the delivery and must be ordered separately; it requires a USB-B connector on one end and USB-C on the other (for newer Macs).
Step 1 of 3: Install Printer
- The mPOP cash register can be used on current MacOS without additional drivers. If you experience problems, you can use the official driver.
- Connect the cash register to the computer using the USB cable.
- Turn on the printer now: The switch is located on the left outside, slightly below the casing. A blue light should now illuminate continuously on the top of the cash register.
- On the computer: Click the magnifying glass in the top right and search for "Printers & Scanners".
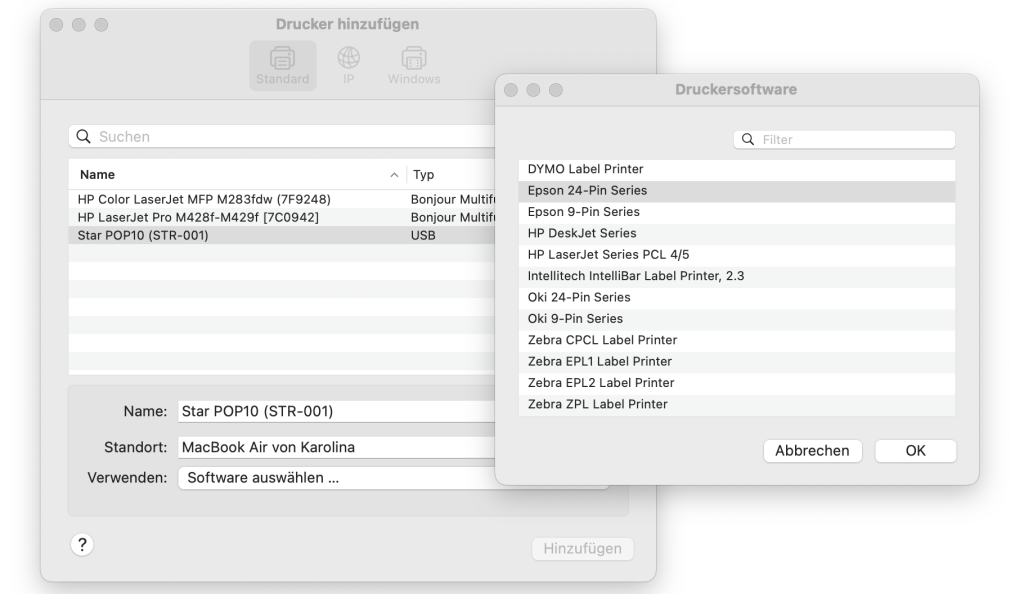
- The printer should be offered immediately here. Select "Epson 24-Pin Series" as the driver and add the printer.
Step 2 of 3: Install Belbo Satellite
- Install the Belbo Satellite software before proceeding to the next step:
- After downloading, double-click the .dmg file you downloaded. This will open the following dialog:
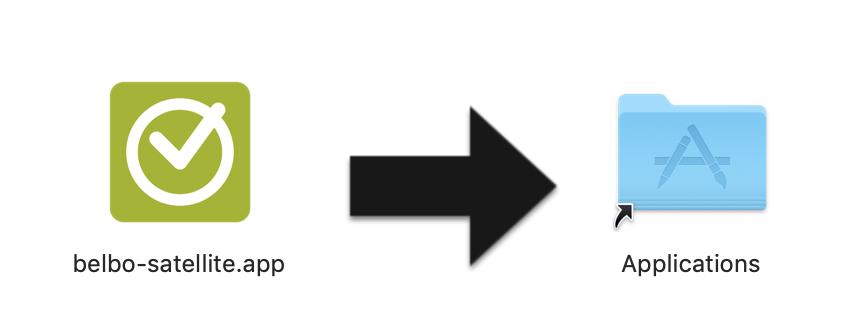
- Drag the Satellite app into the Applications folder as shown in the image and then double-click the blue folder icon to open the folder.
- Right-click on the Belbo Satellite icon and select "Open" and confirm the installation again with "Open". If your computer shows you a warning, please confirm with "OK" that you want to run the application.
- You will then see a Belbo icon in the upper system bar. By clicking on the icon (see image) you will see the available options. Enable autostart here so that the application is automatically available after a computer restart. To do this, click on "Autostart" once. If the option is grayed out, click on the Belbo Satellite icon again, as it may take a moment for the option to become available for activation on first launch.
- After downloading, double-click the .dmg file you downloaded. This will open the following dialog:
- Open the "Settings" menu item in your Belbo calendar and enter "Printer connection" in the search field to access the module. Activate this function if it is not already active.
Step 3 of 3: Activate Printer Connection
- Go to "Settings" in your Belbo calendar.
- Enter the term "Printer connection" in the search field at the top of the page and open the "Printer connection" function.
- Switch to the "Printer Configuration" tab.
- Go to "Set up printer" to find the installed printer.
- Select the printer and then add it to Belbo.
Now you can check in the "Test Printer" tab whether printing works.