
belbo
  • Overview
    • Getting to know Belbo
    • Location Settings
    • Switch to Belbo
    • Calendar View & Navigation
    • Recurring Appointments & Courses
    • Appointment Entry & Management
    • Logins & Permissions
    • Multiple Locations & Head Office
    • Manage Employees
    • Absences & Holidays
    • General
    • Working Hours
    • Time Tracking
    • Data Protection (GDPR)
    • Customer Communication (Email, SMS)
    • Customer Management & Records
    • Bonus & Loyalty Programs
    • Campaigns (Newsletter & SMS)
    • Marketing Consents (GDPR)
    • Tracking & Analytics
    • Overview
    • Services & Prices
    • Products
    • Service Packages & Subscriptions
    • Vouchers
    • Purchasing & Suppliers
    • Stock & Inventory
    • Scanning & Sales
    • Cost of goods & expenses
    • Design & Texts
    • Setup & Settings
    • Integration (Website, Google, Instagram, Facebook)
    • Online payment
    • Accounting & Exports
    • Cash Register Settings & Hardware
    • Checkout process
    • Daily Closing & Reports
    • TSE & Cash Register Anti-Tampering Ordinance
    • Export Overview
    • Employee Utilization
    • Revenue & Reports
    • Belbo Satellite
    • Printer
    • EC Terminal & Card Payment
    • Troubleshooting Hardware
    • Scanner & POS Devices
    • General Settings
    • API & Integrations
    • Notifications & Emails
    • Contracts & Legal
Skip to content

Direct appointment entry in the calendar

If you would like to enter appointments, you can do this either by navigating to the desired day in the calendar or by using the appointment assistant.

Create appointment

Select time
To create an appointment directly in the calendar, go to the desired day and employee. By clicking on the desired time, you will open the appointment entry window.
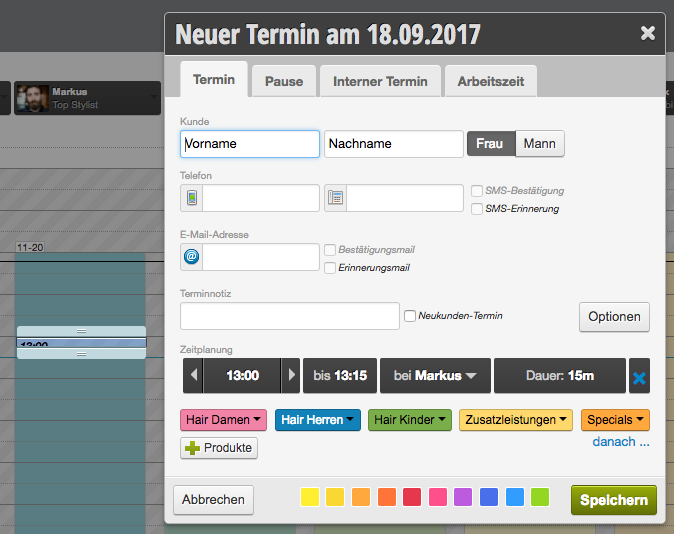

Select customer
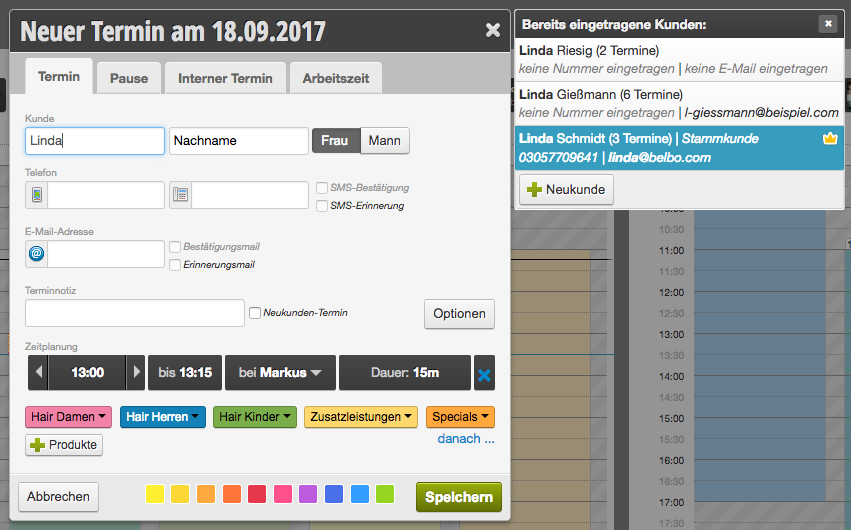
Enter the name of your customer. If this customer already exists in the customer database, simply entering the first three letters will suffice and you can select it from the list that opens. This can be done either with the mouse or keyboard.

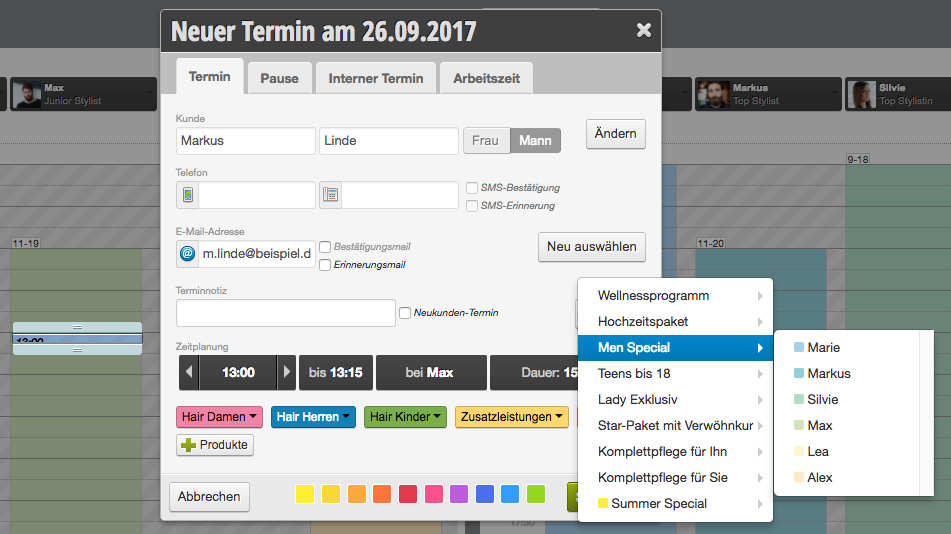
Select services
Choose one of the stored services. If you would like to add multiple services to an appointment, repeat the process.
Additionally, you have the option to select times, employees, duration, and color background. After entering all necessary data, click the "Save" button. The appointment will now appear in the calendar.

Video tutorial for entering appointments

Appointment dialog when entering a new appointment
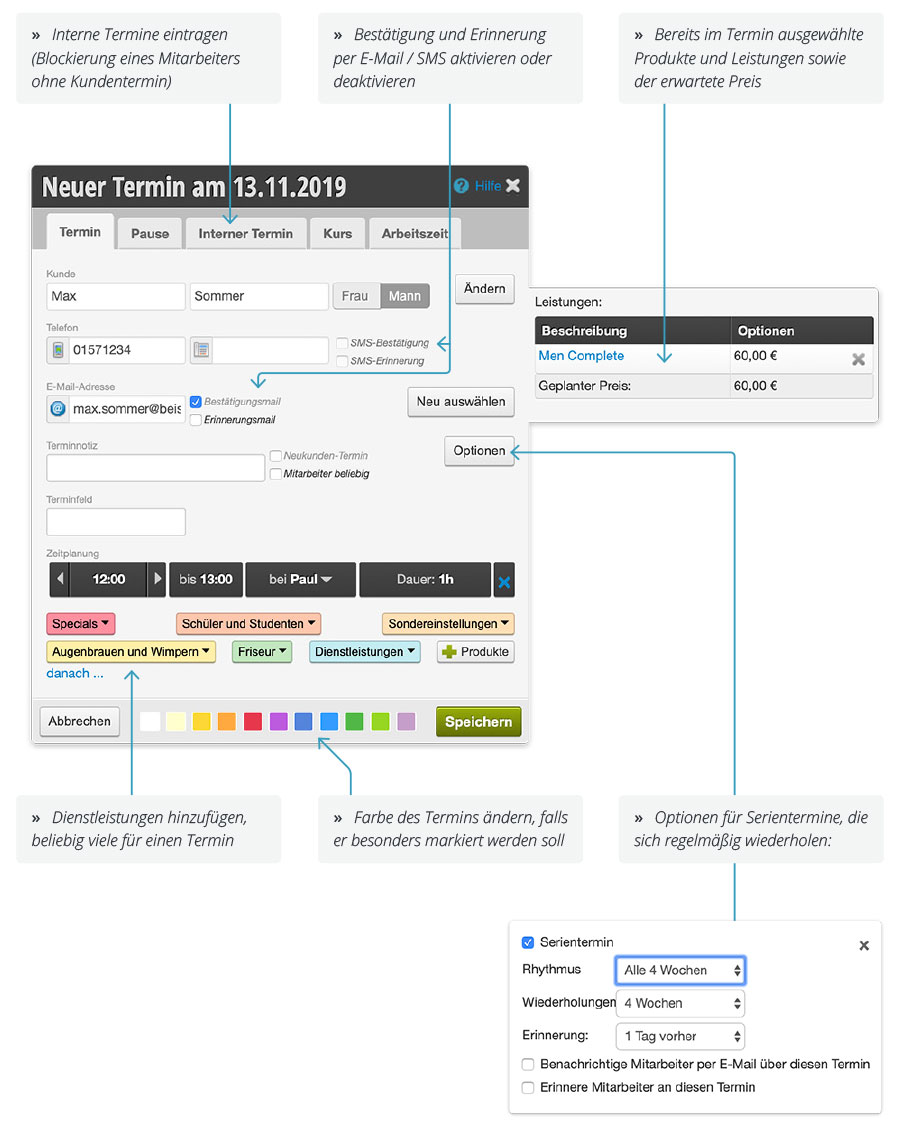
If you would like to view additional fields such as "Address" or "Date of Birth" during appointment entry, use the customer fields.
Categories: Appointment Entry & Management
Tags: Termin eingeben, Terminerstellung, Video-Tutorial
This manual is a service by belbo. Legal notice