
belbo
  • Overview
    • Getting to know Belbo
    • Location Settings
    • Switch to Belbo
    • Calendar View & Navigation
    • Recurring Appointments & Courses
    • Appointment Entry & Management
    • Tasks
    • Overview
    • Multiple Locations & Head Office
    • Manage Employees
    • Logins
    • Rights
    • Overview
    • Absences & Holidays
    • Working Hours
    • Time Tracking
    • Overview
    • Data Protection (GDPR)
    • Customer Communication (Email, SMS)
    • Customer Management & Records
    • Overview
    • Bonus & Loyalty Programs
    • Campaigns (Newsletter & SMS)
    • Marketing Consents (GDPR)
    • Tracking & Analytics
    • Overview
    • Services & Prices
    • Service Packages & Subscriptions
    • Vouchers
    • Products
    • Purchase & Vendors
    • Stock & Inventory
    • Scanning & Sales
    • Cost of Goods & Expenses
    • Overview
    • Design & Texts
    • Setup & Settings
    • Integration (Website, Google, Instagram, Facebook)
    • Online payment
    • Overview
    • Accounting & Exports
    • Cash Register Settings & Hardware
    • Checkout process
    • Daily Closing & Reports
    • TSE & Cash Register Anti-Tampering Ordinance
    • Overview
    • Export Overview
    • Employee Utilization
    • Revenue & Reports
    • Belbo Satellite
    • Printer
    • EC Terminal & Card Payment
    • Troubleshooting Hardware
    • Scanner & POS Devices
    • General Settings
    • API & Integrations
    • Notifications & Emails
    • Contracts & Legal
Skip to content
Cash Register & Accounting›Checkout process

Display customer data on receipt and A4 invoice

If your company exceeds the small invoice limit of § 33 Sentence 1 USTDV (PDF), additional data such as the customer's name and address must be added to the receipt and invoice. With belbo, this is possible if this data is maintained in the customer file.

German flagThis article is particularly relevant for users from Germany.

This article describes technically how you as a belbo cash register user can display certain customer data on receipts and invoices.
Please note that we cannot provide binding legal advice. Please contact your tax office to clarify whether and in what cases the legal requirements according to § 33 Sentence 1 USTDV apply to your company.

Step 1 · Create customer fields

To be able to display a customer's address on the receipt, you must store this data in your customer files. You can create corresponding customer fields if they don't already exist.

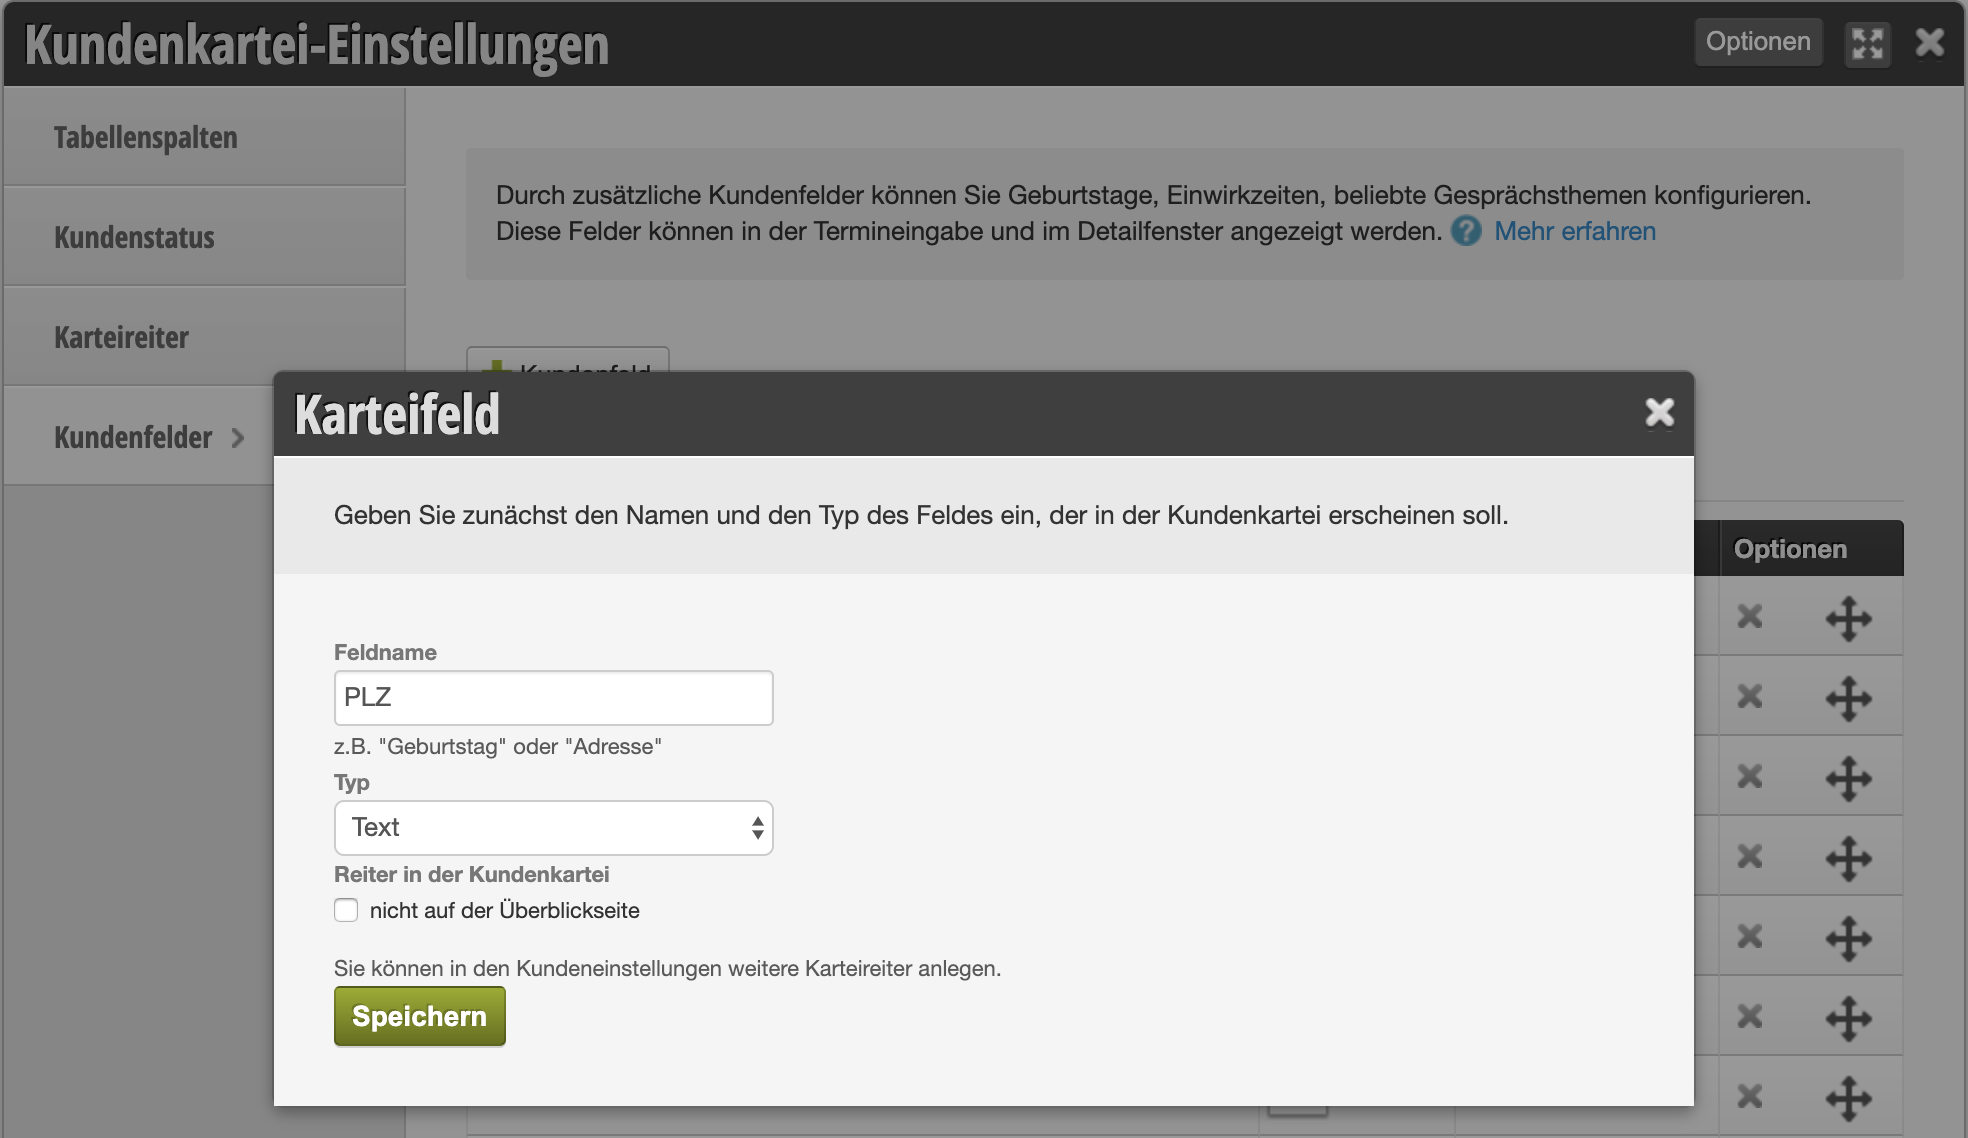
  1. Go to Settings and select Customer Settings > Customer Fields.
  2. Click on + Customer Field.
  3. Assign a name for the field. You need 3 fields for the address: "Street", "Postal Code" and "City".
  4. Set the field type to Text.
  5. Optionally specify the tab and save the new customer field.
Step 2 · Fill in customer fields

You will now find the corresponding customer fields in each customer file and can fill them in.
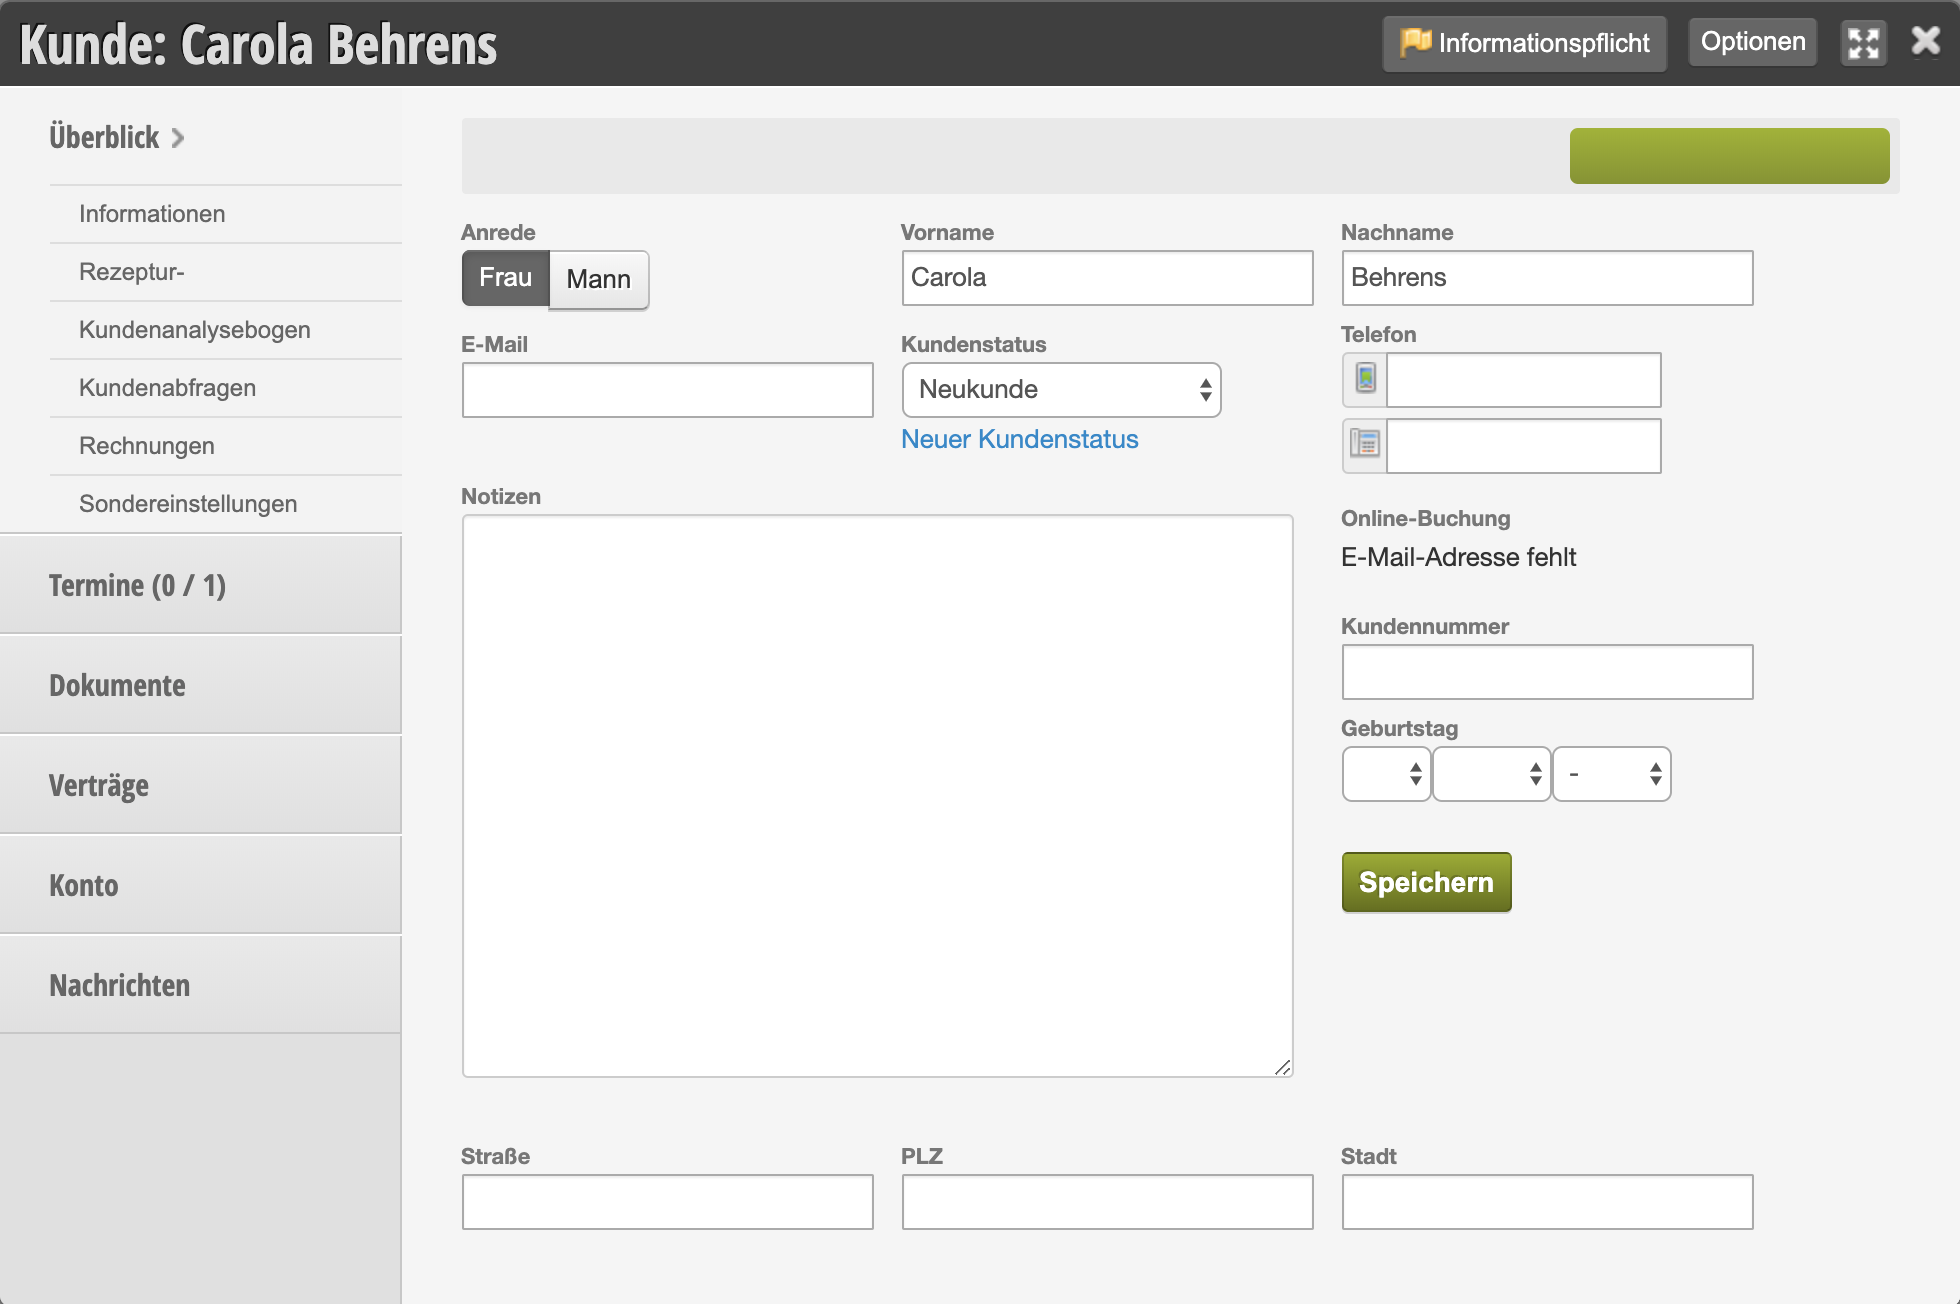
Note: If you have an Excel or CSV file with this data, the address data can also be imported into existing customer files.

Step 3 · Enter customer fields in the receipt header

You can then insert these customer fields into the receipt and invoice.
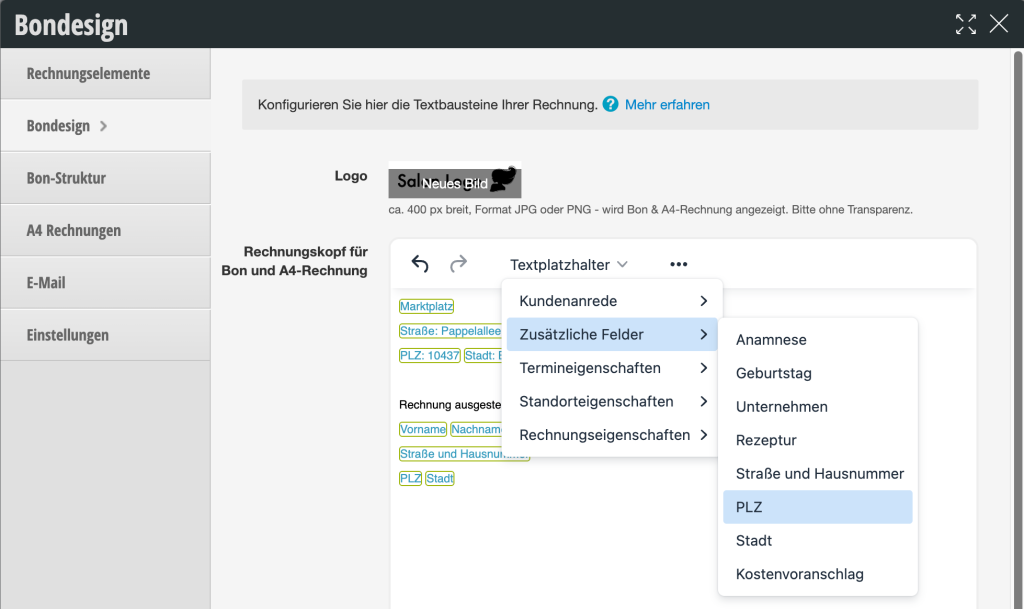
The text placeholders entered here will be displayed on the receipt and invoice and replaced with the actual data of the charged customer.

In this context, please also note the legal requirements for receipt issuance obligations.
Categories: Checkout process
Tags: Bon, Kleinbetragsrechnungs-Grenze, Rechnung

Have a question? Ask it here.

This manual is a service by belbo. Legal notice