belbo
  • Overview
    • Getting to know Belbo
    • Location Settings
    • Switch to Belbo
    • Calendar View & Navigation
    • Recurring Appointments & Courses
    • Appointment Entry & Management
    • Logins & Permissions
    • Multiple Locations & Head Office
    • Manage Employees
    • Absences & Holidays
    • General
    • Working Hours
    • Time Tracking
    • Data Protection (GDPR)
    • Customer Communication (Email, SMS)
    • Customer Management & Records
    • Bonus & Loyalty Programs
    • Campaigns (Newsletter & SMS)
    • Marketing Consents (GDPR)
    • Tracking & Analytics
    • Overview
    • Services & Prices
    • Products
    • Service Packages & Subscriptions
    • Vouchers
    • Purchasing & Suppliers
    • Stock & Inventory
    • Scanning & Sales
    • Cost of goods & expenses
    • Design & Texts
    • Setup & Settings
    • Integration (Website, Google, Instagram, Facebook)
    • Online payment
    • Accounting & Exports
    • Cash Register Settings & Hardware
    • Checkout process
    • Daily Closing & Reports
    • TSE & Cash Register Anti-Tampering Ordinance
    • Export Overview
    • Employee Utilization
    • Revenue & Reports
    • Belbo Satellite
    • Printer
    • EC Terminal & Card Payment
    • Troubleshooting Hardware
    • Scanner & POS Devices
    • General Settings
    • API & Integrations
    • Notifications & Emails
    • Contracts & Legal
Skip to content

Epson Printer Installation for Mac


Here you will learn how to install your Epson printer on an Apple computer and connect it to Belbo. If you use other devices, please see here.


Step 1 of 3: Epson Installation

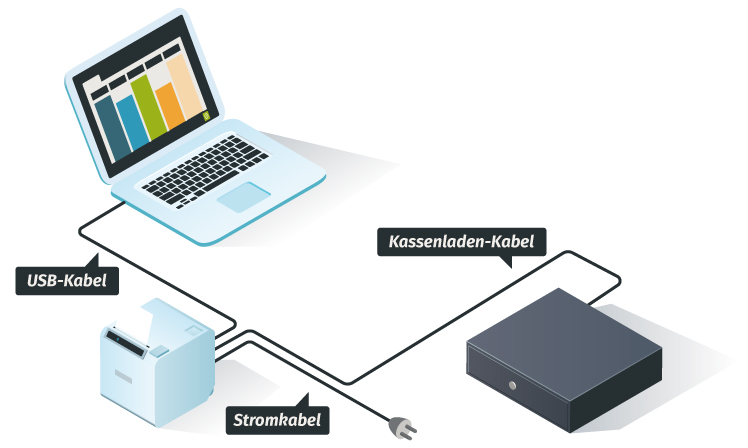
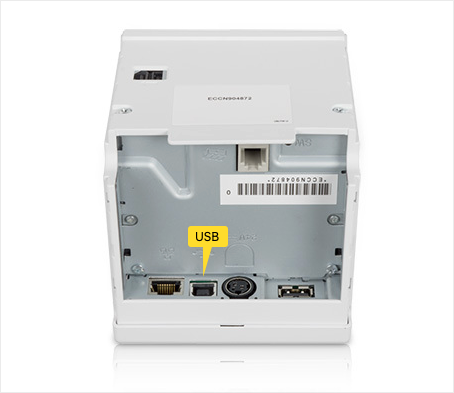
  1. Plug the USB cable into the computer.
    Attention: Some printer models have 2 free USB ports. These are labeled "USB-A" and "USB-B". To connect to the computer, you must use the "USB-B" slot.
Wiring of the cash register device

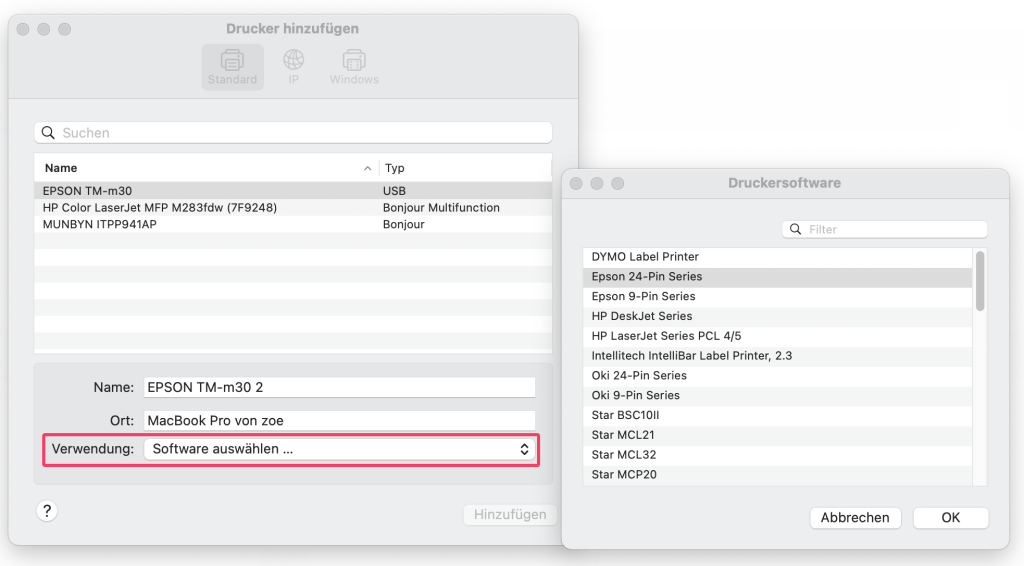
    2. With a current Epson printer, you do not need an explicit driver for installation.
    When "adding a printer", you can use the software "Epson 24-PIN" under "Use -> Select software..."

    Step 2 of 3: Satellite Installation

    Now you just need to connect the printer to Belbo.

    • Install the Belbo Satellite software before performing the next step.

    Step 3 of 3: Printer Connection in Belbo

    1. Go to "Settings" in your Belbo calendar.
    2. Enter "Printer connection" in the search field at the top of the page and open the "Printer connection" function.
    3. Switch to the "Printer Configuration" tab.
    4. Select your printer model under "Printer type".
    5. Click "Set up printer" to find the installed printer.
    6. Select your printer and save it.

    Now you can check in the "Test Printer" tab whether printing works.

    Categories: Printer
    Tags: drucker, epson, installation, Mac
    This manual is a service by belbo. Legal notice