
To avoid having to completely delete former team members from the system, we explain how departed team members are no longer visible in the calendar and how you have access to their profiles and past appointments, revenue, and absences such as vacation and sick days.
Before Departure: Adjust Schedule
If you know that a team member will be leaving you on a specific date, you can delete that team member's schedule for that day. This prevents colleagues or customers from booking appointments with that person after they leave.
- Go to "Schedule" in the main menu.
- Navigate to the date on which the team member is no longer with you.
- Click the checkbox next to the team member's name to delete the entire week.

You can then copy this week forward one year into the future to delete more weeks. Check that all working hours have actually been deleted.
On the First Day After Departure: Deactivate Team Member
Team members who leave your company can only be deactivated on the day they are no longer employed by your company. We cannot do this in advance and we ask you to perform the following steps on the first day of departure yourself:
1. Reschedule Appointments
Especially in case of sudden departure of a person, it can happen that there are still appointments in their column even though they are no longer working in your company. These appointments must be rescheduled manually. There is no automatic function for this! It depends entirely on the workload and competencies of the other employees whether appointments need to be rescheduled or canceled. If necessary, customers may need to be contacted by phone first.
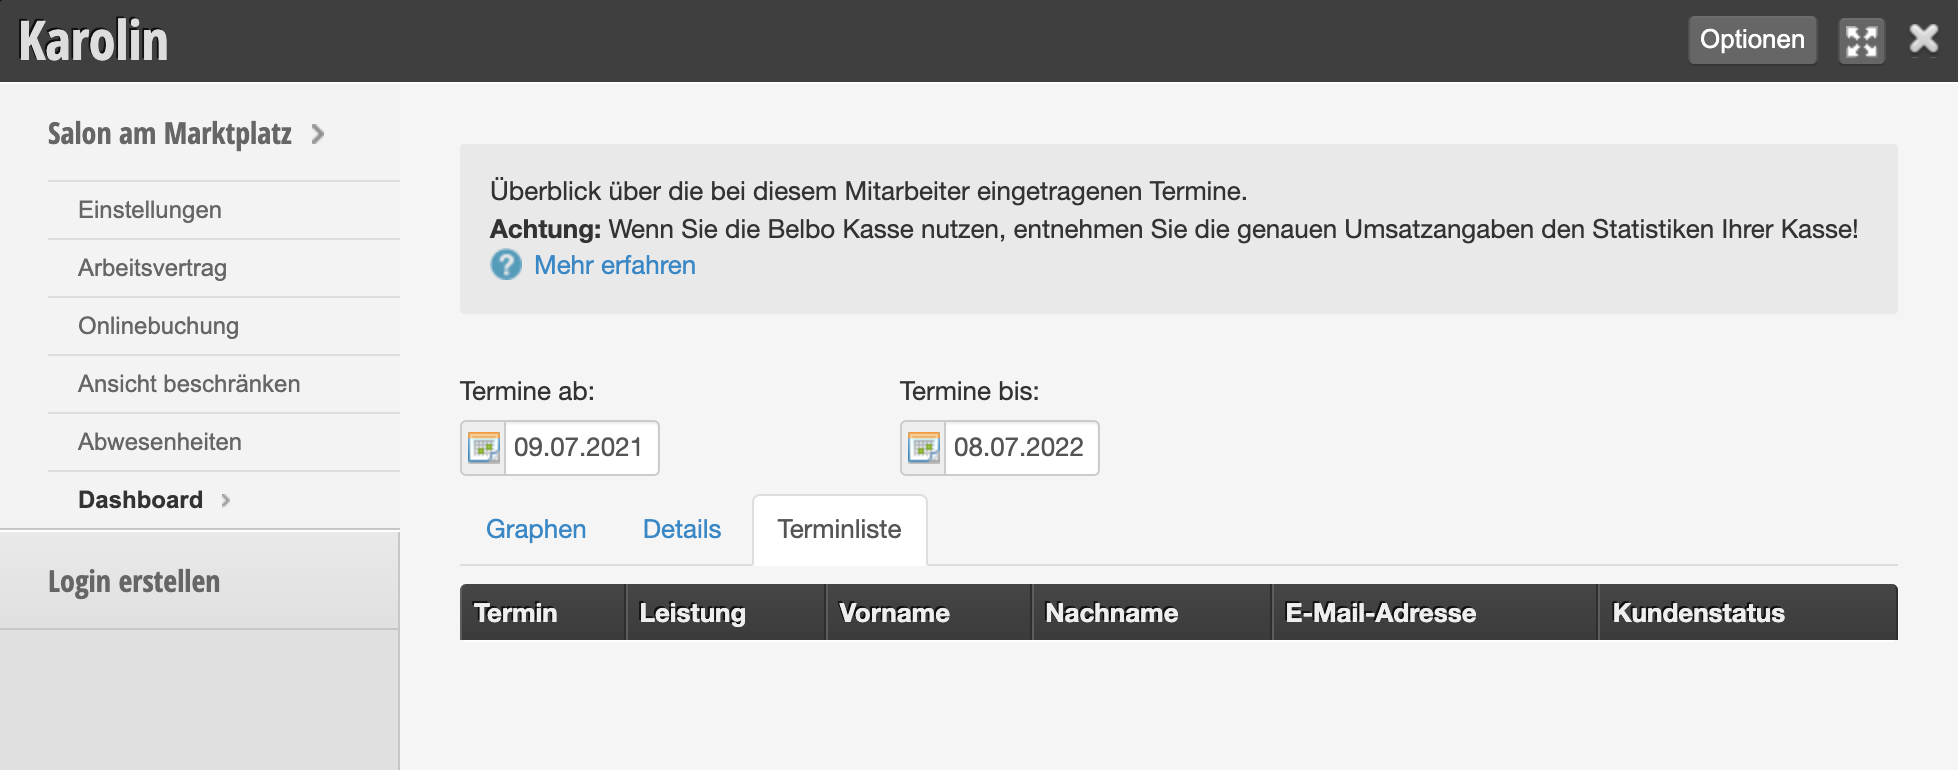
After rescheduling the appointments, you can check the employee's dashboard to make sure all appointments have been removed from the employee's column.
- Under Settings > Employees, click on the desired team member.
- Here you switch to the "Dashboard" tab.
- Enter the time period in which appointments could still exist and have a little patience while the page loads.
- Switch to the "Appointment List" tab to see if there are still appointments in the selected time period.
2. Remove Online Bookability
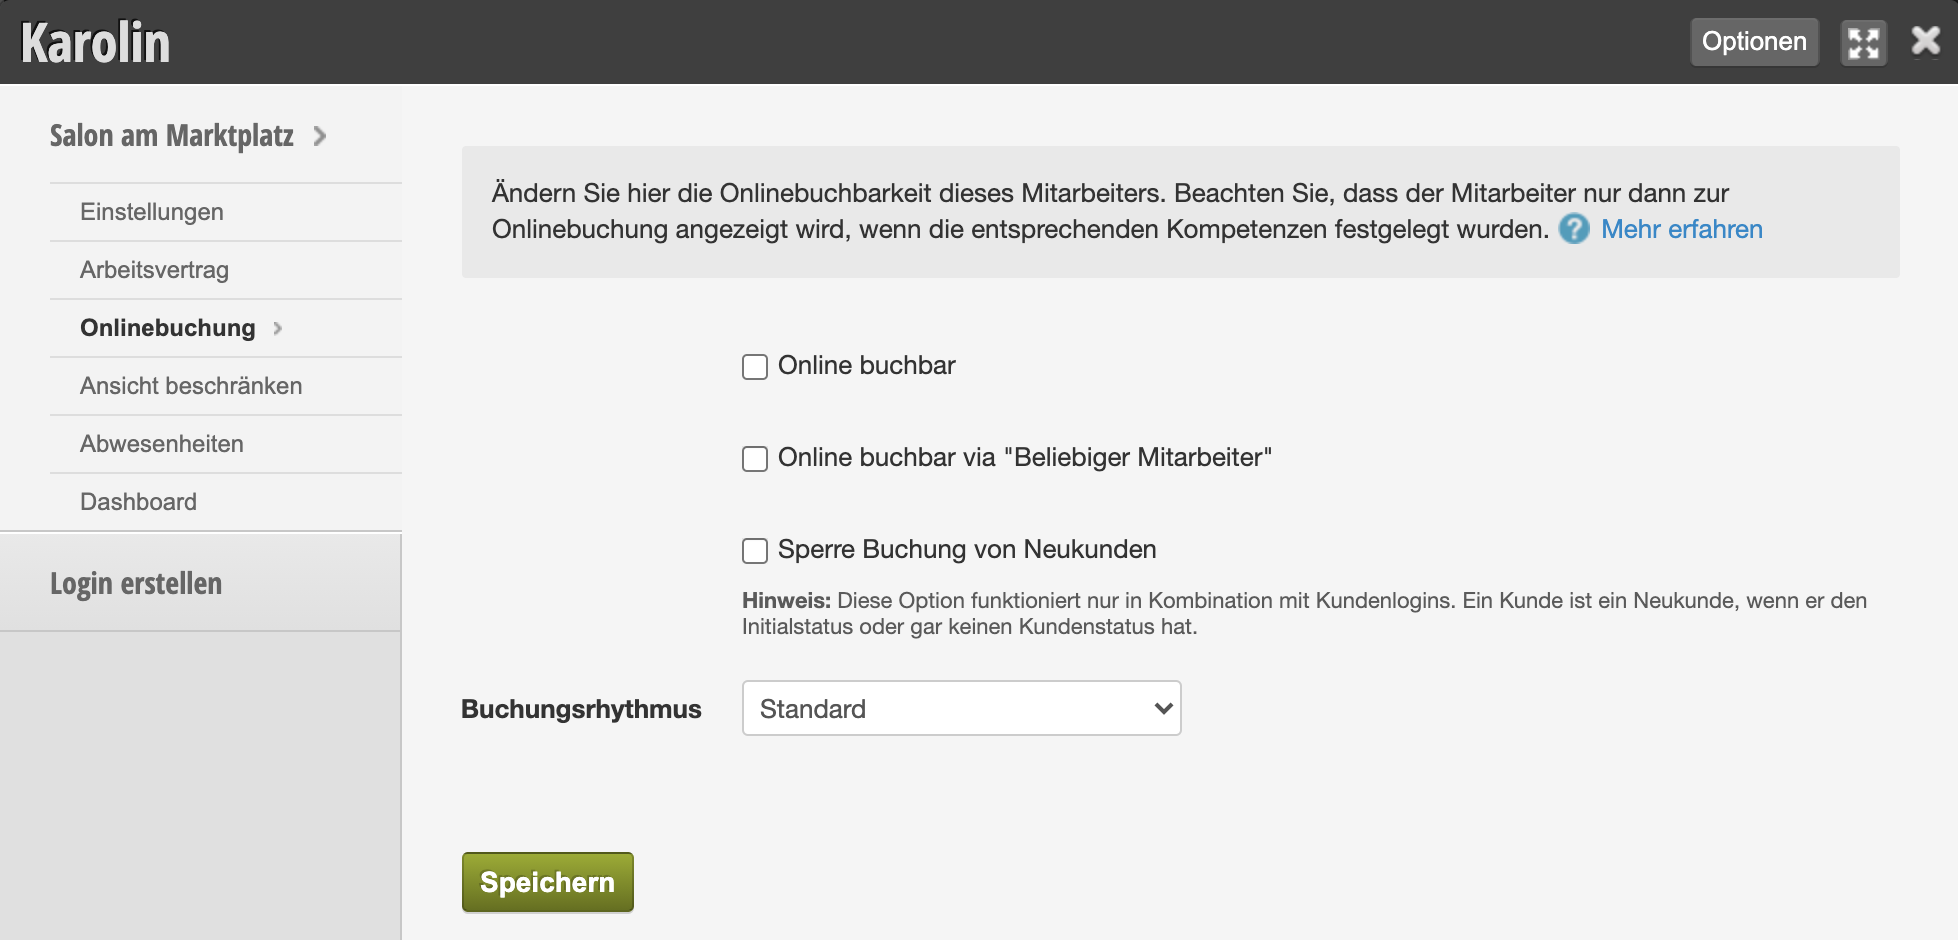
If the team member was online bookable for your customers, you can now remove the bookability.
- Under Settings > Employees, click on the desired employee.
- Here you switch to the "Online Booking" tab.
- Remove the options and save your entry.
3. Delete Employee
Open the employee file and delete the person via "Options":
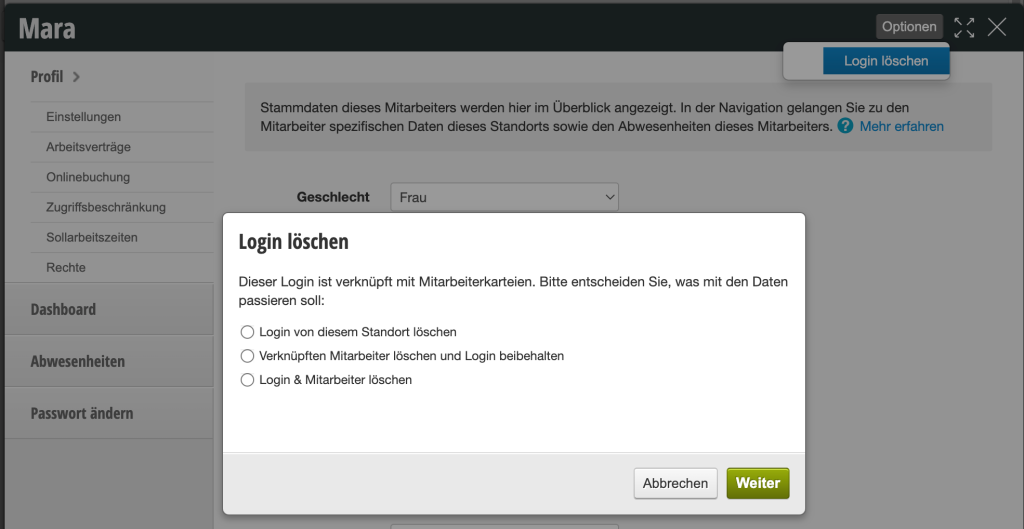
Select the desired option and click "Continue".
The person is now completely hidden from the calendar, schedule, and cash register! This also affects all appointments that were in the employee's column. However, no data is deleted, only hidden from the calendar!
Show Employee Again
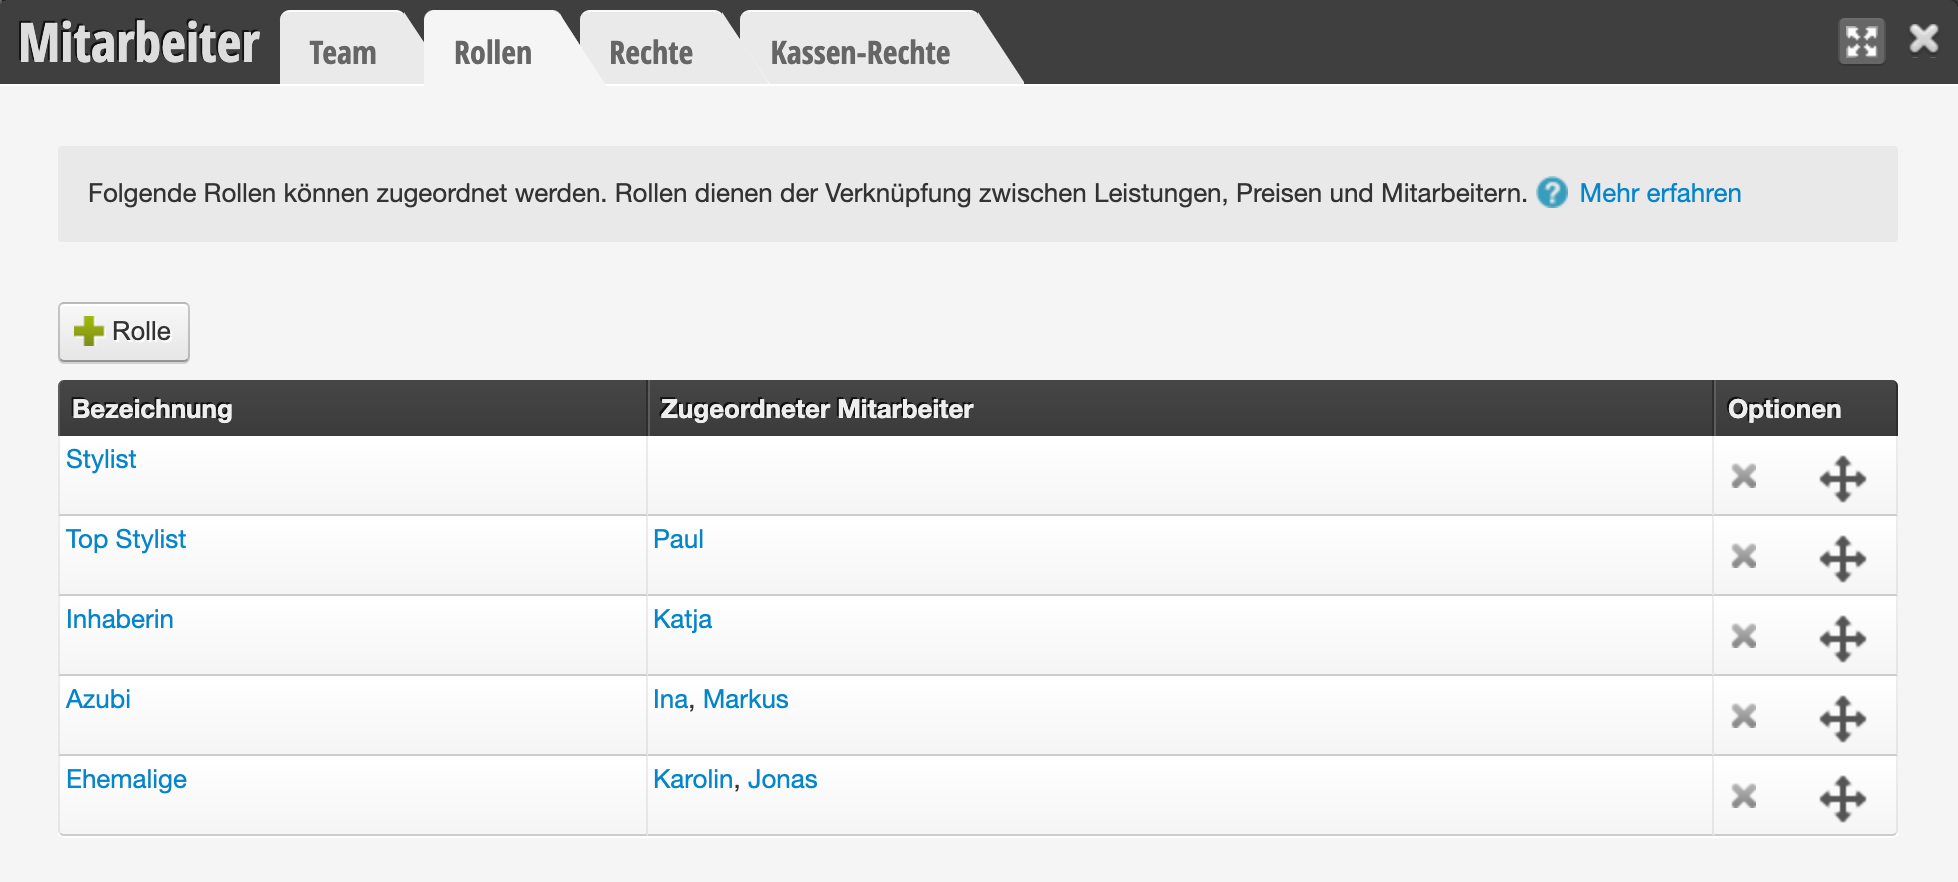
If you want to show hidden employees again, for example to check working hours or past appointments, you can assign the employee a different role.
- Under Settings > Employees, switch to the "Roles" tab.
- Here you see the list of all employees who belong to each role.
- Here you can click on the name of the employee you want to show.
- The employee file opens where you can assign a different role.
- The employee is now visible again.
Lock Employee
If your employee had their own login, you can lock it. Learn how to lock employees here.
Until their departure, your employee still has access to the calendar as long as they are in your company and working with customers. Here you will find some tips on how to protect your data from unauthorized access.