
belbo
  • Overview
    • Getting to know Belbo
    • Location Settings
    • Switch to Belbo
    • Calendar View & Navigation
    • Recurring Appointments & Courses
    • Appointment Entry & Management
    • Tasks
    • Overview
    • Multiple Locations & Head Office
    • Manage Employees
    • Logins
    • Rights
    • Overview
    • Absences & Holidays
    • Working Hours
    • Time Tracking
    • Overview
    • Data Protection (GDPR)
    • Customer Communication (Email, SMS)
    • Customer Management & Records
    • Overview
    • Bonus & Loyalty Programs
    • Campaigns (Newsletter & SMS)
    • Marketing Consents (GDPR)
    • Tracking & Analytics
    • Overview
    • Services & Prices
    • Service Packages & Subscriptions
    • Vouchers
    • Products
    • Purchase & Vendors
    • Stock & Inventory
    • Scanning & Sales
    • Cost of Goods & Expenses
    • Overview
    • Design & Texts
    • Setup & Settings
    • Integration (Website, Google, Instagram, Facebook)
    • Online payment
    • Overview
    • Accounting & Exports
    • Cash Register Settings & Hardware
    • Checkout process
    • Daily Closing & Reports
    • TSE & Cash Register Anti-Tampering Ordinance
    • Overview
    • Export Overview
    • Employee Utilization
    • Revenue & Reports
    • Belbo Satellite
    • Printer
    • EC Terminal & Card Payment
    • Troubleshooting Hardware
    • Scanner & POS Devices
    • General Settings
    • API & Integrations
    • Notifications & Emails
    • Contracts & Legal
Skip to content
Marketing & Customer Loyalty›Bonus & Loyalty Programs

Rating function

Feature: Online Booking › Reviews › Settings

With the rating function, you enable your customers to quickly and easily rate their visit to you. Ratings show you what customers think of your business. You can use ratings for your internal quality assurance or publish them for marketing purposes on your online booking page.
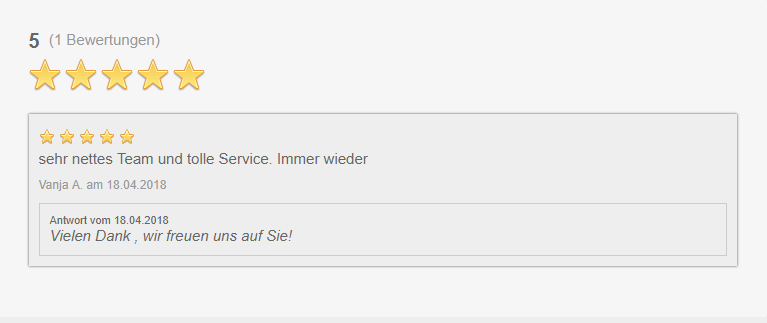
You can access this area via Settings > Ratings If this function is not enabled, it can be activated via "Settings > Add Function".

Customers form an impression of your store/salon, the products and the service on the internet before they book an appointment with you or travel to your business. For this reason, customer ratings are perfect for convincing new customers. It is therefore all the more important to respond to your customers' ratings and evaluate them. This way you will always have a clear picture of what customers think of your business, service or product.

Please note: Your customers will see the 20 most recent ratings. The displayed average of the ratings is of course calculated from all ratings.

1) Activate ratings

  1. Go to Settings > Ratings. If this function is not yet active, you can activate it under "Add Function".
  2. In the settings tab of the function, you can set various parameters for your rating function.
  3. We recommend only displaying the ratings in the online booking once you have already received some meaningful ratings.

All display parameters:
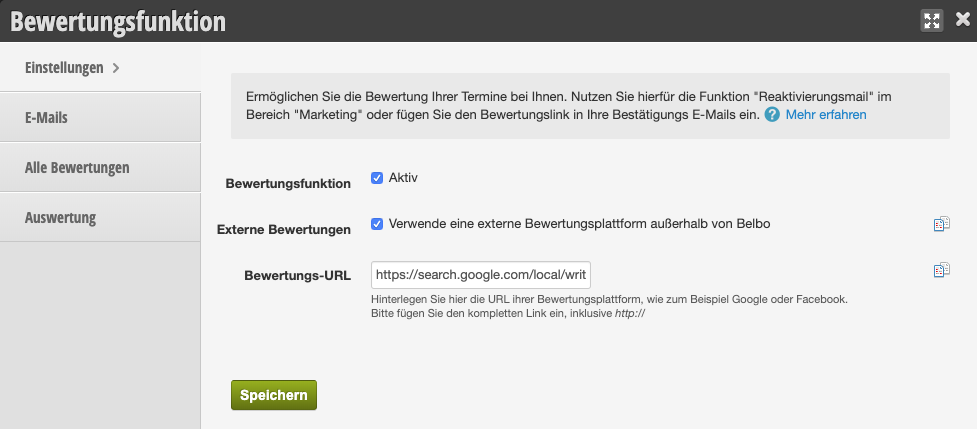
External Ratings
Basically, ratings for your Belbo online booking are collected via the rating link in the email. If you wish to have ratings for another platform (Google, Facebook, etc.), you can change the target of the rating link here. For more information on how to create links for external platforms, please click here. The rating link already created in the email will now redirect to the newly defined target.
Rating Option
In addition to rating the employee, also allows a general rating for the location. This way you can distinguish what your customer thinks about the specific treatment and generally about your company.
Display
Set here where your ratings are displayed within the online booking. We recommend only displaying the ratings in the online booking once you have already received some meaningful ratings.
Notification
Set here whether an email is sent to the address stored under Settings > Location Settings when a new rating is received.
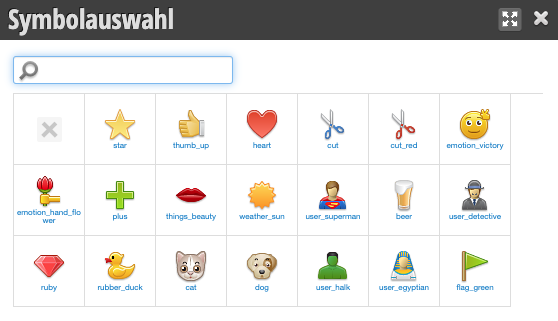
Rating Symbol
Set the symbol here that shows the rating level. Normally this is a series of stars. However, you have the option to choose a different symbol that fits your company:

2) Edit automatic email campaign

Test rating link The rating link in your email only works correctly if it is linked to a real appointment. In the test email, the link is displayed as %RATE_APPOINTMENT% and is not linked to your rating page. The easiest way to test the emails is to create an appointment for yourself in the calendar and then proceed as described in "Point 3) Manual rating request in customer appointment" and send yourself a rating request for an appointment.

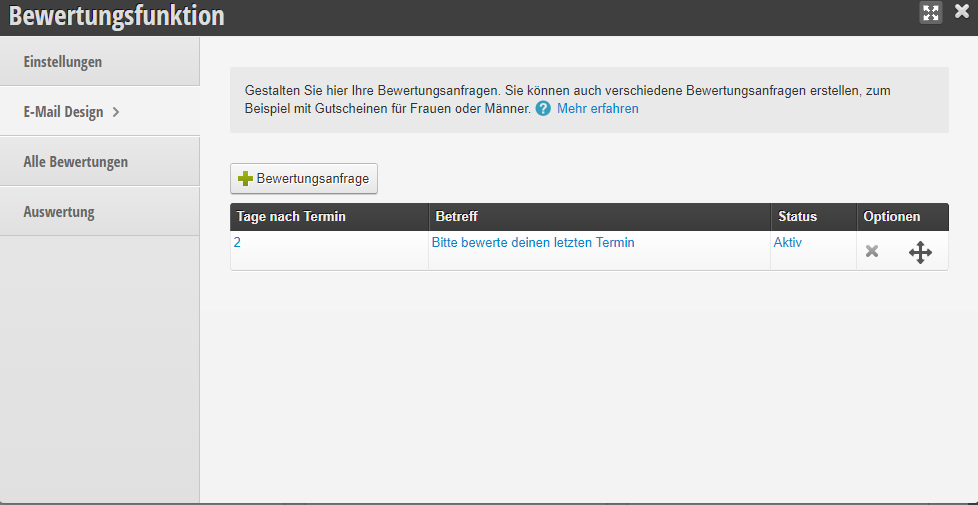
You can create automatic rating requests which are sent by email to your customers after they have had an appointment at your business. To find out how to send a manual rating request directly from your calendar, see below. A customer receives only one rating request per rating campaign.

  • After activating the function, a campaign for all customers is already set up. You will find this in the "Emails" tab.
  • Edit the email text that your customers should receive as a rating request.
  • If you want to send different rating requests to specific customer groups, delete the existing campaign and create a new one.

Create new campaign

Rating Request
Here you can create and design your rating requests yourself. In the field "Name of the email campaign" write the internal name of your rating request. This could be, for example, just "Rating Request 2020" or a sentence like "Rating VIP Customers". This name is used to distinguish your campaigns and is not visible to your customers.
Customer Status
In customer status, you can select whether this rating request should only be sent to certain customer groups, such as only new customers. If you leave this field empty, all customers with marketing approval will be contacted.
Time Period
Set the time period here. You choose how many days after the last appointment the customer receives your rating request.
Email Design
Select the email design for your rating request.

Content & Design

The rating requests you send to your customers by email can be designed very easily and quickly by yourself. After you have created a rating request, click on the desired rating request and start designing your email.
General
Under "General" you have general information about your rating requests, such as campaign name, send status, etc.
Content & Design
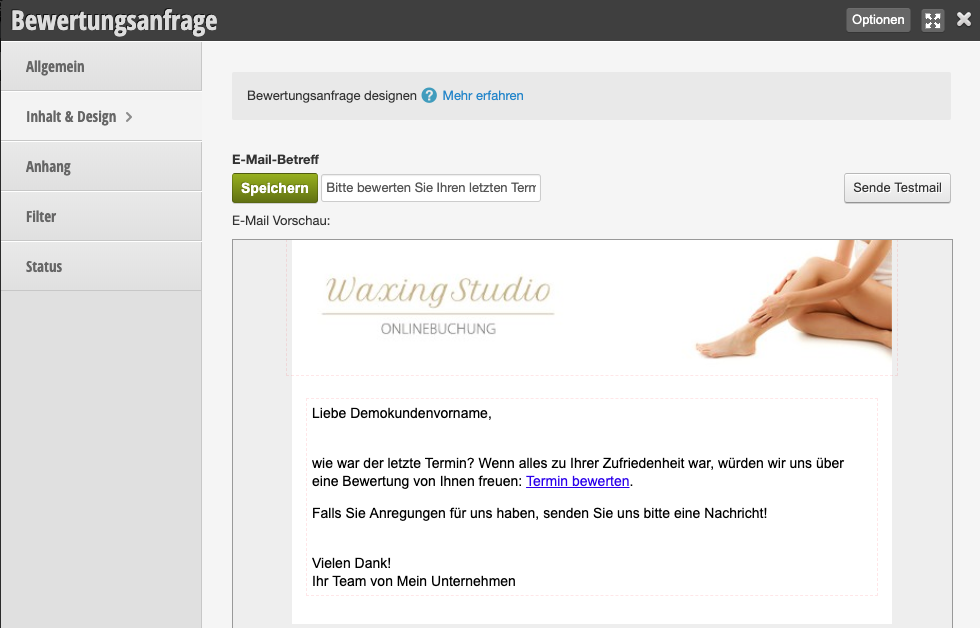
Here you design your rating request as the customer will ultimately receive it by email.

  1. Email Subject In the email subject, it's best to write a sentence where the customer can immediately recognize what your email is about, e.g. "Please rate your last appointment". With this sentence, the customer immediately knows what topic or concern this email campaign is about.
  2. Header image: By default, the header image you created under Settings > Email and SMS Templates > Design is used. However, you can also change it for the rating.
Attachment
If you want to send a document or coupon/discount in your email, click the "+Document" button and select your desired document.
Filter
Here you can filter the recipients of your rating request according to additional criteria.
Status
Here is a list of potential recipients of your email campaign or a list of all your customers who have an email address and have agreed to email and SMS campaigns. Sent: Under Sent you can check your email sending status or the names of customers you sent emails to and the date and time.

3) Manual rating request in customer appointment

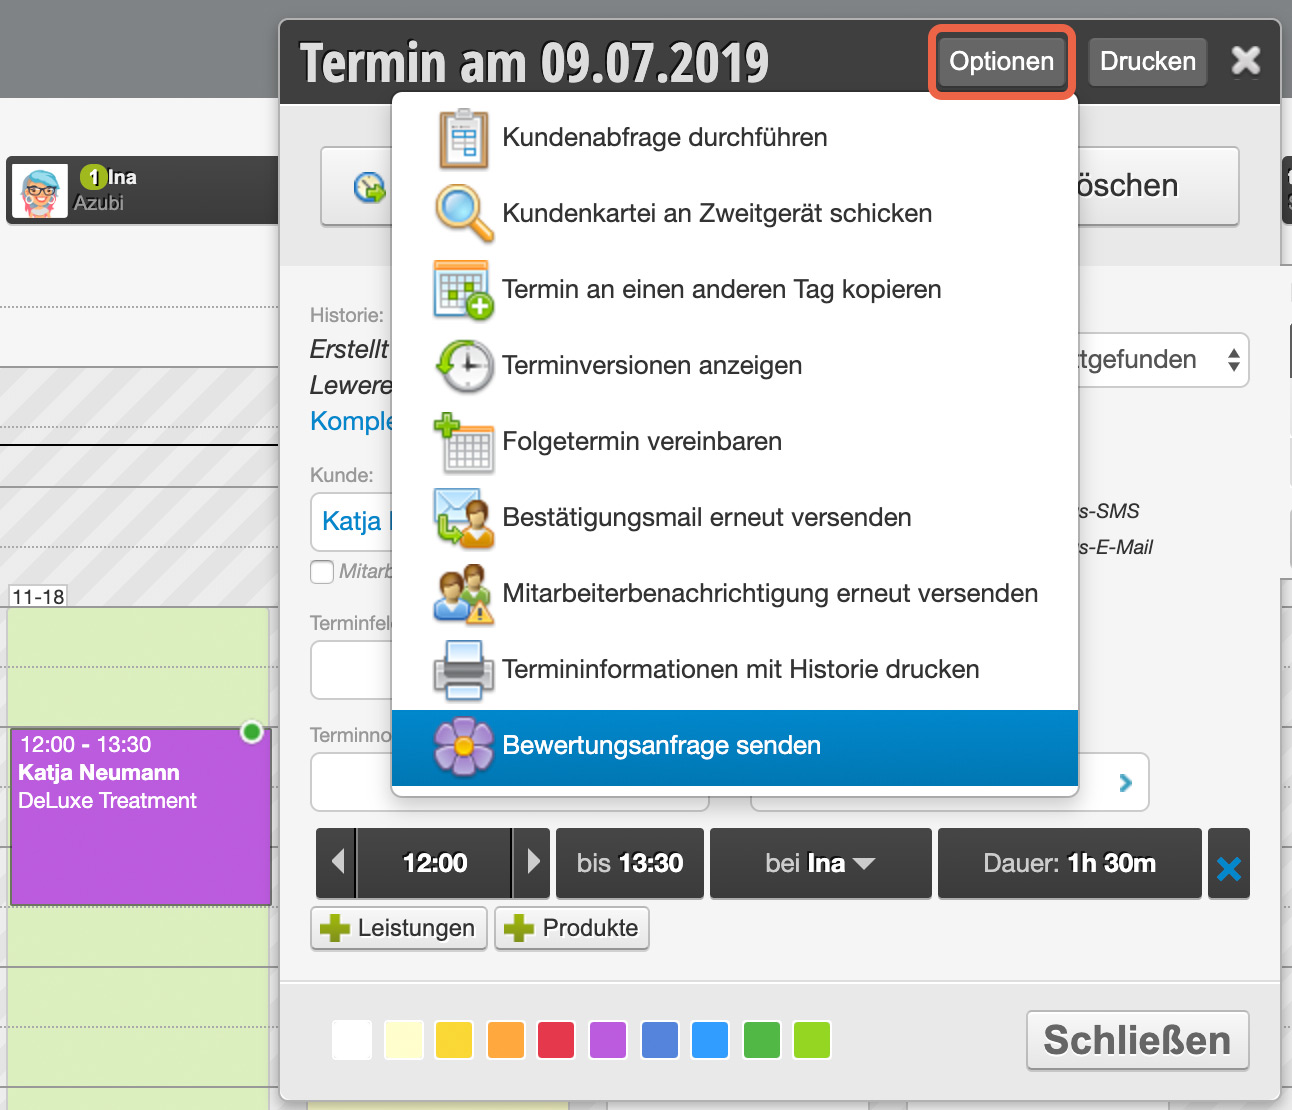
You can also send the rating request manually.

  1. Click on the customer's appointment in the calendar to which you want to send the request.
  2. Click on "Options"
  3. If you have created multiple rating campaigns, select the desired campaign - if you have only created one campaign, it will be sent immediately.
4) Rating evaluation
All Ratings

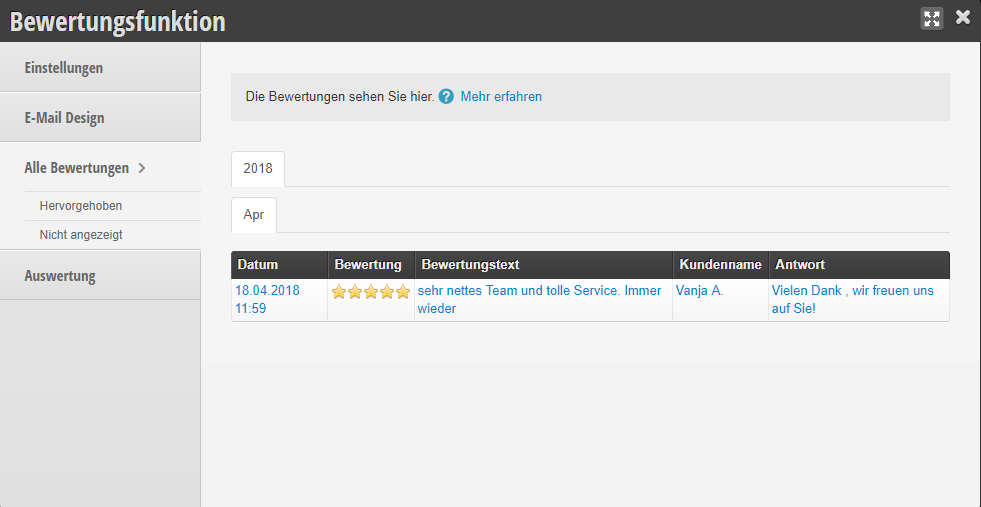
  • All Ratings: Here you have a list of all ratings you have received on your booking page.
  • Highlighted List of all ratings you have highlighted.
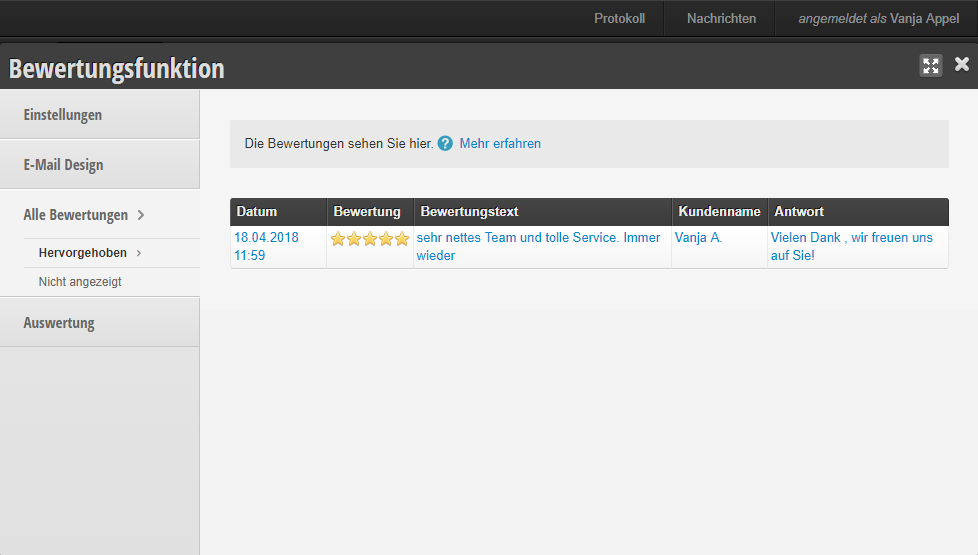
    • Not displayed: List of all non-displayed ratings which accordingly are also no longer visible on your booking page.
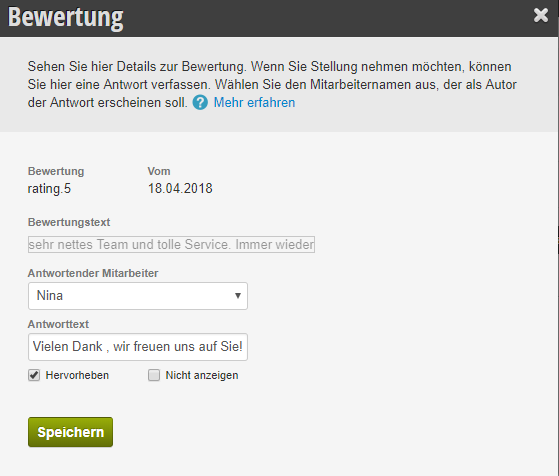
  • Reply to a rating: If you want to respond to or reply to a rating, click on "All Ratings" and select a rating. In the "Rating" window you will first have general information such as rating text, date of rating and rating. Here it is important to select the name of the responding employee and write a response in the "Response text" field. Below the response text you have the option to highlight the rating with your response or not display it. Then click "Save".
Evaluation

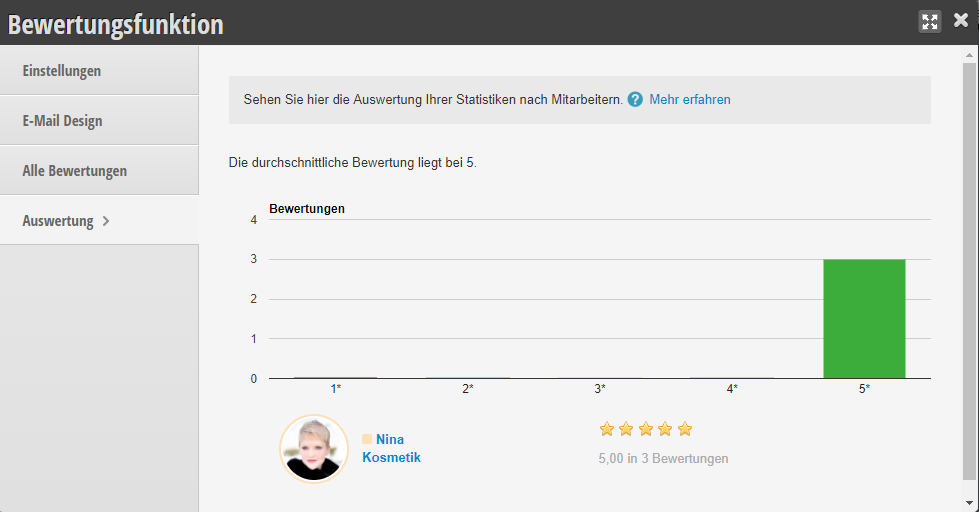
  • Evaluation of your ratings Under "Evaluation" you get a statistic or evaluation of your ratings. The vertical numbers show how many ratings you have in total on your booking page. The horizontal numbers are your rating, showing how many of the ratings are marked with one star, two stars or five stars.

Embed in website

If you wish, you can also embed your rating page in your website via iFrame. The code for this looks something like this:

<iframe src="https://mycompany.belbo.com/login/valuations?noHelp=true&compact=true" width="100%" height="700" frameborder="0" scrolling="auto">

For Swiss customers this may be:

<iframe src="https://mycompany.hairlist.ch/login/valuations?noHelp=true&compact=true" width="100%" height="700" frameborder="0" scrolling="auto">

Please replace the "mycompany" part with your own server prefix.

If you have any questions about this, please contact your web office and please understand that we can only provide limited support regarding your own website.
Categories: Bonus & Loyalty Programs
Tags: Bewertungen, Bewertungsanfrage

Have a question? Ask it here.

This manual is a service by belbo. Legal notice