belbo
  • Overview
    • Getting to know Belbo
    • Location Settings
    • Switch to Belbo
    • Calendar View & Navigation
    • Recurring Appointments & Courses
    • Appointment Entry & Management
    • Logins & Permissions
    • Multiple Locations & Head Office
    • Manage Employees
    • Absences & Holidays
    • General
    • Working Hours
    • Time Tracking
    • Data Protection (GDPR)
    • Customer Communication (Email, SMS)
    • Customer Management & Records
    • Bonus & Loyalty Programs
    • Campaigns (Newsletter & SMS)
    • Marketing Consents (GDPR)
    • Tracking & Analytics
    • Overview
    • Services & Prices
    • Products
    • Service Packages & Subscriptions
    • Vouchers
    • Purchasing & Suppliers
    • Stock & Inventory
    • Scanning & Sales
    • Cost of goods & expenses
    • Design & Texts
    • Setup & Settings
    • Integration (Website, Google, Instagram, Facebook)
    • Online payment
    • Accounting & Exports
    • Cash Register Settings & Hardware
    • Checkout process
    • Daily Closing & Reports
    • TSE & Cash Register Anti-Tampering Ordinance
    • Export Overview
    • Employee Utilization
    • Revenue & Reports
    • Belbo Satellite
    • Printer
    • EC Terminal & Card Payment
    • Troubleshooting Hardware
    • Scanner & POS Devices
    • General Settings
    • API & Integrations
    • Notifications & Emails
    • Contracts & Legal
Skip to content

Set up accountant access

You can grant your tax advisor its own access to your financial statements. This access does not provide any insight into your calendar, but it allows your tax advisor to access current and past financial statements at any time and make account settings.

You can access this area via Settings > Tax Advisor
If this function is not activated, it can be activated via "Settings > Add Function".

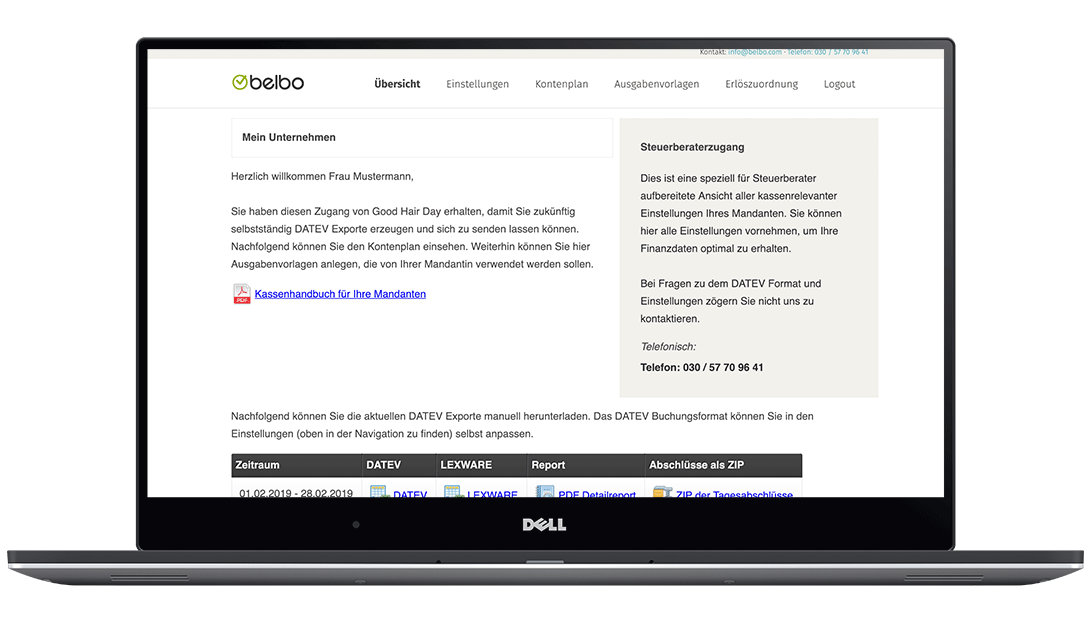
Financial data access for your tax advisor (example view)

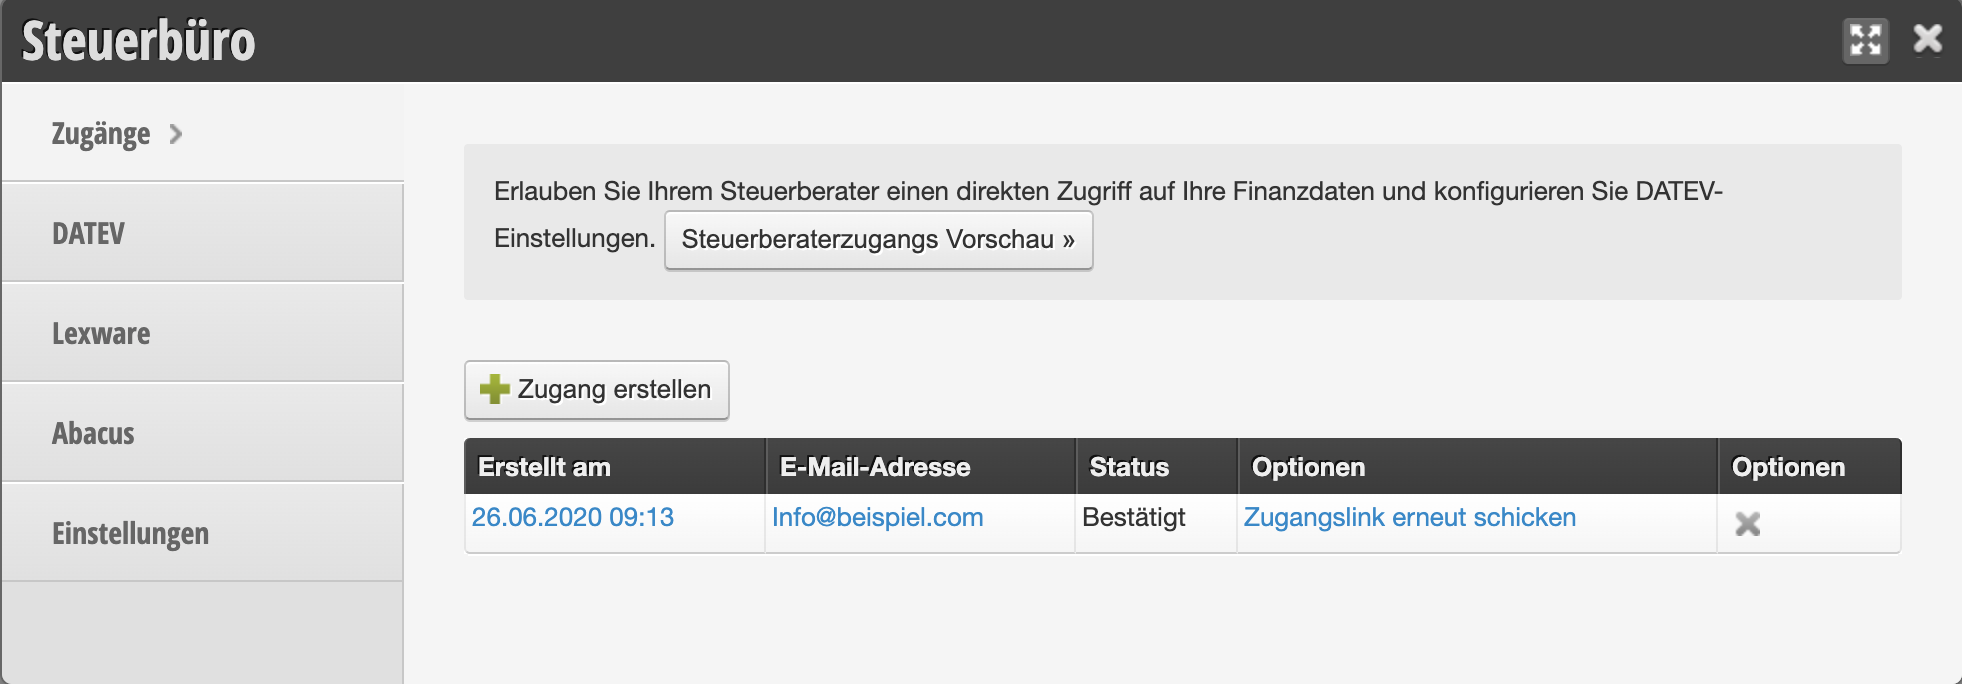
Set up data access

  1. Click on "Settings" in the main navigation and then on the "Tax Advisor" module.
  2. Enter your tax advisor's details here.
  3. After saving, a link will automatically be sent to the email address provided. This message grants the recipient permanent access to your cash register system. Please proceed carefully.

Revoke data access

Once the message has been sent to your tax advisor, you will find a new login under Settings › Tax Advisor.
To revoke this person's access rights, you can delete the access by clicking the X icon on the right in the list.

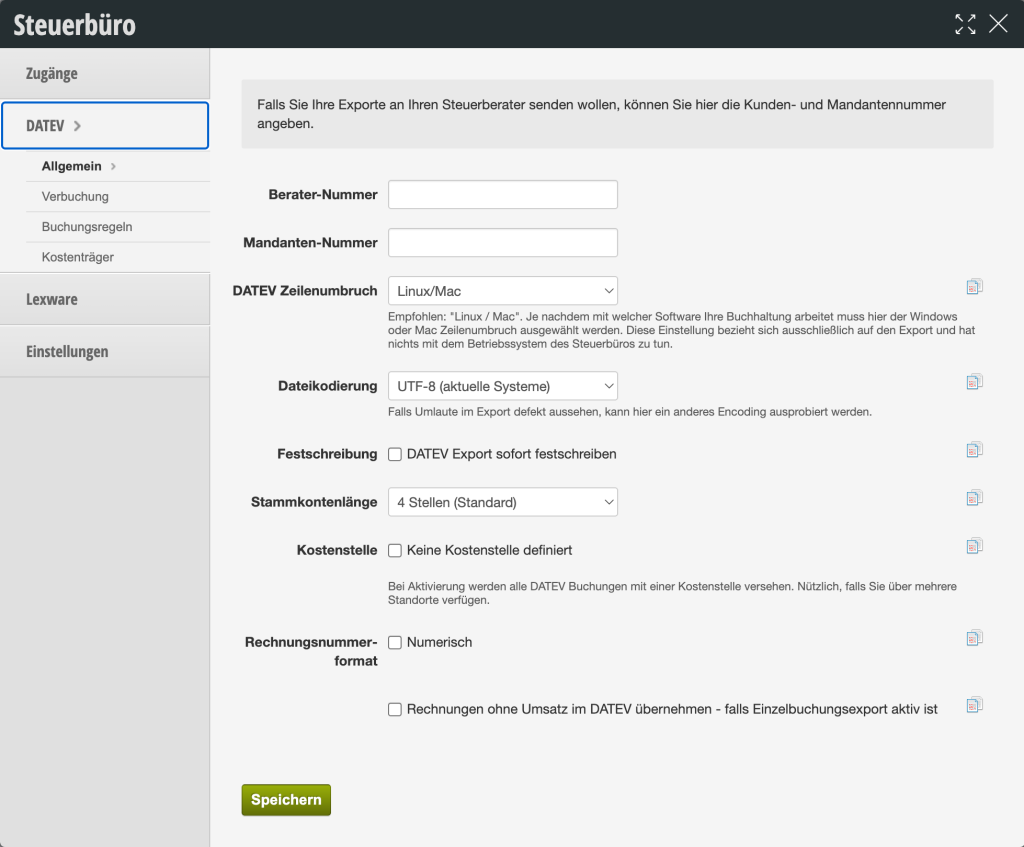
DATEV Settings

As a rule, you can leave the settings as they are. Please do not change these settings without consulting your tax advisor or the Belbo team!

More information on posting can be found here.
Categories: Accounting & Exports
This manual is a service by belbo. Legal notice