
belbo
  • Overview
    • Getting to know Belbo
    • Location Settings
    • Switch to Belbo
    • Calendar View & Navigation
    • Recurring Appointments & Courses
    • Appointment Entry & Management
    • Tasks
    • Overview
    • Multiple Locations & Head Office
    • Manage Employees
    • Logins
    • Rights
    • Overview
    • Absences & Holidays
    • Working Hours
    • Time Tracking
    • Overview
    • Data Protection (GDPR)
    • Customer Communication (Email, SMS)
    • Customer Management & Records
    • Overview
    • Bonus & Loyalty Programs
    • Campaigns (Newsletter & SMS)
    • Marketing Consents (GDPR)
    • Tracking & Analytics
    • Overview
    • Services & Prices
    • Service Packages & Subscriptions
    • Vouchers
    • Products
    • Purchasing & Suppliers
    • Inventory & Stock Counts
    • Scanning & Sales
    • Cost of Goods & Expenses
    • Overview
    • Design & Texts
    • Setup & Settings
    • Integration (Website, Google, Instagram, Facebook)
    • Online payment
    • Overview
    • Accounting & Exports
    • Cash Register Settings & Hardware
    • Checkout process
    • Daily Closing & Reports
    • TSE & Cash Register Anti-Tampering Ordinance
    • Overview
    • Export Overview
    • Employee Utilization
    • Revenue & Reports
    • Belbo Satellite
    • Printer
    • EC Terminal & Card Payment
    • Troubleshooting Hardware
    • Scanner & POS Devices
    • General Settings
    • API & Integrations
    • Notifications & Emails
    • Contracts & Legal
Skip to content
Calendar & Appointments›Recurring Appointments & Courses

Create series appointments

If you want to enter recurring appointments in the calendar, you can do this very easily.

Example:
A customer comes every 4 weeks on Mondays at 14:30 to use the same service.

Enter a recurring appointment

To enter a recurring appointment, first navigate to the date of the day on which the first of the appointments to be created should be scheduled.

  1. Click on the desired time in the calendar.
  2. Enter the name of the customer and the desired service.
  3. Click on "Options".
  4. Enable the checkbox for "Recurring appointment"
  5. Enter the desired frequency and the time period in which the appointment should be repeated at the selected frequency.
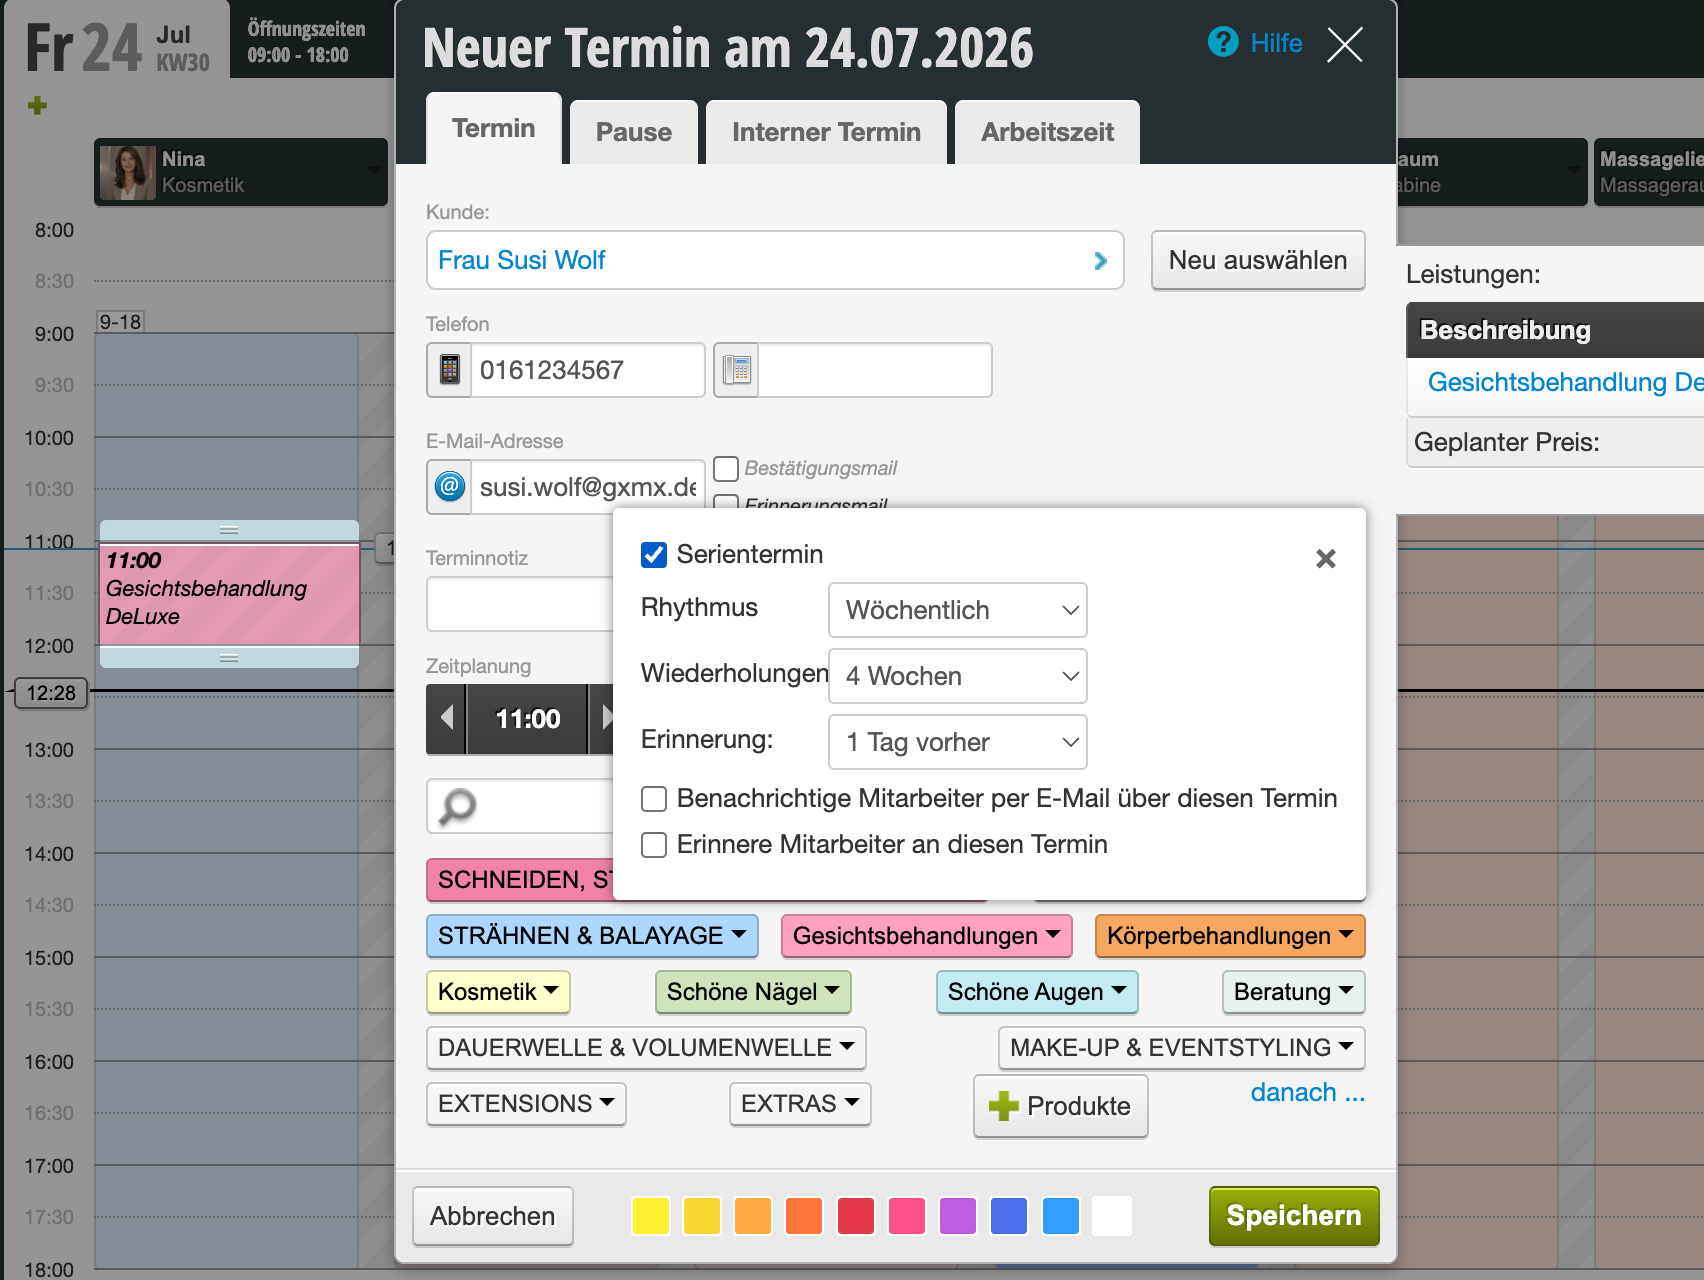
Dialog zur Erstellung eines Serietermins mit Kundenangaben, Rhythmus (wöchentlich), Wiederholungsdauer (4 Wochen) und Erinnerungseinstellung

In the example above, the appointment is entered at a 4-week frequency for 20 weeks. A total of 6 appointments are created.

Attention: When you assign recurring appointments, you must be sure that you can also keep them. After saving, please check the recurring appointments you have entered. These will be entered in the calendar, even if appointments or breaks are already entered on the corresponding days.

View follow-up appointments

When you click on an appointment in the created series, the follow-up appointments entered in the calendar are also displayed.
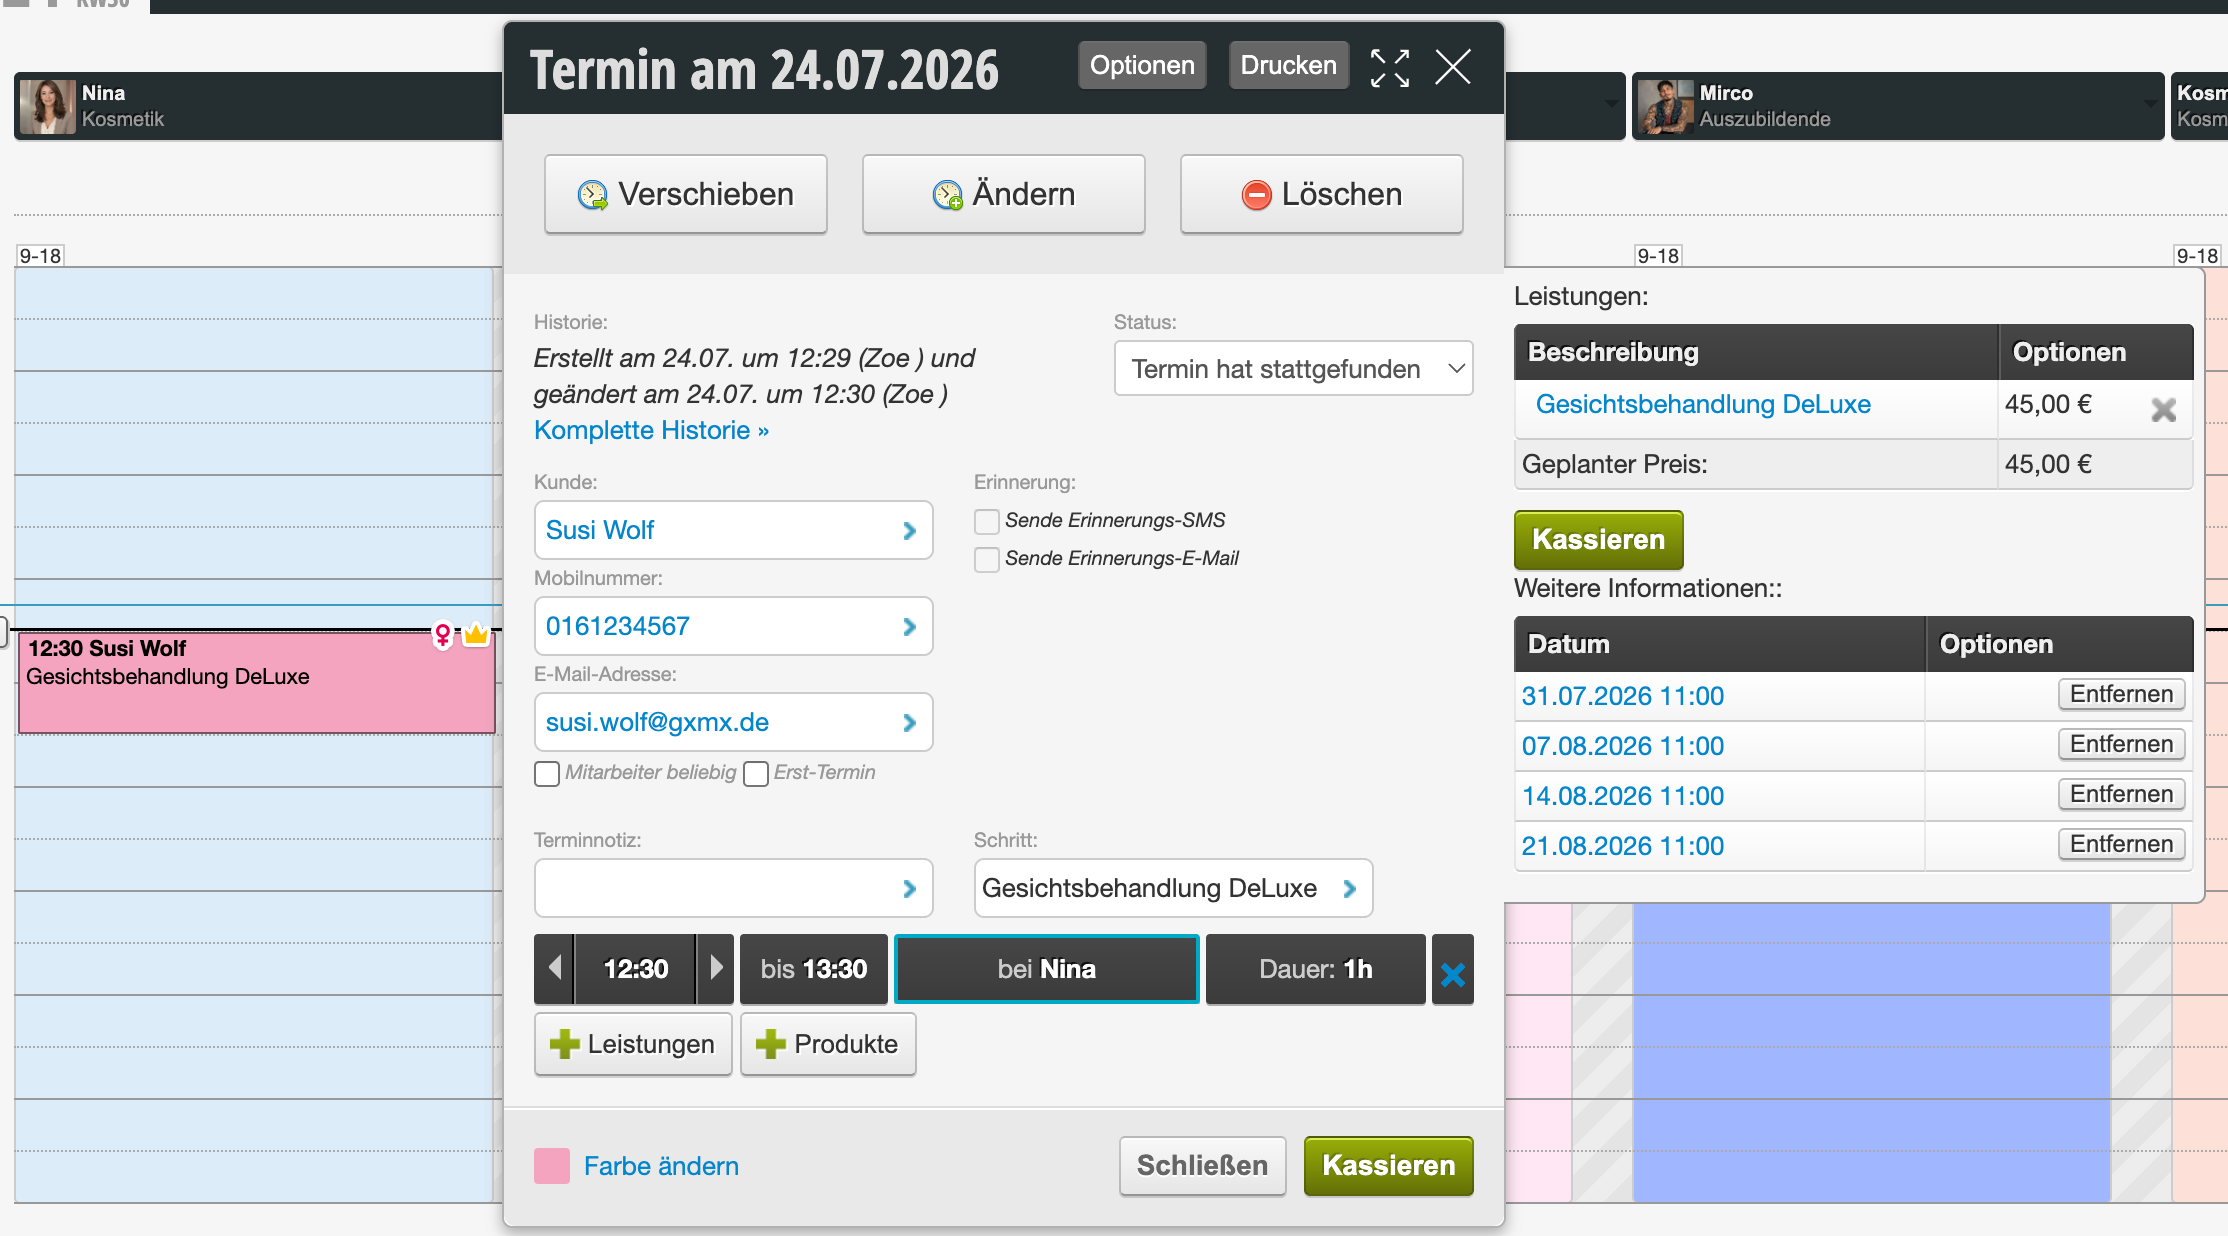
Termindetail-Dialog für einen Termin am 24.07.2026 mit Kundeninformationen, Leistungsbeschreibung und einer Übersicht geplanter Folgetermine zur Verwaltung von Serierterminen

Delete follow-up appointments

To delete one or more follow-up appointments, you can simply click "remove" next to the desired appointment in the open appointment details dialog. The associated appointment will be deleted.

Categories: Recurring Appointments & Courses
Tags: Serie, Terminserie, Wiederkehrend

Have a question? Ask it here.

This manual is a service by belbo. Legal notice