In the employee file, you can view and change all essential data of an employee.
Alles zum Thema: Uncategorized
Customer data form
EN – Mit der Kundenabfrage können Sie die Stammdaten Ihrer Kunden schnell und einfach pflegen, indem Ihre Kunden die eigenen Daten selbst eingeben oder aktualisieren! Auch die Einwilligung zur digitalen Speicherung der Daten kann hier abgefragt werden. Dazu benötigen Sie ein Zweitgerät (zum Beispiel ein Tablet), welches Sie dem Kunden überreichen können. Der Kunde hat ausschließlich Zugang zu den eigenen Daten und erhält keinen Einblick in Ihren Kalender oder in andere Kundenakten.
Activate call tracking
Depending on whether you have ordered a Belbo box, or use the software solution, you still need to make a setting. If you have a Belbo box, you can skip this guide.
Step 1
For the software variant, you must first install the Belbo Satellite .
Step 2
Then click on the trace icon and select “Call Tracking”.

Step 3
Now follow the instruction (1) by calling the number indicated with a telephone. The display of the phone should show “Callmonitor on”.

Step 4
Log in with the Belbo account as shown on the ad and select the destination location.

Completion
Now click on the button “START CALL TRACKING NOW”.

From now on, incoming and outgoing calls should appear in your calendar. If there are problems, we recommend to restart the computer and check if the display via step 2 is green.
Cash products
If you have created products, you can cash them in the POS system.
Sell Product to Recipients
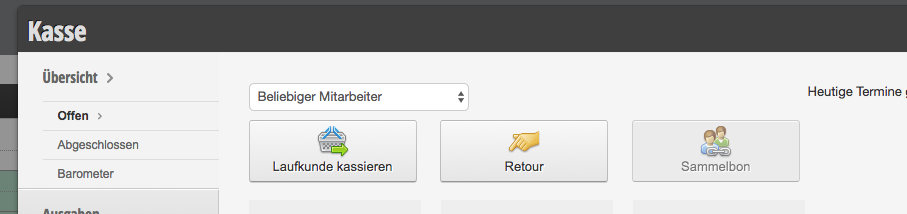
If an unaccompanied customer simply purchases a product, click Checkout and then clickReceive Advance.
Sell
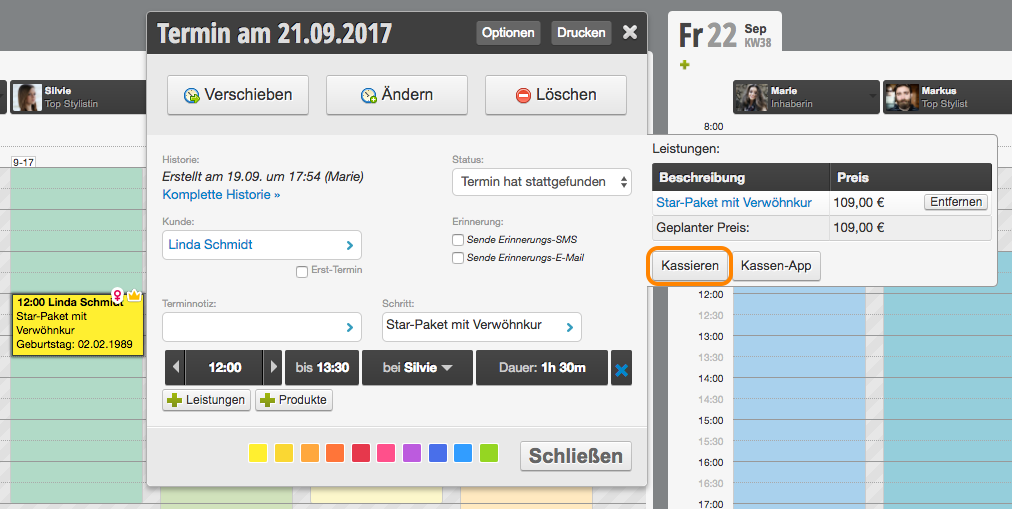
If a customer who has an appointment with you also takes a product, click the appointment in the calendar, and then clickCheck.
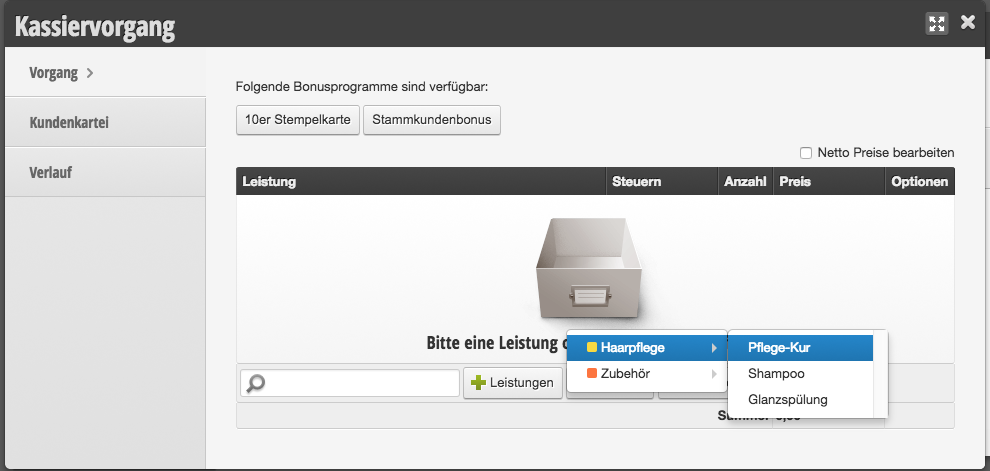
Add products to the checkout
To add a product to the checkout process, you have 3 options:
- Select manually:Select the+ productbutton to add a product.
- Search:Use the search box to search for the product name.
- Scan:Click in the search box and scan the barcode of the product to add the product.
Then follow the steps outlined atcash infrom step 6.
Belbo Satellite
With the Belbo Satellite you can use the following functions:
- Receipt and cash drawer open directly from Belbo
- Direct EC Device Control
- Call Tracker via Fritzbox (BETA)
Installation
Install the Belbo Satellite software on your computer to easily and quickly integrate your receipt printer or EC device directly into Belbo.

Belbo Satellite for Windows
 Belbo Satellite for Mac
Change History
1.0.6 - 29.1.2019
– Backport of all functions for XP
– Direct IP print option
– Direct IP print option
1.0.5 - 28.1.2019
– Call tracking via Fritzbox
– Comfortable installation instructions accessible via menu
– Comfortable installation instructions accessible via menu
1.0.2 - 24.1.2019
– Bon Print native to MacOS & Windows
– Printer search interface for MacOS & Windows
– Printer search interface for MacOS & Windows
1.0.1 - 18.1.2019
– Troubleshooting invalid PIN
– Troubleshooting receipt printing
– Improved status query via JSONThis is the template text that will be pasted at your cursor location.
– Improve receipt printing on status page
– Implementation of the tag “60” with APDU payment confirmation
– Troubleshooting receipt printing
– Improved status query via JSONThis is the template text that will be pasted at your cursor location.
– Improve receipt printing on status page
– Implementation of the tag “60” with APDU payment confirmation
1.0.0 - 14.1.2019
– Initial version
Create an appointment
If you want to enter appointments, you can do so either by navigating to the calendar in the calendar or using the Appointment Wizard .
Create appointment
Select date
To create an appointment directly in the calendar go to the desired day and the employee. Click on the desired time to open the appointment input window.

Customer
Enter the name of your customer . If it already exists in the customer database , just enter the first three letters and you can select it from the list that opens. This can be done either with the mouse or keyboard.

Select services
Select one of the deposited services . If you want to add several services to an appointment, repeat the process.
In addition, you have the option of selecting times, employees, duration and color deposit. After entering all necessary data, click on the “Save” button. The appointment now appears in the calendar.
In addition, you have the option of selecting times, employees, duration and color deposit. After entering all necessary data, click on the “Save” button. The appointment now appears in the calendar.
